– 45 –
7. Remove the 2 Torx (T15) screws from each
burner base. Remove the burner bases.
Caution: When replacing burner bases on
glass-top models, do not overtighten Torx
screws. Tighten to 14 to 20 in/lbs of torque.
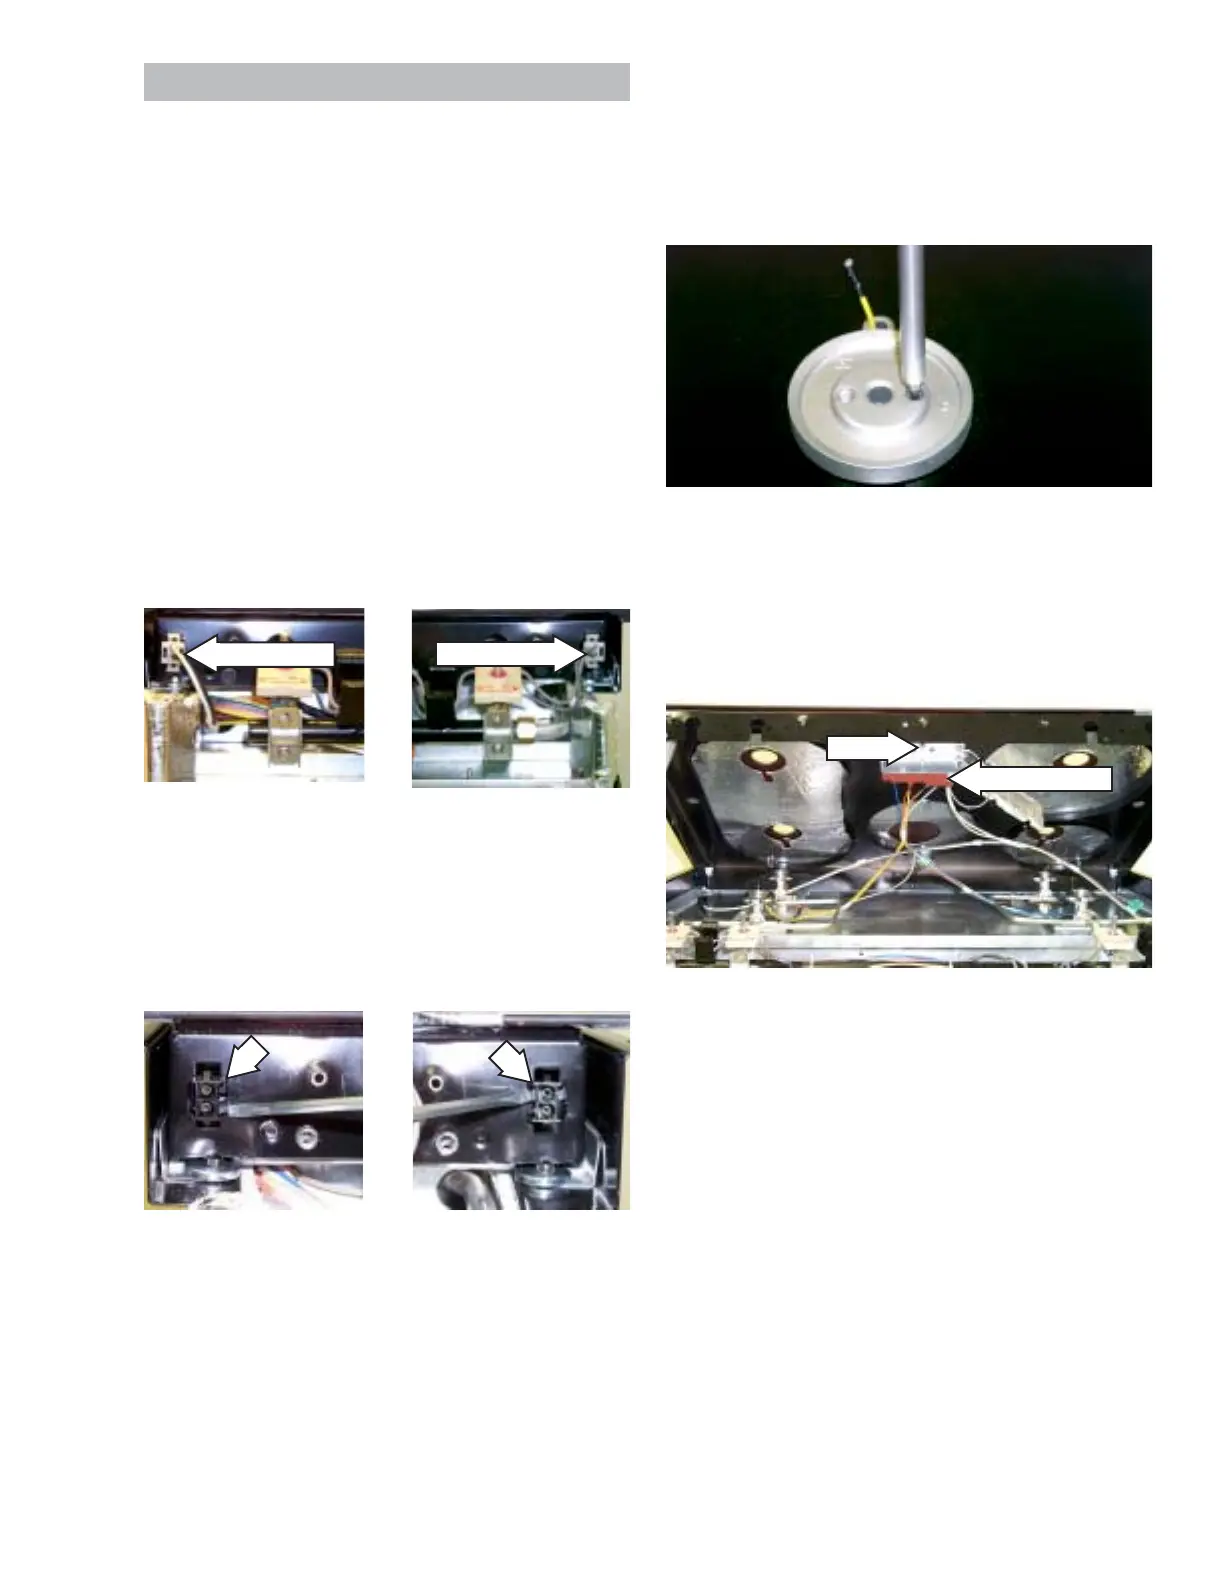
8. The spark module is attached to the metal
frame of the glass cooktop. Lift up the glass
cooktop and remove the screw that holds the
spark module in place.
Spark Module
Screw
9. Remove the spark module from the metal
frame.
10. Remove the glass cooktop.
Caution: The graphite gaskets that seal the
burner compartment are very fragile. When
replacing the glass cooktop, care must be given
to avoid breaking. Replace all damaged graphite
gaskets.
Glass Cooktop
To remove the glass cooktop:
1. Remove the control panel assembly (see
Keypanel and ERC).
2. Remove the control panel frame (see Maintop
Burner Assembly).
3. Remove all spark igniters from the glass
cooktop (see Spark Igniter).
4. Remove the 2 hex-head screws at the rear
corners of the maintop burner assembly (see
Maintop Burner Assembly).
5. Unplug the left and right connectors at the
front corners of the maintop burner assembly.
6. With a small, flat screwdriver push the tabs on
the connector sockets and press each
connector socket through the mounting hole.
Left Corner Right Corner
Left Corner Right Corner
DisconnectDisconnect
 Loading...