The following sections provide the procedures to enable and configure the QuickPanel
+
device to operate as a
SNMP
Agent and establish communication with a SNMP Manager.
• Configure Trap Destinations
• Enable or Disable
SNMP
Agent
• Export MIB to SD Card
• Load MIB into SNMP Manager
• Data Types Mapping between PME Project and SNMP
• Establish SNMP Communication
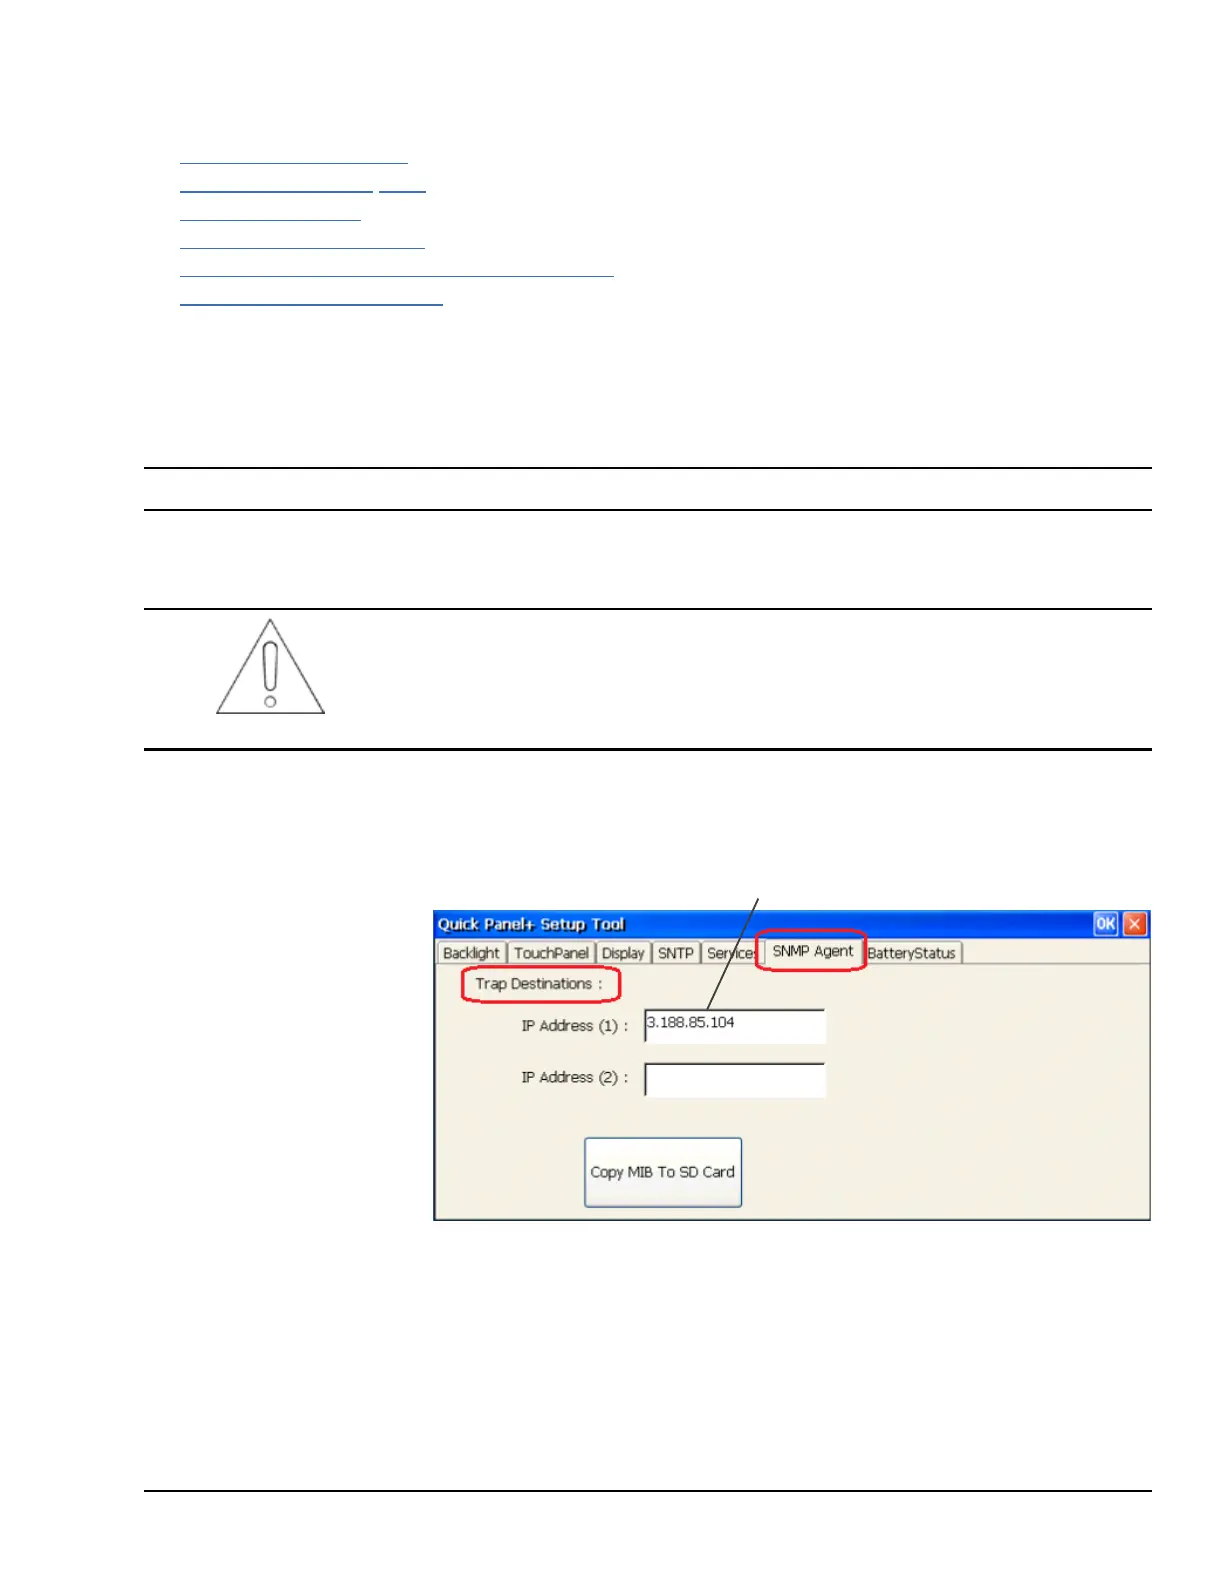
3.14.1 Configure Trap Destinations
TRAP Destinations are configured through the QuickPanel
+
Setup Tool by providing the IP Address of the SNMP Manager
to which Traps should be sent. The user can configure two different Trap Destinations (IP Addresses).
Note If you do not want to be notified of Traps, you do not need to configure Trap Destinations.
➢ To configure Trap Destinations
Attention
If Trap Destination(s) is/are configured after enabling the
SNMP
Agent on the
device,
it
is highly recommended that you disable and then re-enable the
SNMP
Agent
service on the device.
1. From the Start menu, select System, open the QuickPanel
+
Setup Tool, and select the
SNMP
Agent tab.
2. Configure the Trap destination(s) of the SNMP Manager.
Enter the IP Address(es) of the SNMP Manager to which
Traps should be sent.
3. Click OK to save the changes.
Close the QuickPanel
+
Setup Tool, then re-open the tool to view the configured Trap Destination details from the
SNMP Agent tab.
 Loading...