80DWFK6HULHV'&
,QYHUWHU6HUYLFH0DQXDO
63
VLGHRIWKHXQLW7KH¿[LQJSRVLWLRQRIWKHSLSHOLQHVKDOOEHQHDUWKHXQLW
Ɣ
Purchase general-purpose hard PVC pipe locally to be used as the drainage pipeline. When carrying
RXWFRQQHFWLRQSODFHWKHHQGRIWKH39&SLSHOLQHLQWRWKHGUDLQDJHKROH8VHÀH[LEOHGUDLQDJHWXEHDQG
WLJKWHQLWZLWKWKUHDGORRS1HYHUXVHDGKHVLYHWRFRQQHFWWKHGUDLQDJHKROHDQGWKHÀH[LEOHGUDLQDJHWXEH
(As shown in Figure 1-2-9)
Ɣ
When the laid drainage pipe is used for multiple units, the common pipe shall be about 100mm lower
than the drainage outlet of each set of unit. A pipe with thicker wall shall be used for such purpose.
Figure 1-2-9
b. Testing of Drainage System
Ɣ
After the electrical installation is completed, carry out the testing of the drainage system.
Ɣ
'XULQJWKHWHVWFKHFNLIWKHZDWHUFRUUHFWO\ÀRZVWKURXJKWKHSLSHOLQHV&DUHIXOO\REVHUYHWKHMRLQWV
to ensure that there is no leakage. If the unit is to be installed in a new house, carry out testing before
decorating the ceiling.
Ɣ
Matters of Attention
Ɣ
The drain pipe outlet direction can be chosen from either the right rear or right.
Ɣ
The diameter of the drain pipe should be equal to or greater than the diameter of the connecting pipe.
(Vinyl tube; pipe size: 20mm; outer dimension: 26mm)
Ɣ
Keep the drain pipe short and incline downwards at a gradient of at least 1/100 to prevent air pockets.
(Refer to Figure 1-2-10)
Figure 1-2-10
Ɣ
No folding of drain hose inside the indoor unit. (Refer to Figure 1-2-11)
Ɣ
&RQ¿UPWKDWVPRRWKGUDLQDJHLVDFKLHYHGDIWHUWKHSLSLQJZRUN3RXUFFRIZDWHULQWRWKHGUDLQ
SDQIURPWKHDLURXWOHWIRUFRQ¿UPLQJGUDLQDJH5HIHUWR)LJXUH
Figure 1-2-11 Figure 1-2-12
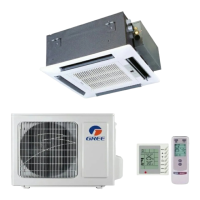
1.3 Installation of Cassette Type
 Loading...