80DWFK6HULHV'&
,QYHUWHU6HUYLFH0DQXDO
70
to let the swing motor lead wire get caught in the sealing material.)
Ɣ
Screw all 4 hexagon head screws located right beneath the latches in approximately 15mm.(Panel
will rise)
Ɣ
Adjust the panel by turning it to the arrowed direction in Fig.4 so that the ceiling opening is completely
covered.
Ɣ
Tighten the screws until the thickness of the sealing material between the panel and the indoor unit
body is reduced to 5~8 mm.
b. Precautions:
Ɣ
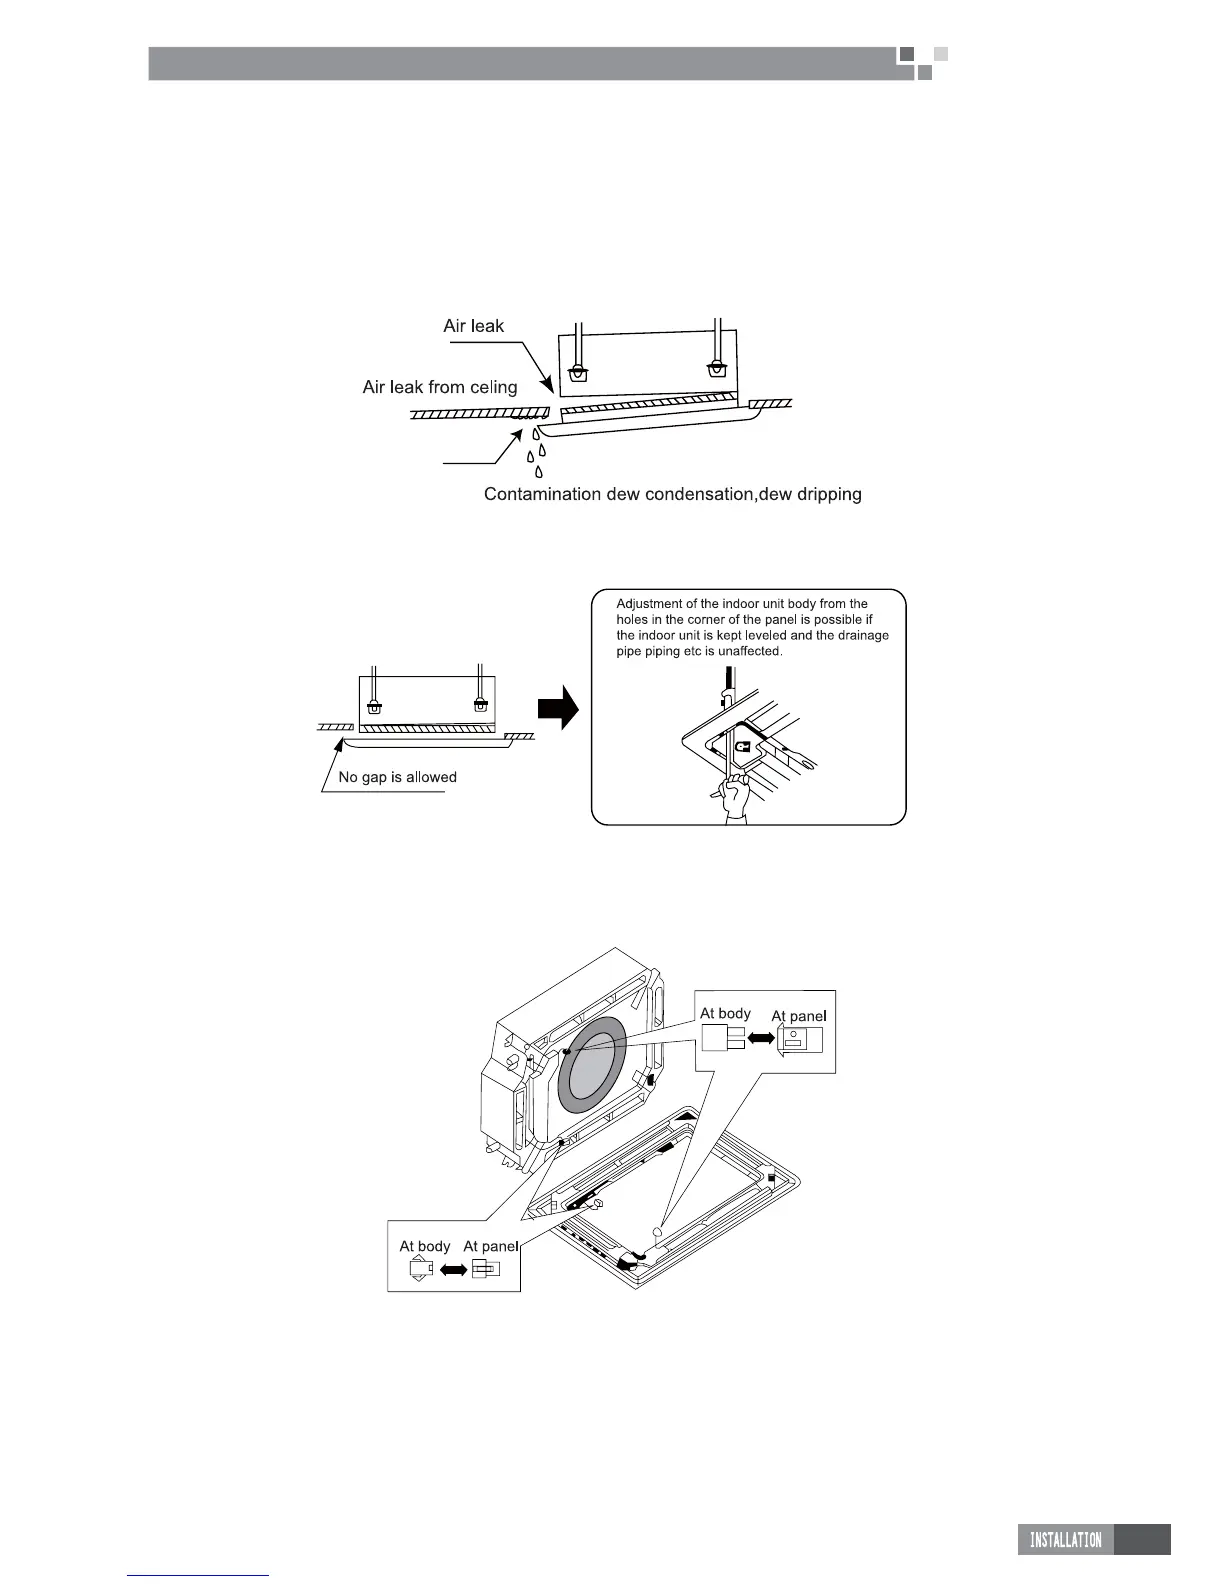
Improper screwing of the screws may cause the troubles shown in Figure 1-3-14.
Figure 1-3-14
Ɣ
If gap is still left between the ceiling and the panel after screwing the screws, readjust the height of
the indoor unit body (Refer to Figure 1-3-15).
Figure 1-3-15
Ɣ
$IWHU¿[LQJEHVXUHQRJDSOHIWEHWZHHQWKHFHLOLQJDQGWKHSDQHO
c. Wiring of the decoration panel.
Ɣ
&RQQHFWWKHMRLQWVIRUVZLQJÀDSPRWRUOHDGZLUHDWSODFHVLQVWDOOHGRQWKHSDQHO5HIHUWR)LJXUH
1-3-16).
Figure 1-3-16
2 OUTDOOR UNIT INSTALLATION
2.1 Before Installation
Ɣ
$IWHUUHFHLYLQJWKHPDFKLQHSOHDVHFKHFNIRUDQ\WUDQVSRUWGDPDJH,I¿QGLQJDQ\VXUIDFHRULQWHUQDO
damage, please immediately report to the transport company or equipment company in writing.
Ɣ
After receiving the machine, please check the unit and accessories in reference to the packing list.
(QVXUHWKDWWKHPRGHOLVFRUUHFWDQGWKHPDFKLQHLVLQJRRGFRQGLWLRQ3OHDVHDOVRFKHFNLIWKHVSHFL¿FDWLRQ
 Loading...