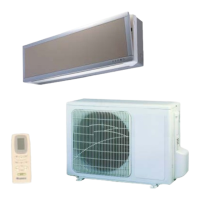
Vaccumize and Leakage Detect
Take off the nut cover on cut-off valve on outdoor unit.
Align the center of piping, tighten enough the flare nut by hand.
T ighten taper nut by spanner.
Take off valve cover and freon nozzle nut on liquid valve and gas valve.
Screw out core of liquid valve by inner hex angle spanner, and prize gas door
core on gas valve by screwdriver. At that time there should be gas exhausted.
After gas exhaust for about 15s contnuously and refrigerant gas appearred,
close core of air door tighten nut of freon charge nozzle.
Turn on core valve of both liquid and gas valve completely (as shown in fig. 11-11).
Tighten valve cover, then check if leakage happens in connecting part between
pipeline and both indoor and outdoor unit by soupauds or detector.
If possible, exhaust air in unit from core of air door from vacuum pump
(As shown in fig.11-9).
Gas pipe
Liquid
pipe
Screwdriver
Freon charge
nozzle
Gas valve
Liquid valve
Inner hex spanner
Fig. 11-11
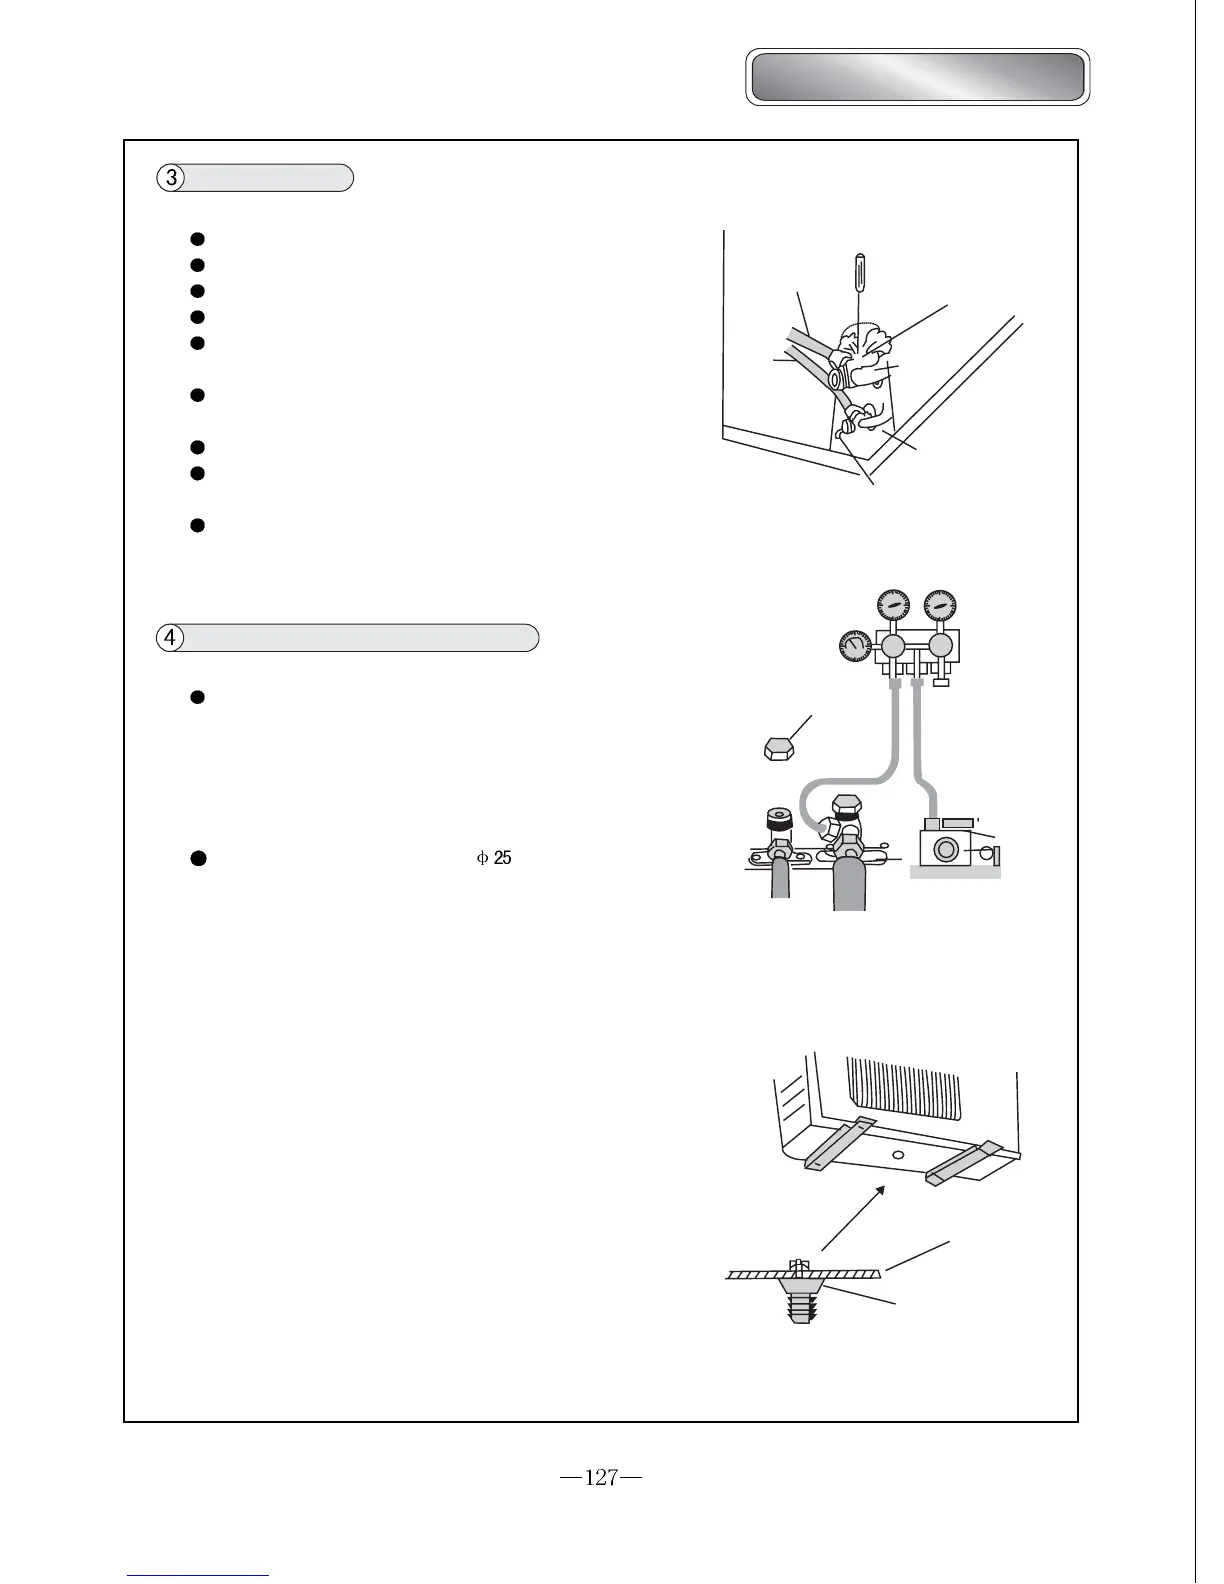
Drainage of condensate of outdoor unit
(Not for cooling only unit)
When heating, condensate water and defrost water produced when
defrosting by outdoor unit can be drained to proper place through
drainage hose.
Install Method:
Vacuum meter
Valve cap
Vacuum pump
Thin pipe
Thick pipe
Fig. 11-12
Insert outdoor drainage joint into hole on chassis
condensate and defrost water to be drained to proper place.
Then connect drainage hose onto drainage nozzle to lead to lead
Bottom plate of
outdoor unit
Drainage joint of
outdoor unit
Fig. 11-13
Bird Single-Split Type
 Loading...