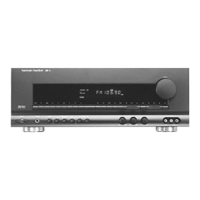
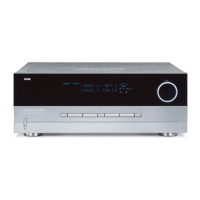
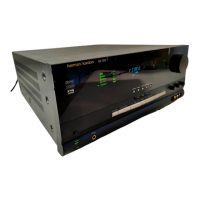
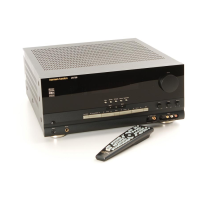
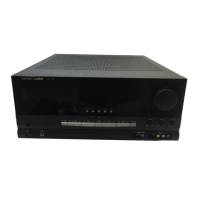
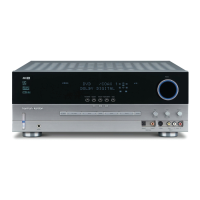
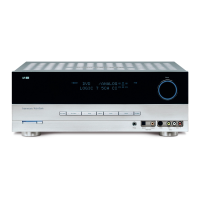
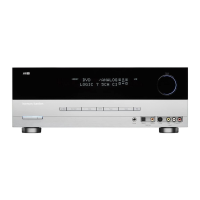
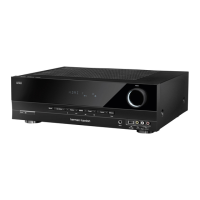
Front Panel Controls
4
ENGLISH
1 Information Display: This display
delivers messages and status
indications to help you operate the
receiver. Refer to the separate
diagram for a complete explanation of
the FL display.
2 Remote Sensor Window: The
sensor behind this window receives
infrared signals from the remote
control. Aim the remote at this area
and do not block or cover it unless an
external remote sensor is installed.
3 AM/FM Tuner Mode Selection:
Press this button once to select the
tuner. Press it again to switch
between FM, MW and LW.
4 CD: Press this button to select the
CD player.
5 Tape1/Monitor: Press this button
to select Tape One as the input
source. A red LED above the button
will illuminate to indicate that the Tape
Monitor has been selected.
6 Tape2: Press this button to select
Tape2.
7 Video Sources: Press any of
these buttons to select a video input
source.
8 Aux: Press this button to select the
source connected to the front panel
Aux jacks.
9 Display: Press this button to
turn off the front panel FL display. The
DISP indicator will illuminate
to remind you that the unit is still
turned on.
) OSD (On Screen Display): Press
the button briefly to display a system
status report on your video screen.
Press and hold to change the video
standard.
! Delay: Press this button to
increase the delay to the rear
(surround) channels.
@ Mode: Press these buttons to
scroll up
⁄ or down ¤ through the
list of available surround modes.
# P-Set: Press these buttons to
manually scroll up
⁄ or down ¤
through the FM, LW or AM stations
programmed into the receiver’s preset
memory.
$ P-Scan: Press this button to
automatically scan through the FM or
AM stations preset into the receiver’s
memory. Press the button again to
stop the scan when the tuner is at the
desired station.
% Tune: Press these buttons to
manually or automatically scan up
⁄
or down ¤ through the FM or
AM bands.
^ Mute: Press this button to cut the
output to the speakers. Press it again
to return to the previous volume level.
& Volume Control: Turn the knob
clockwise to increase volume,
counterclockwise to decrease the
volume. Note that approximately two
revolutions of the knob are required to
go from no output to maximum
volume.
* Power: Press this button to turn
the unit on or off.
NOTE: When the Power Switch is in
the “OFF” position, the unit is in a
“Standby” condition and is NOT
disconnected from the AC mains
supply.
( Headphone Jack: Plug standard
stereo headphones into this jack for
private listening.
NOTE: When the headphones are in
use the output to the speakers is
muted and the surround mode is
automatically switched to
STEREO.
When the headphones are removed
from the jack, sound to the speakers
is restored and the unit returns to the
previous sound mode.
Ó Memo: The memo button is used
to enter stations to the tuner’s preset
memory in either the manual or
automatic modes. It is also used in
clearing the memory and entering the
sleep timer period.
Ô Clear: The clear button is used
to cancel tuning, memory input or
when clearing the unit’s memories.
FM Mode: Press this button
to select the receiving mode for FM
stations (Stereo/Mono/Auto).
Ò RDS Display: When a station
transmitting RDS data is tuned, press
this button to view the tuning
frequency.
Ú RDS AF: The button is used to
search for stations transmitting a
specific programme that may offer
better reception than the currently
tuned station.
Û RDS PTY: Press this button to
view the programme type (PTY) when
an RDS station is tuned. It is also used
to initiate a search for RDS stations
transmitting a specific programme
type.
Ù Bass: This knob adjusts the tone
of low frequency sounds. Turn it to the
right to boost bass frequencies or to
the left to cut bass frequencies.
ı Treble: This knob adjusts
the tone of high frequency sounds.
Turn to it the right to boost high
frequencies or to the left to cut high
frequencies.
ˆ Balance: This knob adjusts the
balance between the front left and
right speakers.
˜ Front Panel Inputs: Audio or
Video sources connected to these
jacks may be selected by pressing the
Aux button 8.
AVR70 engelsk manual 11/01/98 11:57 Side 4
 Loading...