QUICK START
Ideally, you should read this entire manual before using the MX400. But, if you just
can’t wait to get started, this section explains how to set up a simple parallel connec-
tion (using the MX400 with a mixer) and select a program.
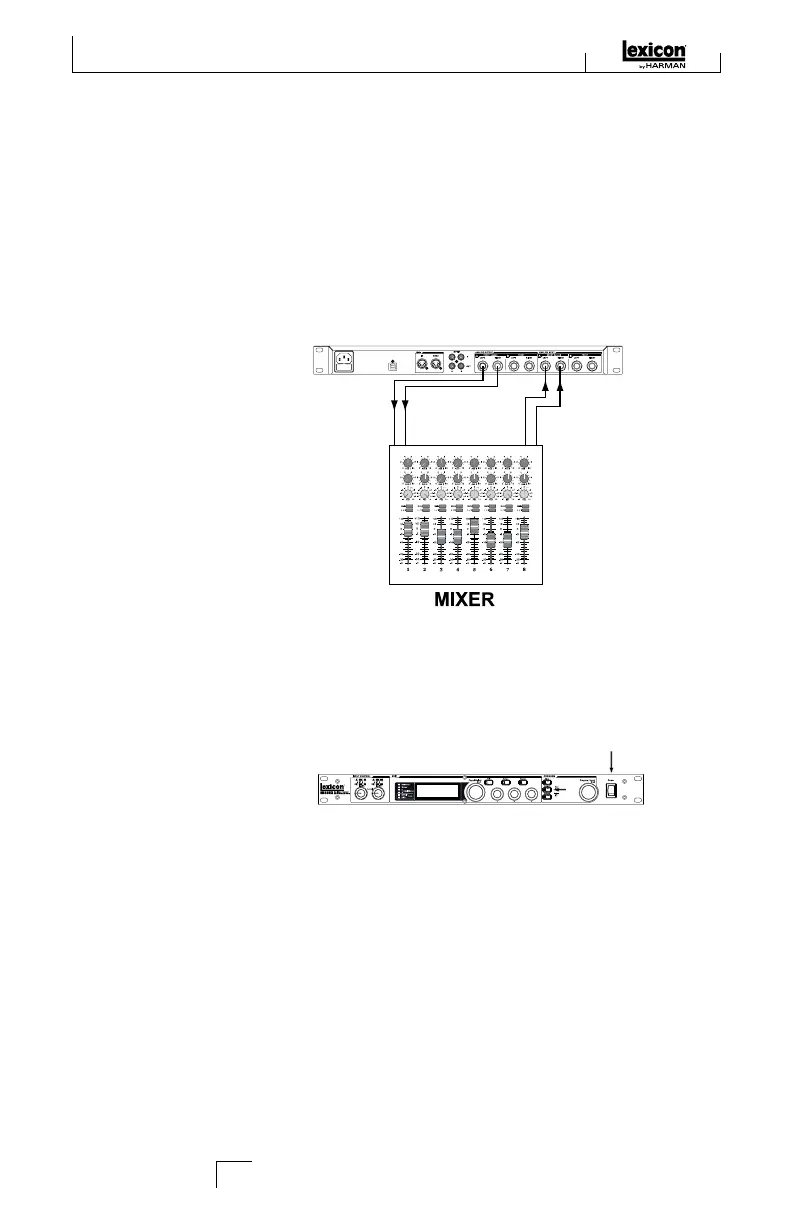
StanDarD ParaLLeL connectIon
1. Connect the mixer’s Post Fader Aux Send outputs to the MX400’s Left and Right
(Front) inputs.
2. Connect the MX400 Left and Right (Front) outputs to a stereo Aux Return input
on the mixer (or a stereo line input, or two adjacent line inputs if you like).
Aux
Send 1
Aux
Return 1
Aux
Send 2
Aux
Return 2
PoWerInG the unIt
1. Plug the included power cord into an A/C outlet.
2. Connect the power cord to the Power Jack connection on the MX400’s back
panel and turn on the MX400's power.
Set auDIo LeveLS
1. Set the gain on the mixer’s input channel appropriate to the source (vocal mic,
guitar, keyboard, etc.).
2. Set the Aux Master level (if provided on your console) to the 12 o’clock position.
3. Set the Input A level on the MX400 to the 12 o’clock position.
4. Provide source signal (by speaking or singing into the mic, playing guitar,
keyboard, etc.) on the selected mixer channel.
5. Turn up the Aux Send levels on the channel corresponding to the Post-fader send
(Aux 1 and Aux 2 in this example) that the MX400 is connected to until the red
input LEDs light only occasionally. If the red Input LEDs stay lit, too much signal
is being sent to the MX400; reduce the Aux Master or Aux Send on the mixer.
6. Turn up the Aux Return 1 and 2 to the 12 o’clock position, or stereo line input
faders to the 0dB position, if you used that connection.
7. To increase or decrease the amount of effect on the signal, adjust the Aux Send
level on the channel that you want affected.
2
Quick Start
 Loading...