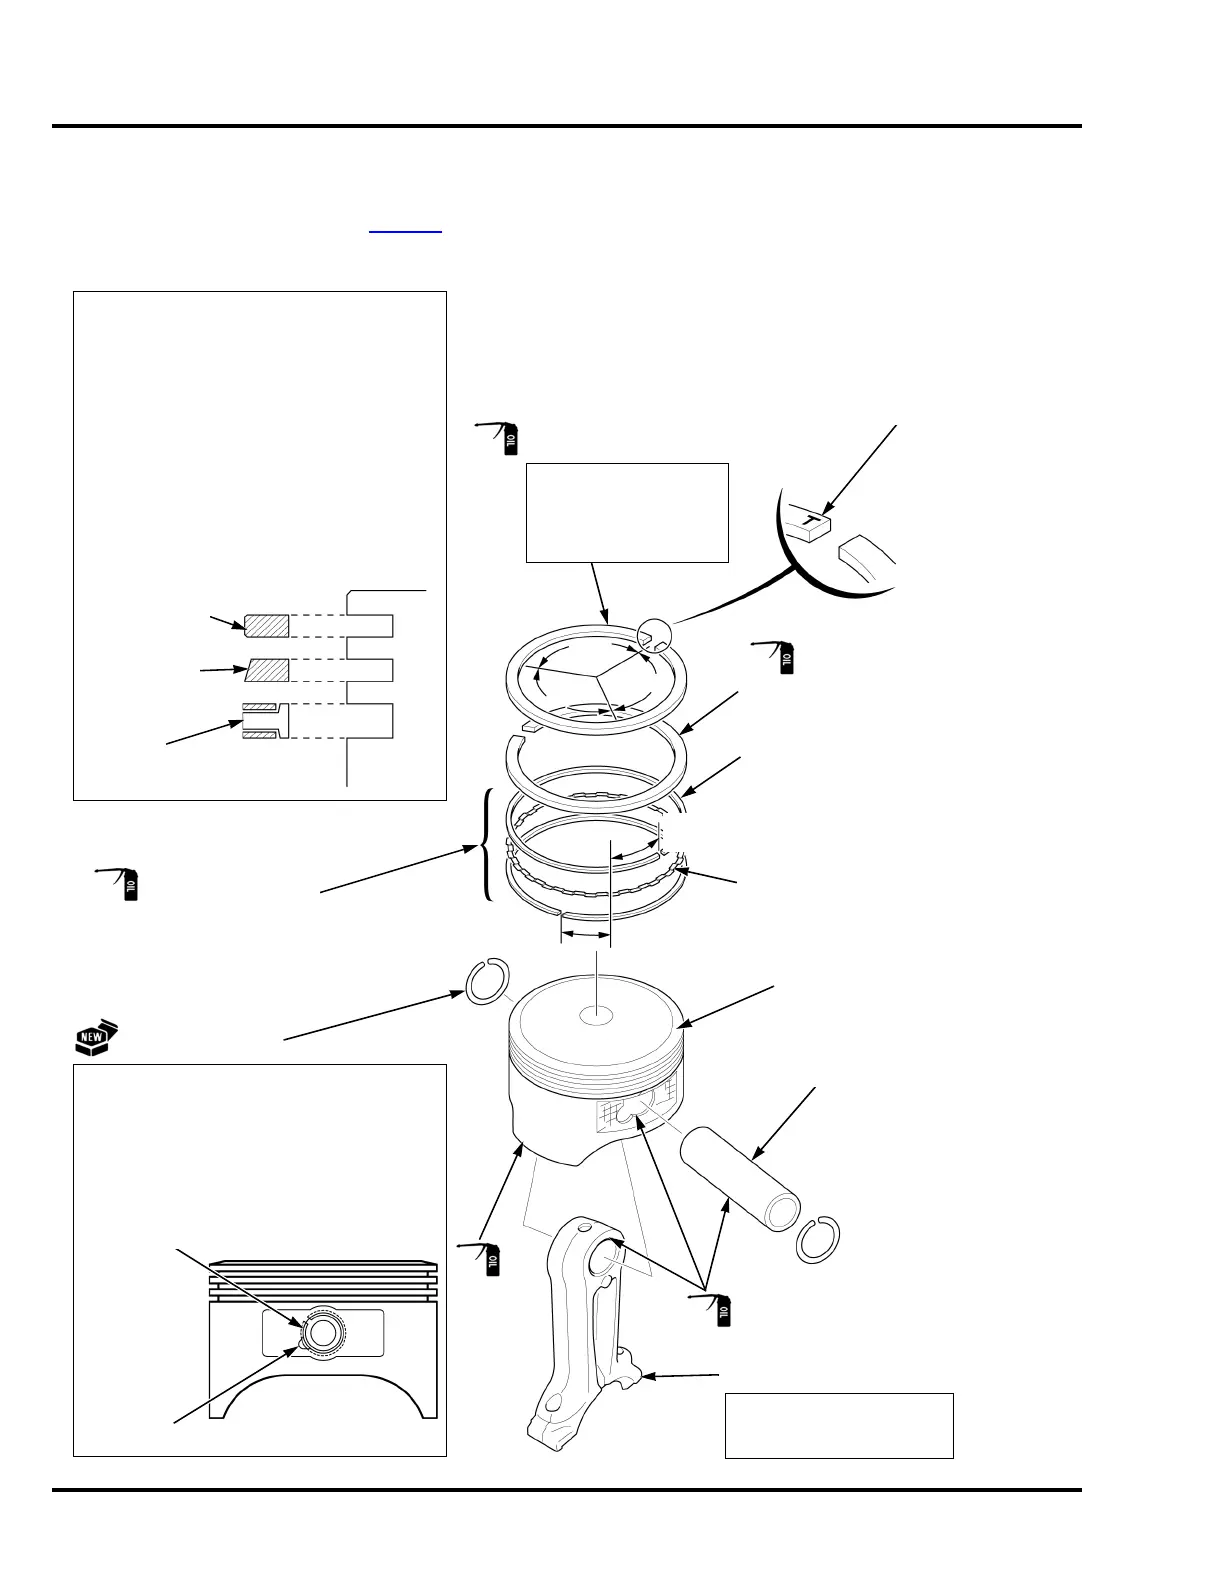
8. PISTON/CONNECTING ROD DISASSEMBLY/ASSEMBLY
ASSEMBLY:
ASSEMBLY:
SIDE RAIL
SPACER
SECOND RING
120°
120°
120°
10 mm (0.4 in)
10 mm
(0.4 in)
PISTON PIN
PISTON
CUTOUT
CLIP
Do not align the end gap of the clip with the
cutout in the piston pin bore.
·
Install by setting one end of the clip in the
piston groove, holding the other end with
long-nosed pliers, and rotating the clip in.
·
PISTON PIN CLIP (2)
ASSEMBLY:
Chrome plated. Do not
interchange with the
SECOND RING.
TOP RING
OIL RING
(COMBINATION RING)
SECOND RING
MANUFACTURERS MARK
Install with the manufacturers mark facing
upward as shown.
·
Do not interchange the top ring and the
second ring.
·
After assembly, check for smooth
movement of the piston rings.
·
Stagger the piston ring end gaps 120°
apart.
·
Do not align the piston end gaps with the
piston pin.
·
PISTON RINGS
TOP RING
(chrome plated)
OIL RING (COMBINATION
RING)
CONNECTING ROD
The connecting rod can be
installed in either direction
during reassembly.

 Loading...