20
www.honeywell.com
Two-point pressure calibration (items required)
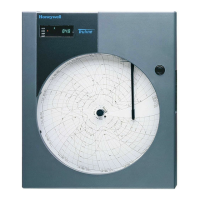
• ERX
• Pressure Source and fittings (capable of providing pressures of at least 50% of the ERX
pressure transducer range)
• Pressure Reference (accuracy to equal or exceed the accuracy of the ERX pressure system)
• Computer (IBM Compatible)
• I/O cable, part number 40-1629 and a MPA, part number 40-2620 or through the use of
I/O cable, part n
umber 40-1629 only if the instrument is equipped with an external case
connector and a third option is through the use of I/O cable 40-2696 that connects directly to
J5 on the main circuit board.
• Barometer
Two-point pressure calibration (procedure - absolute)
Make certain that the Pressure Compensation Coefficients loaded in the instrument are for the
pressure transducer installed. Also ve
rify that instrument is setup for the desired pressure unit.
Since the two-point calibration is mostly a software function, references to the appropriate
sections in the MasterLink32 software are included.
1. Connect the pressure source and pressure reference to the ERX pressure connector.
2. Make a serial connect from the computer’s serial port to the ERX serial port.
3. Start MasterLink32 softw
are on the computer.
4. Enter the access code for Level 1 or Level 2 when requested. The default Level 1 Access
Code is “11111”, the default Level 2 Access Code is “22222”.
5. If a communications link has not yet been established, the screen will display a box
requesting the user to input the Instrument Access Code. Enter the access code when this
box appears. The default code is “33333”.
6. Se
lect “Calibrate” from the main menu.
7. Select “Pressure Calibration” from the sub-menu.
8. With zero pressure applied to the ERX pressure transducer, perform the “Pressure Zero
Calibration.” The pressure displayed in green on the computer’s screen is a live reading.
This permits the user to determine if the pressure has stabilized so that a sample may be
obtained. Click the AVERAGE PRESSURE NO
W button when it becomes active (text
changes from gray to black) to obtain a sample of the applied pressure.
9. Obtain the current local atmospheric pressure reading using a barometer or by some other
means. When MasterLink32 displays “Average Pressure”, the value should be changed
to match the current atmospheric pressure value by clicking the CHANGE button when it
becomes active. Enter the c
urrent atmospheric pressure value, making sure the units are
comparable, i.e., PSIA. The ERX will calculate the required difference offset, store this
calculated value within the instrument before returning to a live absolute pressure
reading.
10. Compare the displayed pressure to the reference pressure. If the ERX absolute pressure
reading is not acceptable, click the AVERAGE PRESSURE NOW butt
on again to obtain
another pressure sample. The program will continue to loop back to the live pressure
reading. Obtain as many pressure samples as necessary until an acceptable pressure
reading is displayed.
11. If the ERX absolute pressure reading is acceptable, click the SPAN button to change to
the Span Calibration sequence.
12. The screen title should have changed to “Pressure Span Calibrat
ion.” At this point, the
software is waiting to sample the applied pressure. Increase the pressure applied to the
ERX Recorder to the span reference pressure that exceeds the zero reference pressure by
at least 50% of the rated transducer range.
 Loading...


