EasyManuals Logo

HP Apollo a6000 Chassis User Manual

HP Apollo a6000 Chassis
62 pages
To Next Page IconTo Next Page
To Previous Page IconTo Previous Page
Page #25 background image
Removal and replacement procedures 25
CAUTION: Hewlett Packard Enterprise has not tested or validated the Apollo a6000 Chassis
with any third-party racks. Before installing the Apollo a6000 Chassis in a third-party rack, be
sure to properly scope the limitations of the rack. Before proceeding with the installation,
consider the following:
You must fully understand the static and dynamic load carrying capacity of the rack and be
sure that it can accommodate the weight of the Apollo a6000 Chassis.
Be sure sufficient clearance exists for cabling, installation and removal of the chassis, and
actuation of the rack doors.
To install the chassis:
WARNING: To reduce the risk of personal injury or equipment damage, be sure that the rack
is adequately stabilized before installing the chassis.
1. Install the chassis into the rack.
2. Secure the chassis to the rack.

Table of Contents

Questions and Answers:

Question and Answer IconNeed help?

Do you have a question about the HP Apollo a6000 Chassis and is the answer not in the manual?
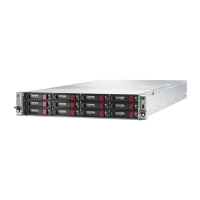
HP Apollo a6000 Chassis Specifications

General IconGeneral
Form FactorRack
Number of Nodes Supported4
Processor SupportIntel Xeon Scalable processors
ManagementIntegrated Lights-Out (iLO)
Memory SupportVaries by node. Supports DDR4 memory.
Drive BaysVaries by node. Supports SAS/SATA/SSD drives.
Expansion SlotsVaries by node. Supports PCIe slots.
NetworkingVaries by node. Supports Ethernet and InfiniBand.

Related product manuals