Chapter 1 41
Remove/Replace System Components
Removing/Replacing System Components
Replacing the Liquid Crystal Display (LCD) Module
To replace the liquid crystal display, follow this procedure:
1. Remove the front bezel if you have not already done this. Otherwise, skip this step. To
remove the front bezel, follow the procedure in the section “Removing the Front
Bezel and Top Cover” found in this chapter.
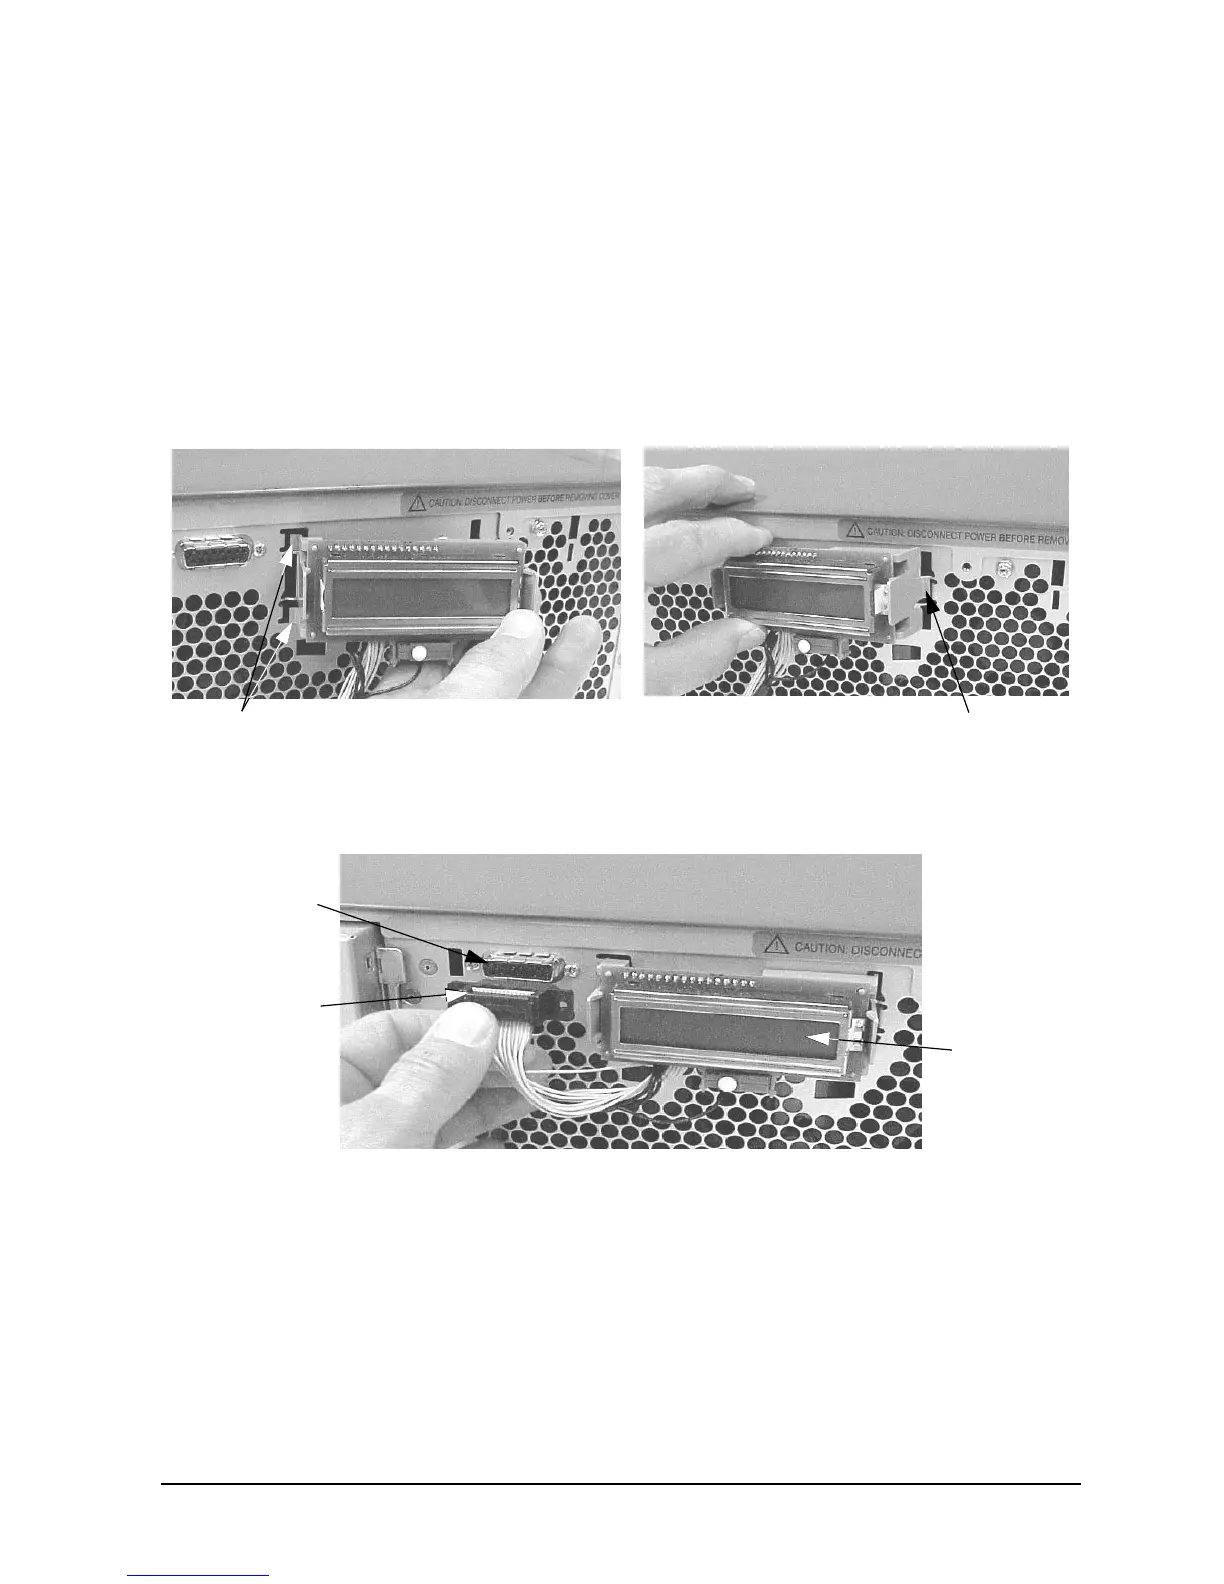
2. Replace the LCD Module by inserting the left-side and right-side retainer clips in their
slots and pressing inward to snap them in place. See Figure 1-45.
Figure 1-45. Replacing the LCD Module
3. Connect the LCD control cable connector to the LCD connector. See Figure 1-46.
Figure 1-46. Connection the LCD Control Cable Connector
4. Complete the procedure in the section “Replacing the Front Bezel and Top Cover”
found in this chapter.
5. Connect and turn on the power to your system.
6. Determine that your LCD Module replacement was successful by looking at the LCD
and noticing if the LCD lights up and the heart shaped activity indicator is blinking. If
the LCD does not light up and the heart shaped activity indicator is not blinking, repeat
this procedure. If your LCD continues to not light up and the heart shaped activity
indicator is not blinking, contact your local HP Support Representative.
Two Left-Side Retainer Clips
Right-Side Retainer Clip
LCD Control
LCD
Cable Connector
LCD Connector
 Loading...