Heat sink
Heat sink appearance varies based on processor type and graphics memory.
To remove the heat sink:
1. Prepare the computer for disassembly (see Preparing to disassemble the computer on page 19).
2. Remove the rear port cover (see Rear port cover on page 23).
3. Remove the stand (see Attaching and removing a stand on page 20).
4. Remove the access panel (see Access panel on page 24).
5. Remove the system board shield (see System board (EMI) shield on page 30).
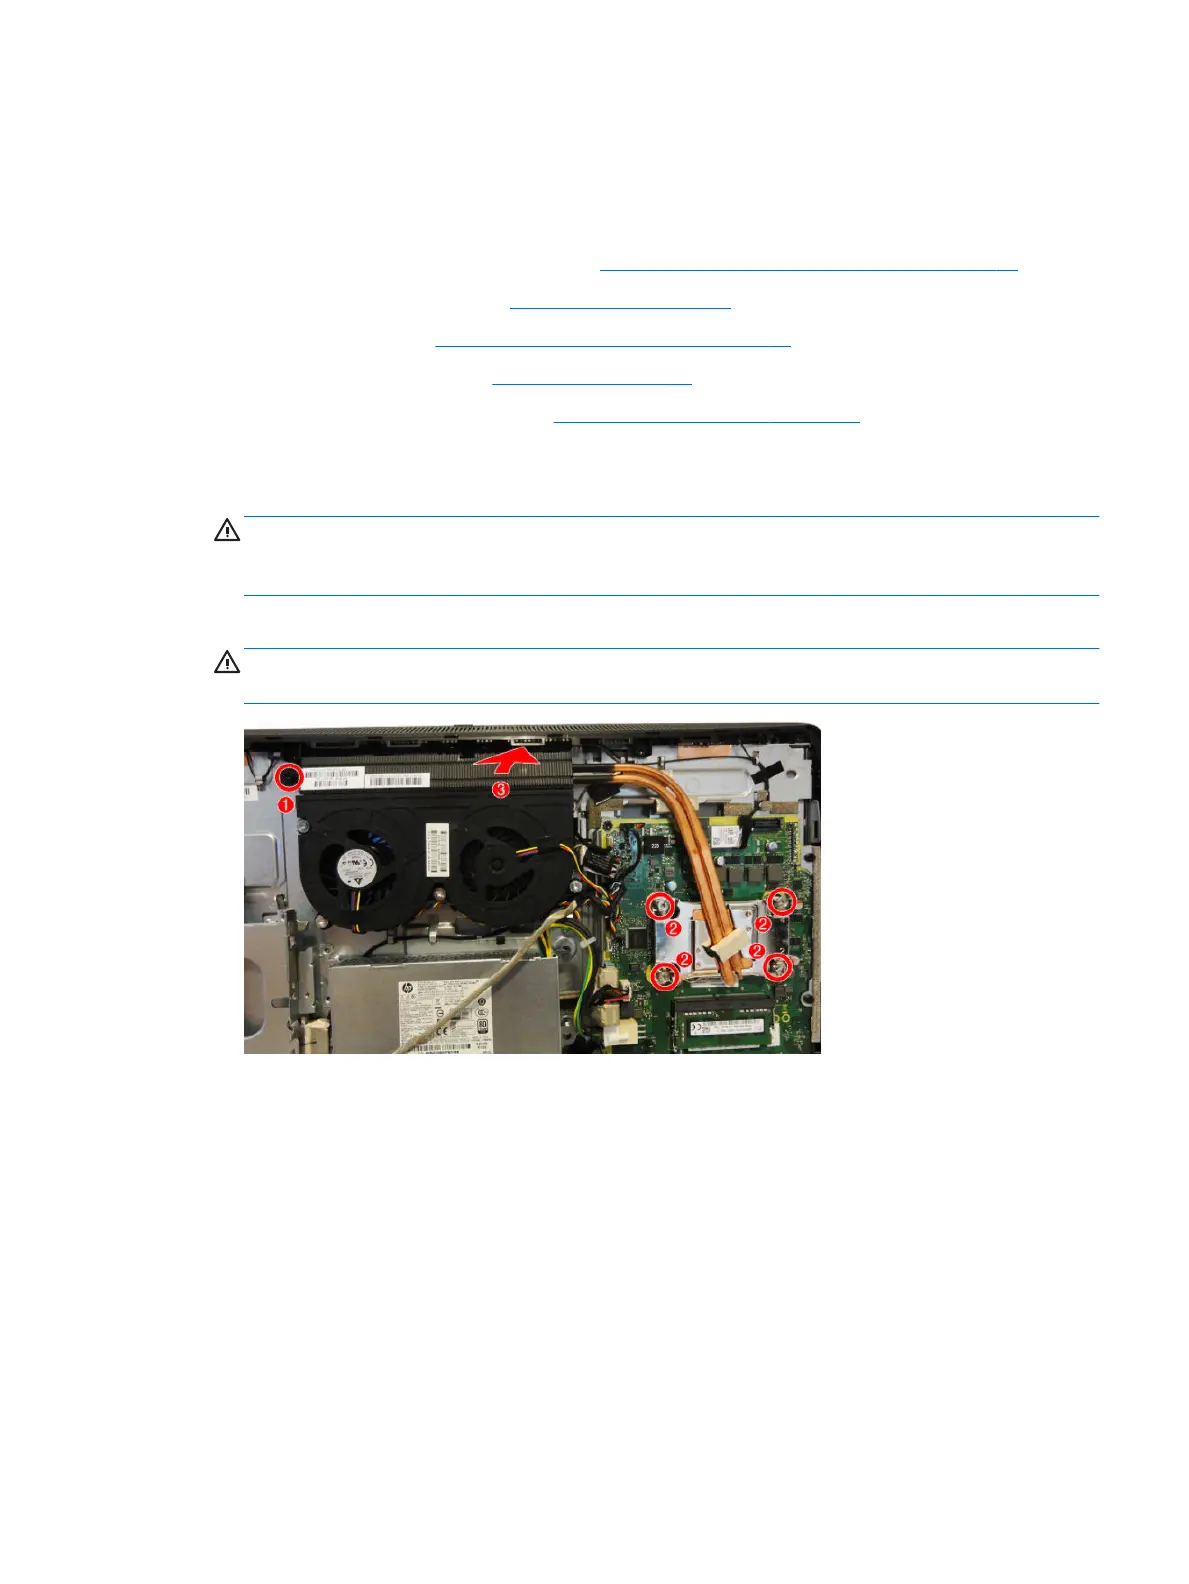
6. Remove the non-captive Torx screw from the top end of the heat sink (1)
7. In the order indicated on the heat sink, loosen the silver captive Torx screws (2).
CAUTION: Remove heat sink retaining screws in diagonally opposite pairs (as in an X) to even the
downward forces on the processor. This is especially important as the pins on the socket are very fragile
and any damage to them may require replacing the system board.
8. Lift the heat sink out of the computer (3).
CAUTION: To reduce a degradation in thermal performance, be sure not to touch the thermal grease
on the surface of the processor or the heat sink.
To replace the heat sink, reverse the removal procedures.
Heat sink 35
 Loading...