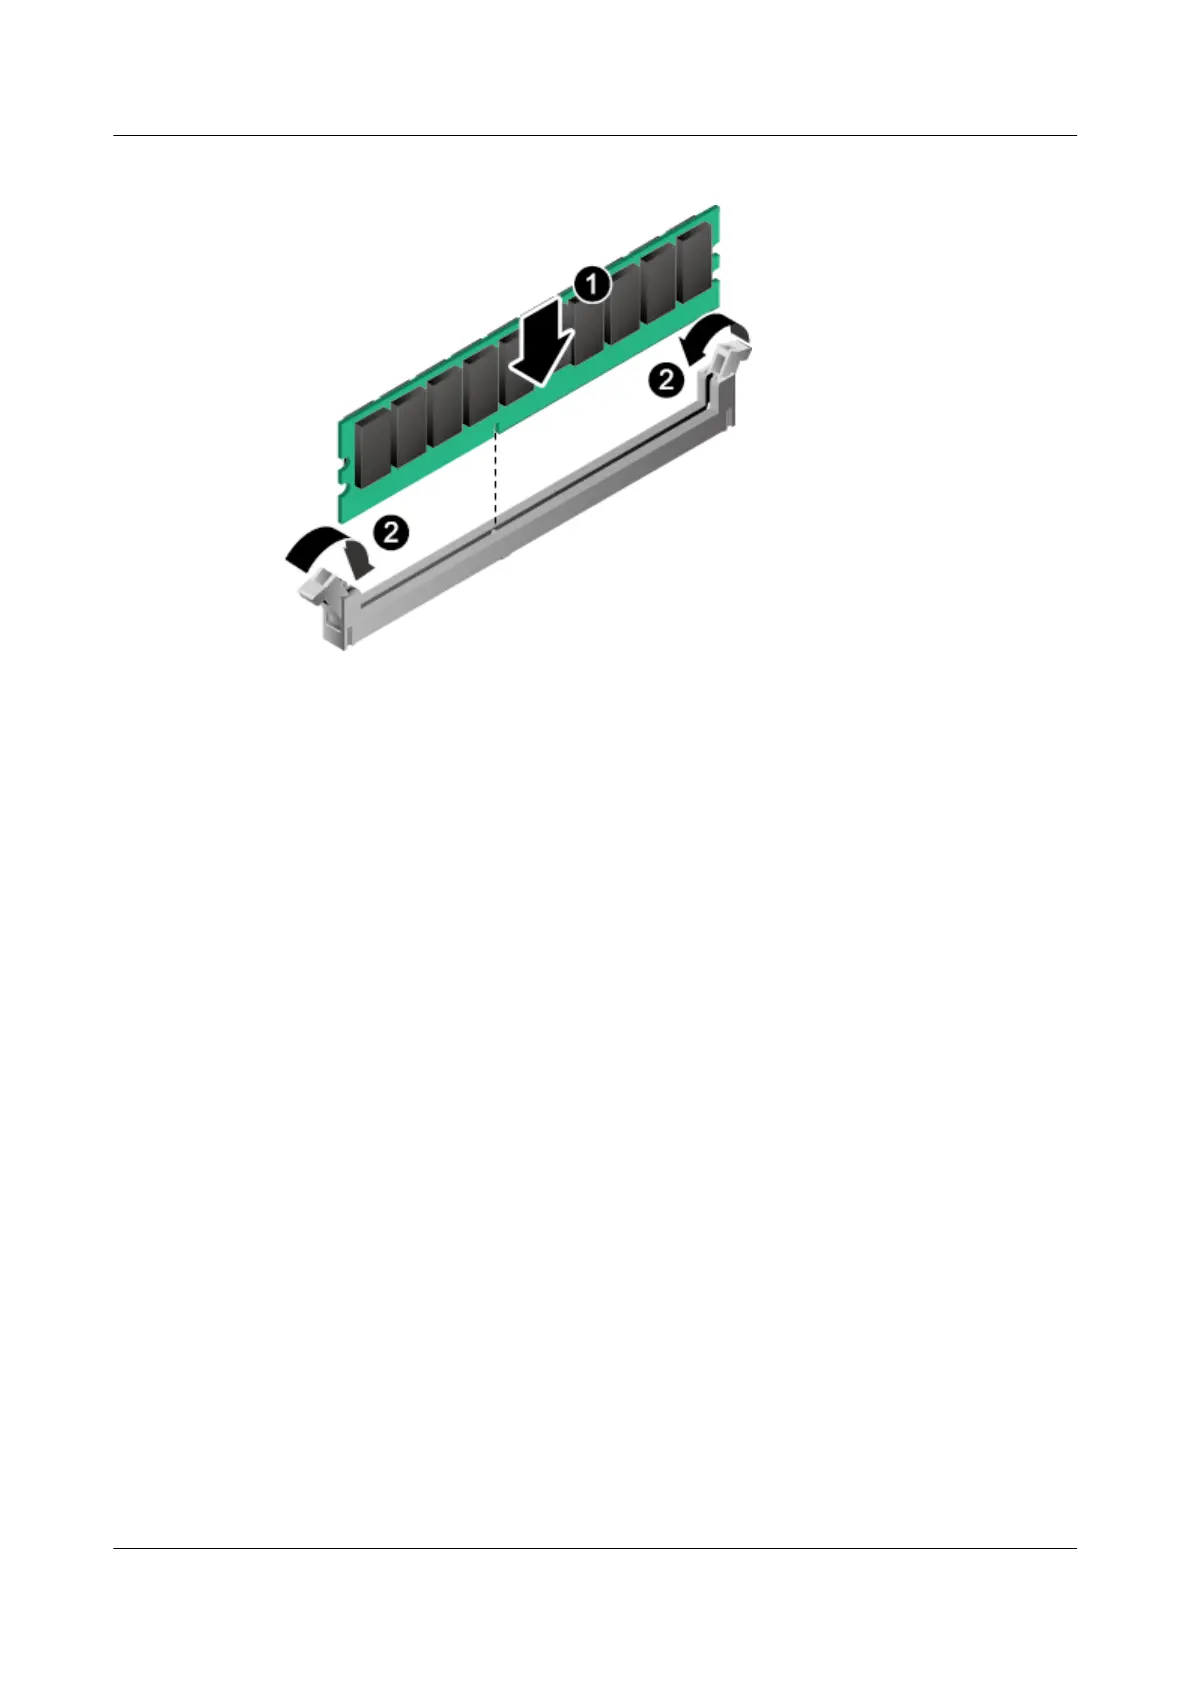
Figure 7-81 Installing a DIMM
Step 6 Install the air duct. For details, see 7.14 Installing the Air Duct.
Step 7 Install the supercapacitor if it is required. For details, see 7.35 Installing the Supercapacitor
(RAID Controller Card).
Step 8 Install full-height full-length riser cards if they are required. For details, see 7.20 Installing a
Riser Card.
Step 9 Install the chassis cover. For details, see 7.12 Installing the Chassis Cover.
Step 10 Install the 5288 V3. For details, see 3.4 Installing the Server.
Step 11 Connect all internal cables such as power and network cables. For details, see 3.5 Connecting
External Cables.
Step 12 Power on the 5288 V3. For details, see 4.1 Powering On the Server.
----End
7.41 Removing the Mainboard
Remove the mainboard before replacing it with a new one.
Procedure
Step 1 Confirm the iBMC and BIOS configurations with the customer for quick recovery after
replacing the motherboard.
Step 2 Log in to the iBMC and record the firmware (iBMC, BIOS, and CPLD) versions of the
mainboard to be replaced. (Choose Information > System Info > Mainboard Info on the
iBMC WebUI or run the ipmcget -d version command on the iBMC CLI.)
Step 3 (Optional) Export the iBMC and BIOS configuration files. Then you can quickly restore the
configurations of the server by importing the iBMC and BIOS configuration files after the
5288 V3 Server
User Guide
7 Replacing Parts
Issue 26 (2018-11-19) Copyright © Huawei Technologies Co., Ltd. 196
 Loading...


