l ESD-preventive bag
l Tag
Precaution
When replacing a disk, pay attention to the following:
l Do not insert a disk forcibly. When the disk does not fully align with the interface, too
much force may cause damage to the interface.
l After removing a disk, wait at least one minute before you insert the new disk. After
inserting a disk, wait at least one minute before you remove the disk.
l To avoid data loss, you only need to replace the disk whose disk alarm/location indicator
is on or that is faulty on the ISM.
Procedure
Step 1 Wear an ESD-preventive wrist strap, ESD-preventive gloves, or ESD-preventive clothes.
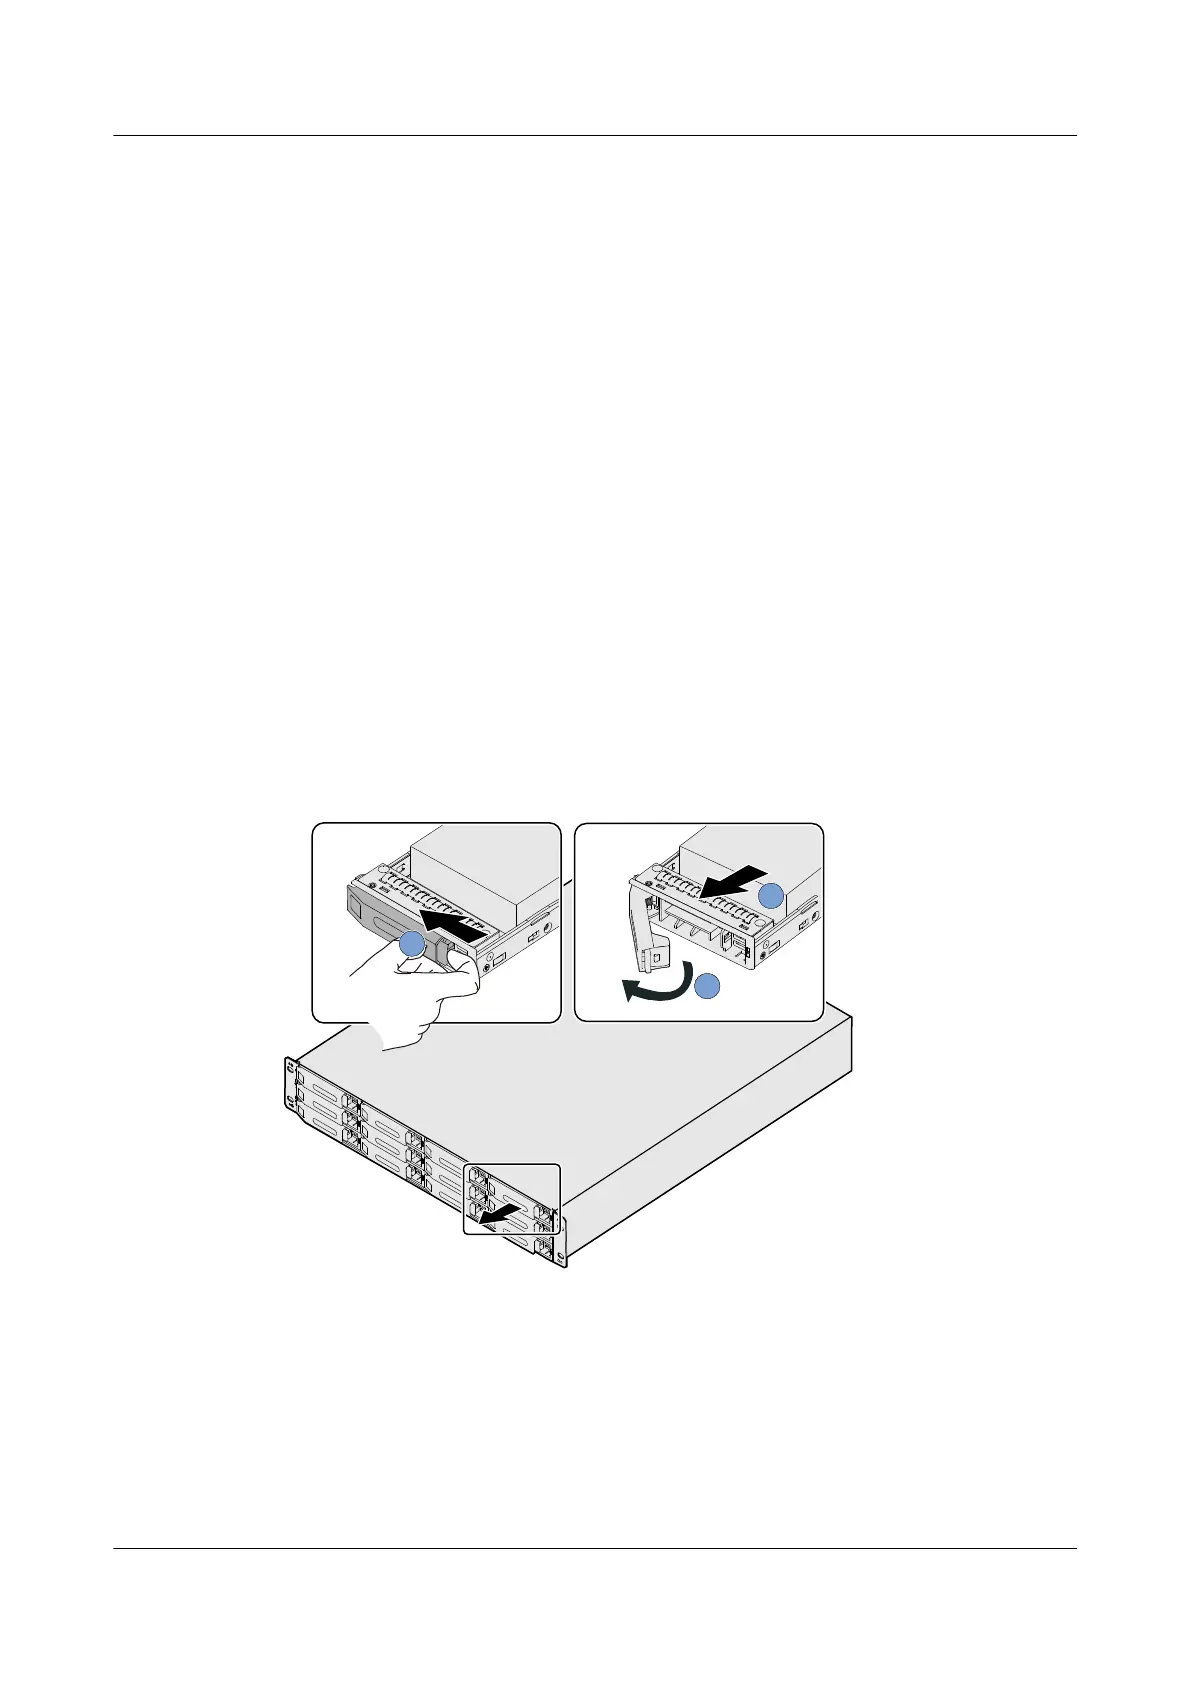
Step 2 As shown in step ① in Figure 6-3, press the buckle on the handle in the arrow direction.
Step 3 As shown in step ② in Figure 6-3, open the handle.
Step 4 As shown in step ③ in Figure 6-3, pull out the faulty disk module.
Figure 6-3 Remove a disk module
1
3
2
Step 5 Put the removed disk module into an ESD-preventive bag.
Step 6 Wait for one minute and then log in to the ISM. On the menu bar, choose Alarm > Alarm
Management… to go to the Alarm Management interface. Confirm that the disk module is
removed on the Current Alarm tab.
Step 7 Take the disk module to be installed from the ESD-preventive bag.
6 Replacing Parts
OceanStor S2600 Storage System
Troubleshooting
6-6 Huawei Proprietary and Confidential
Copyright © Huawei Technologies Co., Ltd.
Issue 03 (2010-01-28)
 Loading...