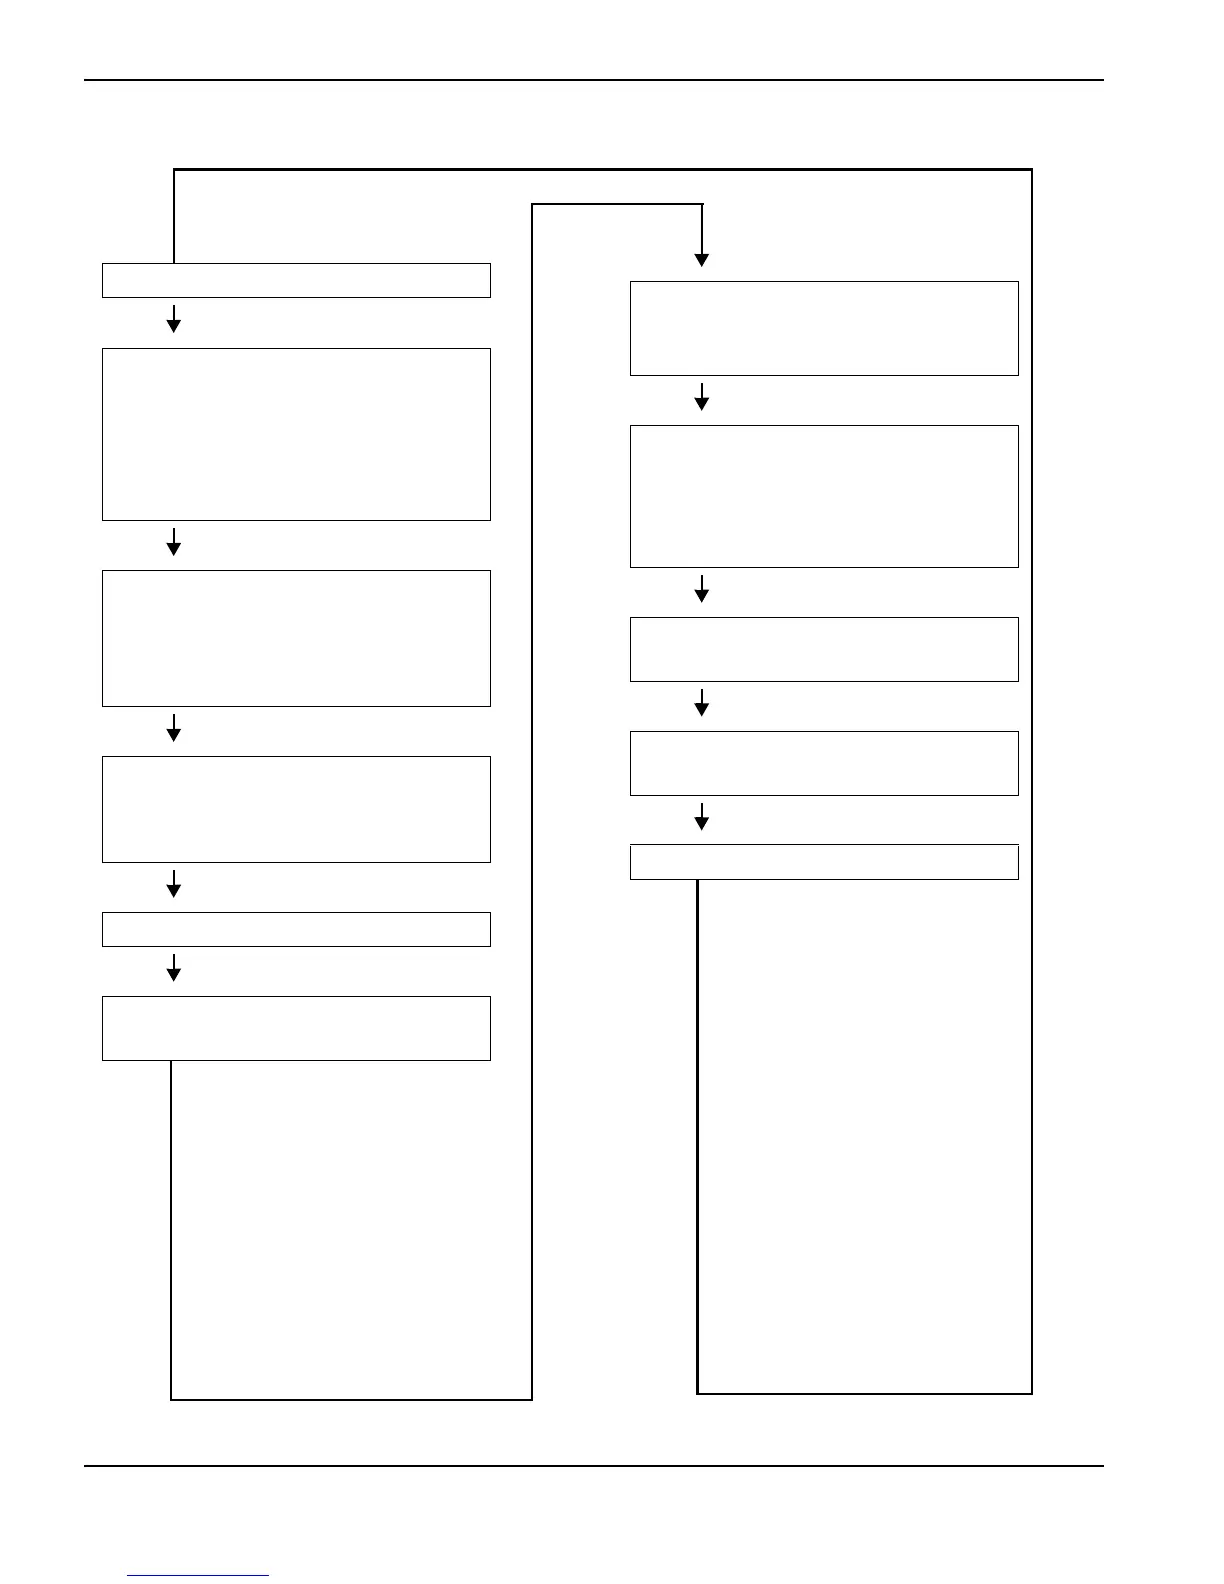
Power OFF (O)
• Connect the gas supply to the gas fitting
on the power supply.
• Connect the work lead to the workpiece.
• Apply power at the line-voltage
disconnect box.
• Set the power switch (S1) to ON (I).
• The green power-ON LED illuminates,
indicating the system is ready for
operation.
• All the fault LEDs should be extinguished.
(See Troubleshooting guide on page 63.)
• Set the amperage adjustment knob to the
desired output current (between 15 A and
30 A) based on the input voltage and
circuit size.
• The power circuits are ready.
• Position the torch on the workpiece.
• Pull the plasma start trigger on the torch.
• The gas solenoid valve (V1) opens.
• The gas flow starts.
• The cutting arc starts.
• Drag the torch lightly across the
workpiece to make a cut.
• The workpiece drops after the cut.
• Release the plasma start trigger on the
torch.
• The arc extinguishes.
• Gas postflow continues for 20 seconds.
• The gas solenoid valve (V1) closes.
• The gas flow stops.
• Set the power switch (S1) to OFF (O).

 Loading...


