MAINTENANCE
3-27
powermax600 Service Manual
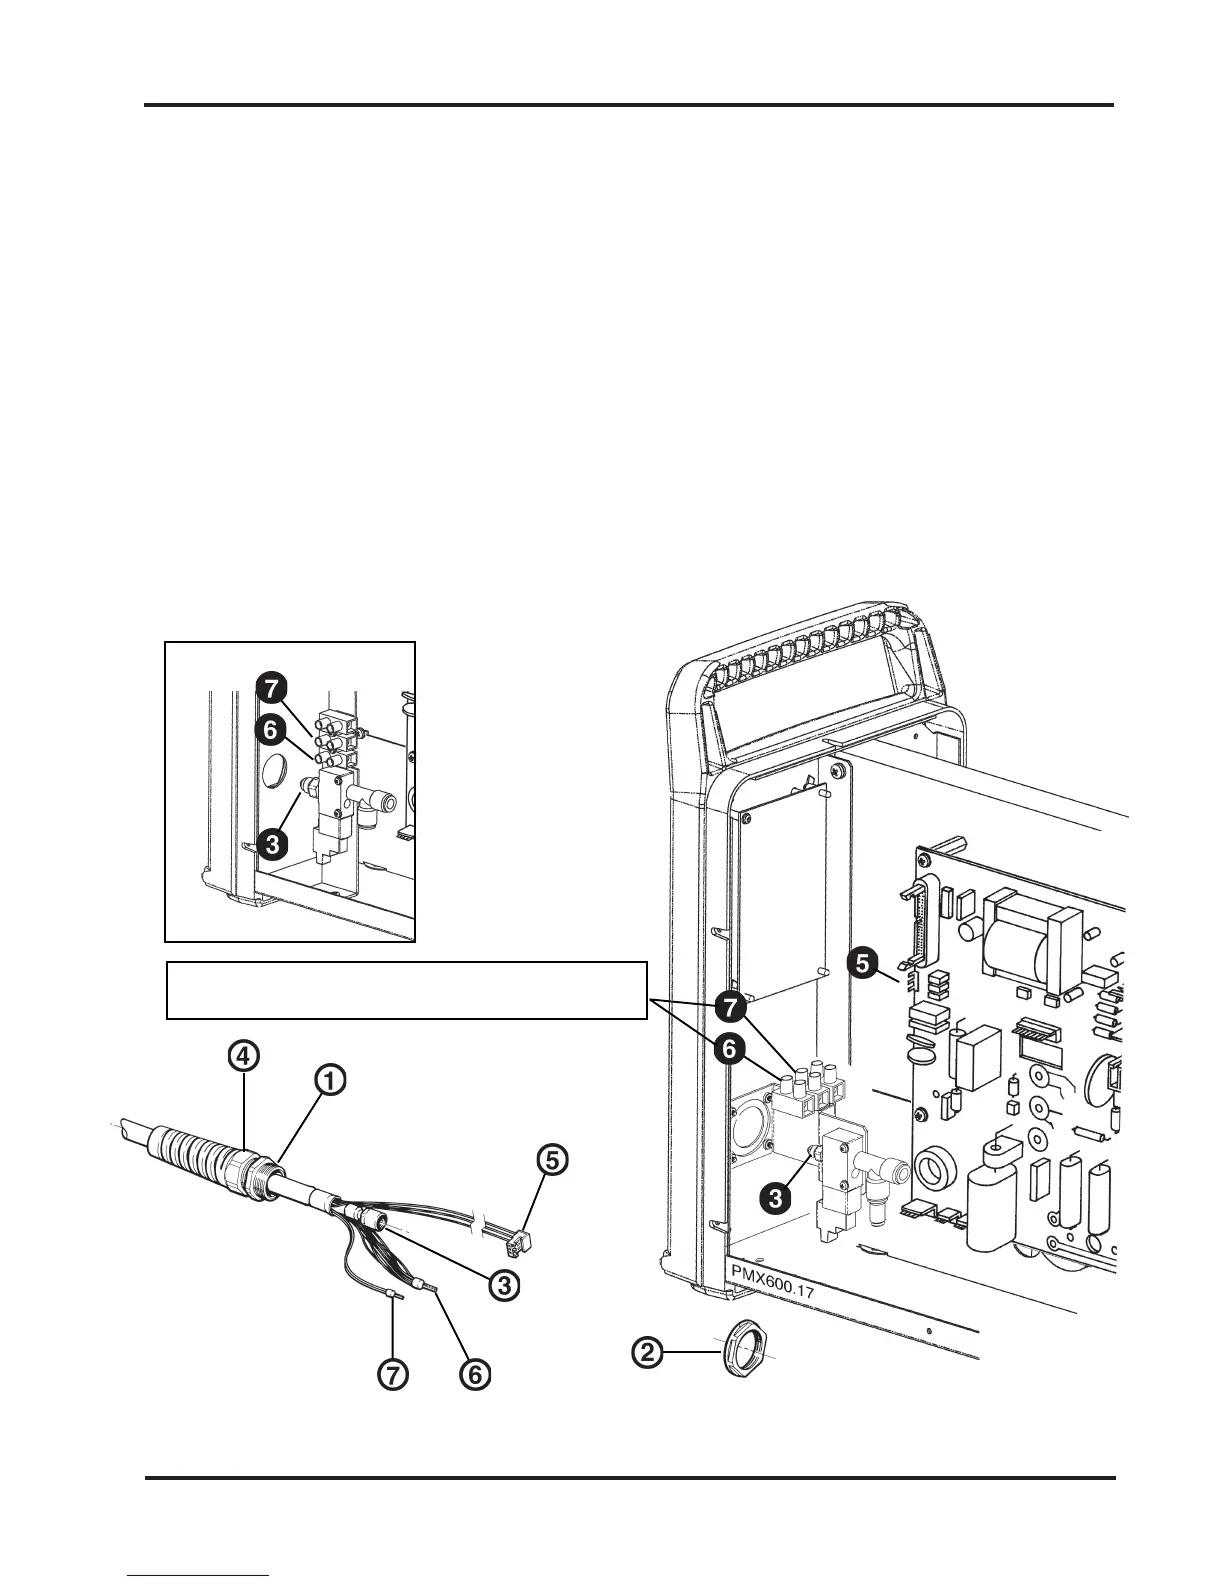
Torch Lead Replacement (For models without quick disconnect)
Disconnect electrical power and gas supply before removing the old torch lead.
Installation - Refer to Figure 3-11.
CAUTION:Do not tighten the strain relief collar (4) onto the torch lead until
the gas fitting (3) is tight, or the gas connection may leak.
Install the strain relief (1) and secure with nut (2).
Connect and tighten the gas fitting (3).
Tighten the strain relief collar (4) onto the lead.
Connect the electrical connections (5), (6) and (7).
Tighten terminal block screws to 10 in-lb (12 kg cm) of torque.
Install the power supply cover.
Figure 3-11 Torch Lead Replacement
CAUTION: These are high current connections.
Proper torque is critical.
Early Configuration
10-99
 Loading...