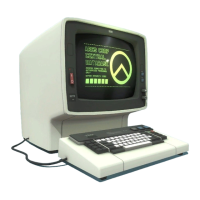
6.7.1 Keyboard from Display Station
1. Switch
off
power.
2.
Remove
the
display station front cover.
3. Remove
the
cable ground wing
nut
from
the
frame.
4. Free the cable fastener, and remove
the
keyboard
cable connector from its socket.
5.
Reinstall
in
the reverse sequence.
6.
Ensure
that
all
cable connectors are tightly seated
in
the sockets and
that
the ground straps are
attached.
6.7.2 Keyboard Top Cover
1.
Invert
the
keyboard.
2.
Remove the four screws
in
the corners
of
the
keyboard base.
3.
Place the keyboard base on a flat surface.
4. Lift
the
top
cover off the keyboard.
5.
Reinstall
in
the reverse sequence.
Note:
Check
for
cover clearance
around
the
keys
after
the cover
has
been
reinstalled.
Adjust
if
required.
6.7.3 Keyboard Assembly from
Base
1.
Switch
off
power.
2.
Disconnect the keyboard from
the
display sta·
tion. (See par. 6.7.1.)
3. Remove the keyboard
top
cover. (See par.
6.7.2.)
4. Disconnect the keyboard cable connector and
clicker connector
at
the
logic card.
5.
Remove the
two
screws
that
hold
the
keyboard
assembly
to
the
mounting. (Mark for alignment
reference. )
6.
Lift
the
keyboard assembly off
the
mounting
and remove the logic card assembly from the
keyboard per paragraph 6.7.8.
7. Reinstall
in
the
reverse sequence.
8.
Ensure
that
the
cable connector
is
tightly seated.
SY27·2510-6
(1/81) 6·11
 Loading...