5
REMOTE CONTROLLER’S BASIC OPERATION
72
D Connecting to a radio through a network
To connect to a radio through a network using the Remote Controller, rst you have to access the radio using the
Remote Utility.
To connect the radio using the Remote Utility, see page 36 when you are operating as the Server, or see page
66 when you are operating as a Remote station.
1. Double-click the “RS-BA1 Remote Control” icon
on your desktop to open the Remote Controller.
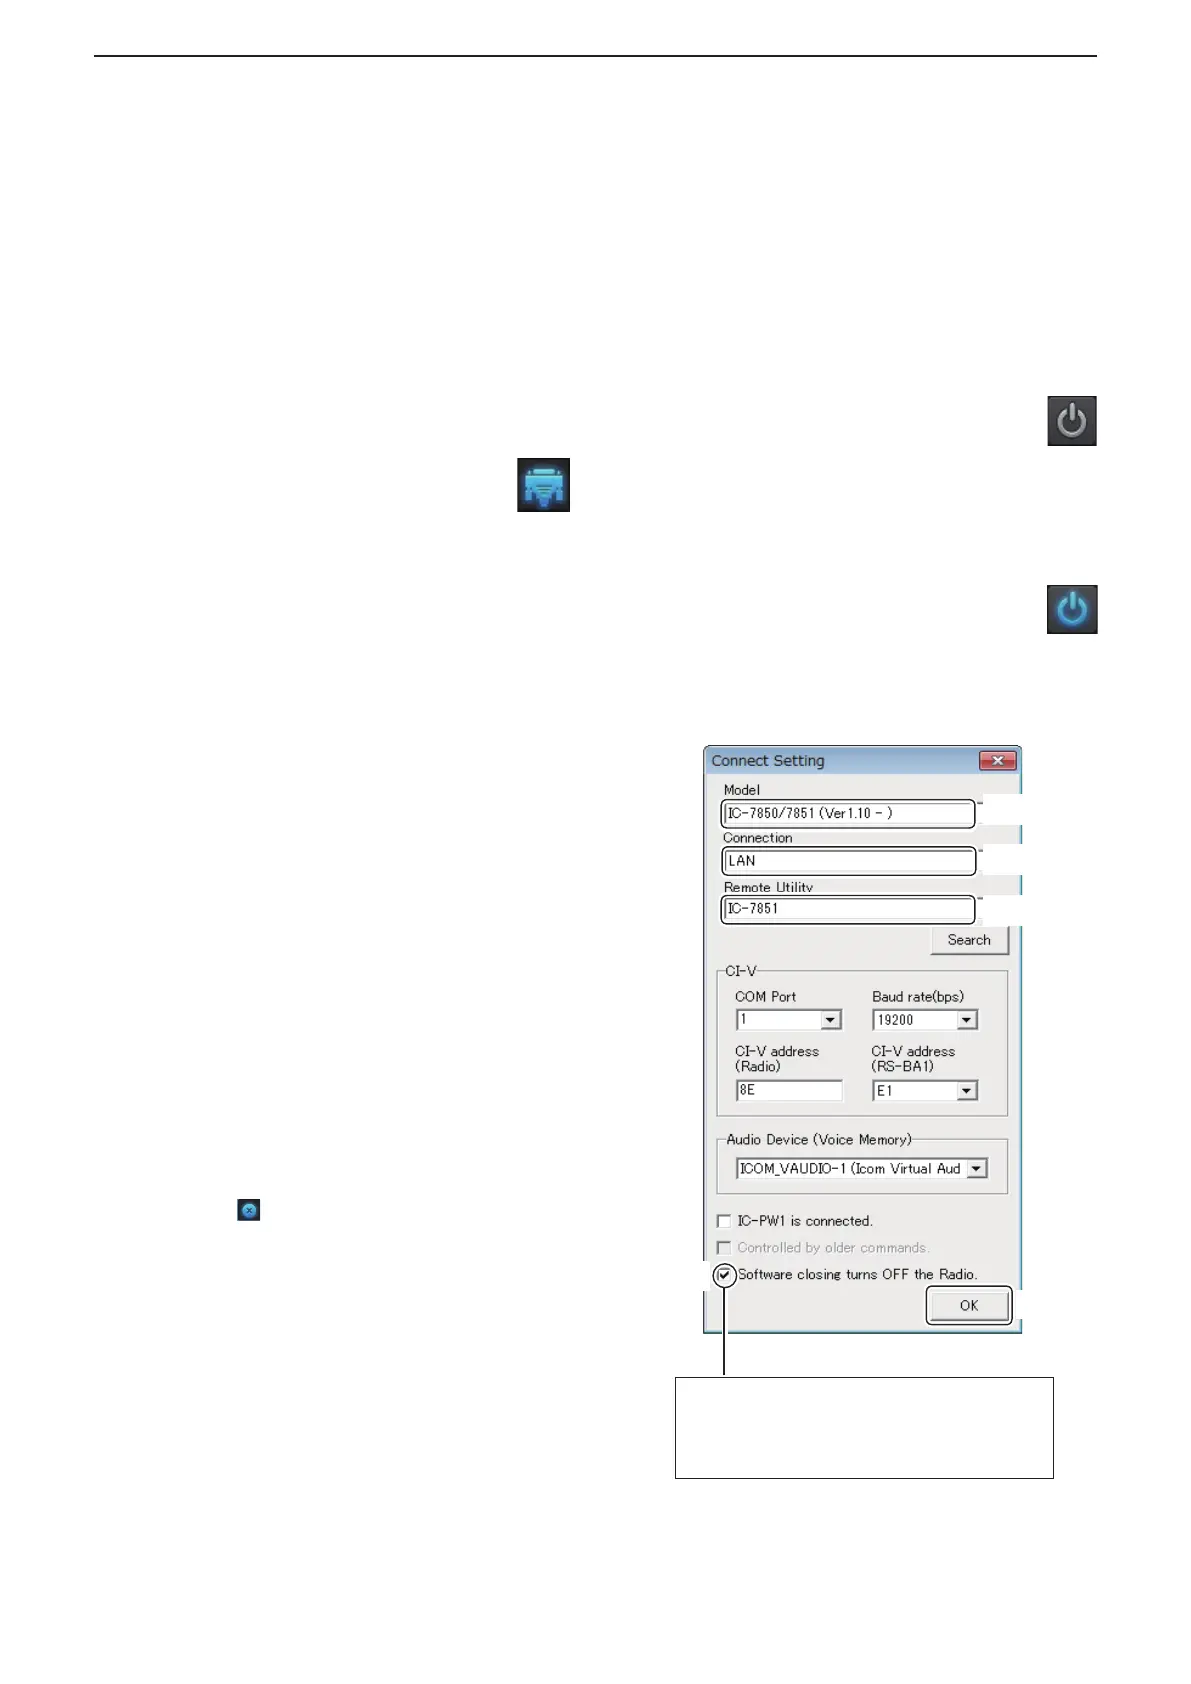
2. Click the icon in the toolbar as shown to
the right, or click “Connect Setting...” in
the [Option] menu, to display the Connect
Setting screen.
• The Connect Setting cannot be set while the radio is
connected.
3. Select a radio that you want to control in the
Model menu.
• The items that cannot be used in the selected model
will be grayed out.
4. Select how to connect to the transceiver between
REMOTE, REMOTE/RS-232C, RS-232C, LAN,
and USB.
• The selectable device differs, depending on the
transceiver.
• When the “MOD Select has also been changed.”
dialog is displayed, click <OK>.
• The conrmation dialog for the connection setting
may be displayed, depending on the transceiver. If
connected correctly, click <OK>.
5. Select a radio that you are accessing with the
Remote Utility, in the Remote Utility menu.
• The CI-V settings are automatically loaded from
the Remote Utility to the CI-V eld. The settings
include the virtual COM Port number, the radio’s CI-V
address and baud rate and the virtual audio device
for the Voice Memory function.
L If the desired radio is not displayed in the Remote
Utility menu, click <Search> to load the radios’
information from the Remote Utility.
6. Click the Software closing turns OFF the
Radio. box to make a check mark to turn OFF
the radio when the Remote Controller is closed
by clicking < > or [Exit] on the File menu.
• Only for transceivers that can be turned ON or OFF
with the CI-V Power ON/OFF command.
• When the PC is shut down while the Remote
Controller is still running, the transceiver’s power may
not be turned OFF.
7. Click <OK> to save the settings, and close the
Connect Setting screen.
■ Connecting to a radio with the Remote Controller (Continued)
8. Click the icon in the toolbar as shown to
the right, or click “Connect ON” in the [File]
menu, to connect to the radio.
• When the connection has succeeded, the radio’s
current data will be displayed on the main panel.
• If the connection fails, and an error screen
is displayed, solve the problem using the “6.
TROUBLESHOOTING” section. (p. 77)
• To disconnect from the radio, click the icon
as shown to the right, or click “Connect OFF”
in the [File] menu.
- The radio will be turned OFF if it can be turned ON
or OFF with the CI-V Power ON/OFF command.
q Select
e Select
t Click
r Click
w Select
If you insert a check mark, the radio power
turns OFF when closing the software.
See the Help le for the Remote Control
software for more details.

 Loading...