5
REMOTE CONTROLLER’S BASIC OPERATION
73
D Directly connecting to a radio
If a radio is physically connected to your PC, you can directly access the radio using the Remote Controller,
instead of using the Remote Utility.
• When you are operating a radio on the remote control system with the Remote Controller, without having used
the Remote Utility to connect, let other users know that the radio is being used.
1. Double-click the “RS-BA1 Remote Control” icon
on your desktop to open the Remote Controller.
2. Click the icon in the toolbar as shown to
the right, or click “Connect Setting...” in
[Option] menu, to display the Connect
Setting screen.
3. Select a radio that you want to control in the
Model menu.
• The items that cannot be used in the selected model
will be grayed out.
4. Select how to directly connect to the radio in the
Connection menu.
• When the “MOD Select has also been changed.”
dialog is displayed, click <OK>.
• The conrmation dialog for the connection setting
may be displayed, depending on the transceiver. If
connected correctly, click <OK>.
5. Select “Not Use” in the Remote Utility menu.
6. Select the COM port number to which the radio is
connected, in the COM Port menu.
7. Enter the radio’s CI-V address in the CI-V
address (Radio) eld, and select the radio’s
baud rate in the Baud rate (bps) menu.
If the radio’s baud rate is set to “Auto,” select
“19200” in the Baud Rate (bps) menu.
If you are using the Spectrum Scope function
with the IC-7851, IC-7850, IC-7610, or IC-7300
using a USB for the connection, select “115200”
in the Baud Rate menu.
• See page 21 for details of radio’s presetting.
• To check or change the radio’s CI-V address and
baud rate settings, see the instruction manual that
comes with the radio.
8. Click the Software closing turns OFF the
Radio. box to make a check mark to turn OFF
the radio when the Remote Controller is closed
by clicking < > or [Exit] on the File menu.
• Only for transceivers that can be turned ON or OFF
with the CI-V Power ON/OFF command.
• When the PC is shut down while the Remote
Controller is still running, the transceiver’s power may
not be turned OFF.
9. Click <OK> to save the settings, and close
the Connect Setting screen.
10. Click the icon in the toolbar as shown to
the right, or click “Connect ON” in the [File] menu,
and connect to the radio.
• When the connection has succeeded, the radio’s
current data will be displayed on the main panel.
• If the connection fails, and an error screen
is displayed, solve the problem using the “6.
TROUBLESHOOTING” section.(
p. 77
)
• To disconnect from the radio, click the icon
as shown to the right, or click “Connect OFF”
in the [File] menu.
- The radio will be turned OFF if it can be turned ON
or OFF with the CI-V Power ON/OFF command.
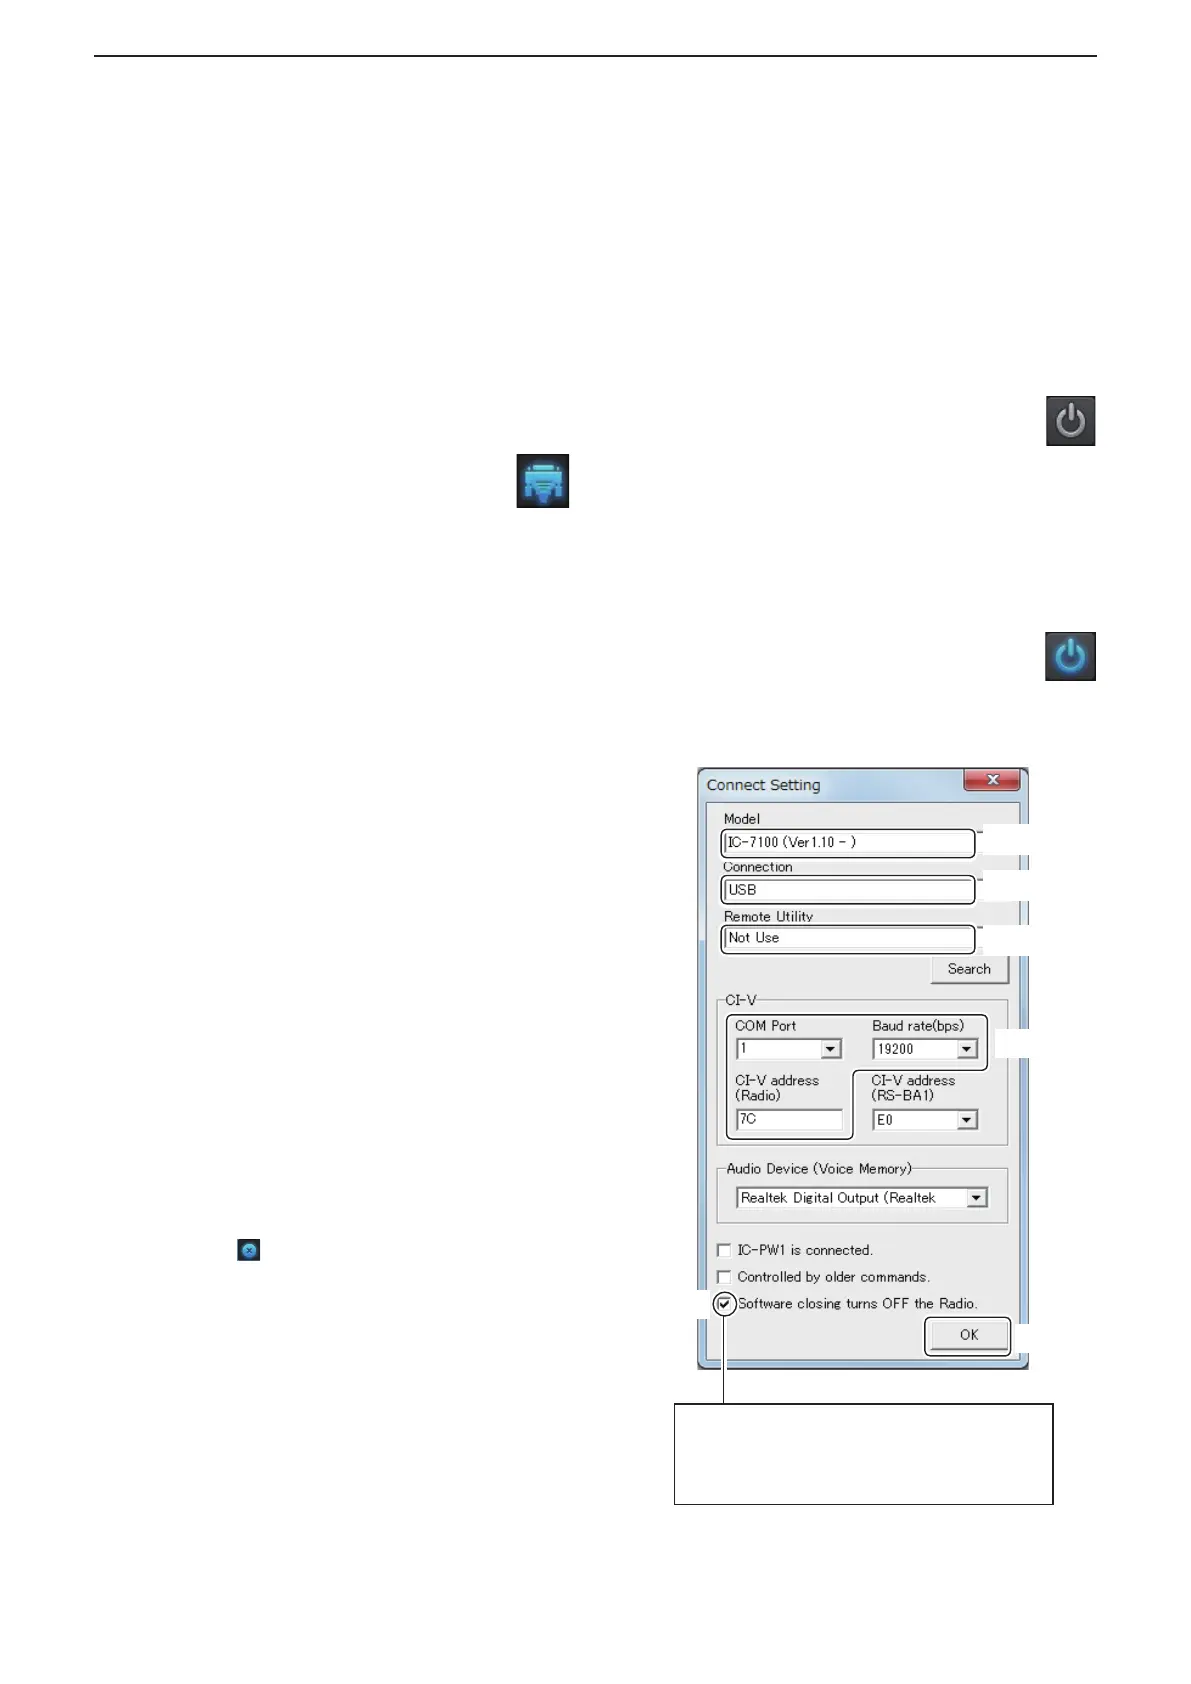
q Select
w Select
e Select
y Click
t Click
r Enter
If you insert a check mark, the radio power
turns OFF when closing the software.
See the Help le for the Remote Control
software for more details.
■ Connecting to a radio with the Remote Controller (Continued)

 Loading...