EasyManua.ls Logo

Integra DHC-80.1 User Manual

Integra DHC-80.1
164 pages
To Next Page IconTo Next Page
To Previous Page IconTo Previous Page
Page #11 background imageLoading...
Page #11 background image
11
Front & Rear Panels—Continued
d DIGITAL COAXIAL IN 1, 2, and 3
These coaxial digital audio inputs are for connect-
ing components with coaxial digital audio outputs,
such as CD and DVD/BD players. They’re assign-
able, which means you can assign each one to an
input selector to suit your setup. See “Digital Audio
Input Setup” on page 49.
e USB port
A USB mass storage device, such as a USB flash
drive or MP3 player, containing music files can be
plugged in here and the music selected can be
played through the AV controller.
f ETHERNET
This port is for connecting the AV controller to your
Ethernet network (e.g., router or switch) for playing
music files on a networked computer or media
server, or for listening to Internet radio.
g u REMOTE CONTROL
This u (Remote Interactive) jack can be con-
nected to an u jack on another Onkyo AV compo-
nent. The AV controller’s remote controller can then
be used to control that component. To use u, you
must make an analog audio connection (RCA)
between the AV controller and the other AV compo-
nent, even if they are connected digitally.
h RS232
Terminal for control.
i HDMI IN 1–7, OUT MAIN, and OUT SUB
HDMI (High Definition Multimedia Interface) con-
nections carry digital audio and digital video.
The HDMI inputs are for connecting components
with an HDMI output, such as a DVD player, Blu-
ray Disc Player, DVD recorder, or DVR (digital
video recorder). They’re assignable, which means
you can assign each one to an input selector to suit
your setup. See “HDMI Input Setup” on page 47.
The HDMI outputs are for connecting a TV or pro-
jector with an HDMI input.
j MONITOR OUT
These S-Video and composite video jacks should be
connected to a video input on your TV or projector.
k COMPONENT VIDEO IN 1, 2 and 3
These RCA component video inputs are for con-
necting components with a component video out-
put, such as a DVD player, DVD recorder, or DVR
(digital video recorder). They’re assignable, which
means you can assign each one to an input selector
to suit your setup. See “Component Video Input
Setup” on page 48.
l COMPONENT VIDEO MONITOR OUT
These RCA component video outputs are for con-
necting a TV or projector with a component video
input.
m COMPONENT VIDEO ZONE 2 OUT
This RCA component video output is for connect-
ing a TV or projector with a component video input
located in your main listening room or Zone 2.
n ZONE 2 OUT
This composite video output can be connected to a
video input on a TV in Zone 2.
o PC INPUT ANALOG RGB
This input terminal is for connecting a personal
computer with an analog RGB output. You can
assign it to an input selector to suit your setup. See
“Component Video Input Setup” on page 48.
p FM ANTENNA
This jack is for connecting an FM antenna.
AM ANTENNA
These push terminals are for connecting an AM
antenna.
q AC INLET
The supplied power cord is connected here. The
other end of the power cord should be connected to
a suitable wall outlet.
r GND screw
This screw is for connecting a turntable’s ground
wire.
s PHONO IN
These analog audio inputs are for connecting a turn-
table.
t BALANCE L/R INPUT
This balanced XLR input is for connecting a com-
ponent with a stereo balanced XLR output. For a
mono source, connect to the BALANCE L XLR.
u CD IN
These analog audio inputs are for connecting a CD
player’s analog audio output.
v 12V TRIGGER OUT (A/B/C)
These outputs can be connected to the 12-volt trig-
ger inputs on other components.
w TV/TAPE IN/OUT
These analog audio inputs and outputs are for con-
necting a TV or recorder with an analog audio input
and output (cassette, Mini Disc, etc.).
x AUX 2 IN
This analog audio input is for connecting an analog
audio output, such as an audio device, etc.
y GAME IN
Here you can connect a game console, etc. Input
jacks include S-Video, composite video, and analog
audio.
z CBL/SAT IN
Here you can connect a cable/satellite receiver, set-
top box, etc. Input jacks include S-Video, composite
video, and analog audio.

Table of Contents

Other manuals for Integra DHC-80.1

Question and Answer IconNeed help?

Do you have a question about the Integra DHC-80.1 and is the answer not in the manual?

Integra DHC-80.1 Specifications

General IconGeneral
BrandIntegra
ModelDHC-80.1
CategoryController
LanguageEnglish

Summary

Important Safety Instructions

Damage Requiring Service

Details on conditions requiring professional servicing for the apparatus.

Object and Liquid Entry

Precautions against inserting objects into openings and liquid spills.

Precautions

Power

Important information before plugging in the unit for the first time.

Features

Processing

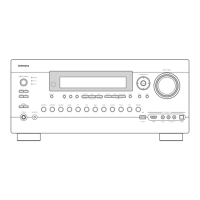
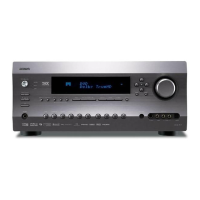
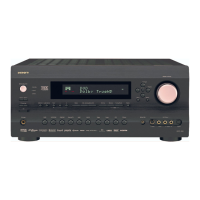
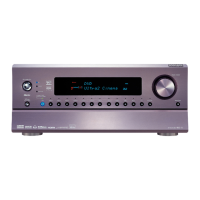
Key processing technologies and features of the AV controller.

Connections

Overview of the various input and output connection options available.

Remote Controller

Installing the Batteries

Step-by-step guide for inserting batteries into the remote controller.

Aiming the Remote Controller

Instructions on how to point the remote controller for effective signal transmission.

Controlling the AV Controller

Explanation of how to use the remote controller to operate the AV controller.

About Home Theater

Speaker Placement

Guidance on optimal placement of various speakers for home theater setups.

Connecting the AV controller

Connecting Your Speakers

Instructions for connecting speakers to the AV controller and amplifier.

Connecting Powered Subwoofers

Guide for connecting powered subwoofers to PRE OUT jacks.

Connecting a Power Amplifier with RCA Inputs

Instructions for connecting to a multichannel power amplifier via RCA.

Connecting a Power Amplifier with XLR Inputs

Instructions for connecting to a multichannel power amplifier via XLR.

Bi-amping the Front Speakers

Procedure for bi-amping front speakers for improved performance.

About HDMI

Overview of HDMI interface, supported audio formats, and system control.

Making HDMI Connections

Detailed steps for establishing HDMI video and audio connections.

Connecting a TV or Projector

Instructions for connecting the AV controller to a TV or projector.

Connecting the Power Cord

Steps for safely connecting the AV controller's power cord.

Turning On the AV controller

Turning On and Standby

How to turn the AV controller on, off, and put it into standby mode.

First Time Setup

Monitor Setup

Configuring the Monitor Out setting for video signal output.

Using the Onscreen Setup Menus

Navigating and using the AV controller's onscreen setup menus.

Monitor Out Setup

Detailed configuration of Monitor Out settings and resolution.

HDMI Input Setup

Assigning HDMI inputs to input selectors for proper signal routing.

Video Input Setup

Assigning video inputs (composite, S-Video) to input selectors.

Component Video Input Setup

Assigning component video inputs to input selectors.

Digital Audio Input Setup

Assigning digital audio inputs (optical, coaxial) to input selectors.

Analog Audio Input Setup

Assigning analog audio and multichannel inputs to input selectors.

Speaker Settings

Configuring speaker types, crossover, and bi-amping settings.

Audyssey MultEQ® XT Room Correction and Speaker Setup

Automatic room acoustic correction and speaker setup process.

Using Audyssey MultEQ® XT

Step-by-step guide to running the Audyssey MultEQ XT auto setup.

Advanced Setup

Onscreen Setup Menus

Overview of the AV controller's setup menu structure.

Input/Output Assign

Configuring input/output assignments for various signals.

Component Video Input

Assigning component video inputs to input selectors.

Digital Audio Input

Assigning digital audio inputs to input selectors.

Analog Audio Input

Assigning analog audio inputs to input selectors.

Speaker Setup

Configuring speaker settings, levels, and distances.

Level Calibration

Adjusting speaker levels using test tones for balanced sound.

Equalizer Settings

Manually adjusting speaker equalization for optimal sound.

Audio Adjust

Adjusting various audio settings like multiplex and Dolby parameters.

Audyssey

Settings for Dynamic EQ, Reference Level, and Dynamic Volume.

Source Setup

Configuring settings for each input source like IntelliVolume and A/V Sync.

Miscellaneous (Volume/OSD) Setup

Configuring volume display, muting, and onscreen display settings.

Hardware Setup

Accessing hardware-related settings like Remote ID and Network.

HDMI

Configuring HDMI settings like Audio TV Out, Lip Sync, and x.v.Color.

Using the Audio Settings

Adjusting various audio settings like Tone Control and Late Night Function.

Speaker Levels

Adjusting the volume level of individual speakers.

Troubleshooting

Can’t turn on the AV controller

Steps to take if the AV controller does not power on.

There’s no sound, or it’s very quiet

Troubleshooting steps for no or low audio output.

Only the front speakers produce sound

Diagnosing why only front speakers are producing sound.

Only the center speaker produces sound

Diagnosing why only the center speaker is producing sound.

The surround speakers produce no sound

Troubleshooting steps for surround speakers not producing sound.

The center speaker produces no sound

Diagnosing why the center speaker is not producing sound.

Related product manuals