Initial startup and operation:
Before operating,
be
sure
that
:
• All the hoses have been connected and tightened securely, and correct amount
of
filter sand
have been loaded.
• The entire system is connected
to
a grounding type receptacle protected by a ground-fault
ci
rcuit interrupter (GFCI)
or
residual current device (RCD).
A
CAUTION
,
The
filter control valve has a closed position.
The
pump
should
never
be
on
when
the valve
is
in the closed position.
If
the
pump
is operated with
the
valve closed,
explosive situation could exist.
1. Turn both plunger valve handles fully counter-clockwise until they stop. This opens the valves
to allow water to flow into the sand filter pump. With water flowing into sand filter pump, the
water pressure will allow the air trapped inside
to
escape from the air release valves (19).
When all the air has escaped water will flow out
of
the valves (19). When this occurs gently
finger tighten the valves
(19)
in
a clockwise direction.
2.
Ensure the drain/waste outlet on the 6-way valve is not
covered and directed
to
a proper draining receptacle.
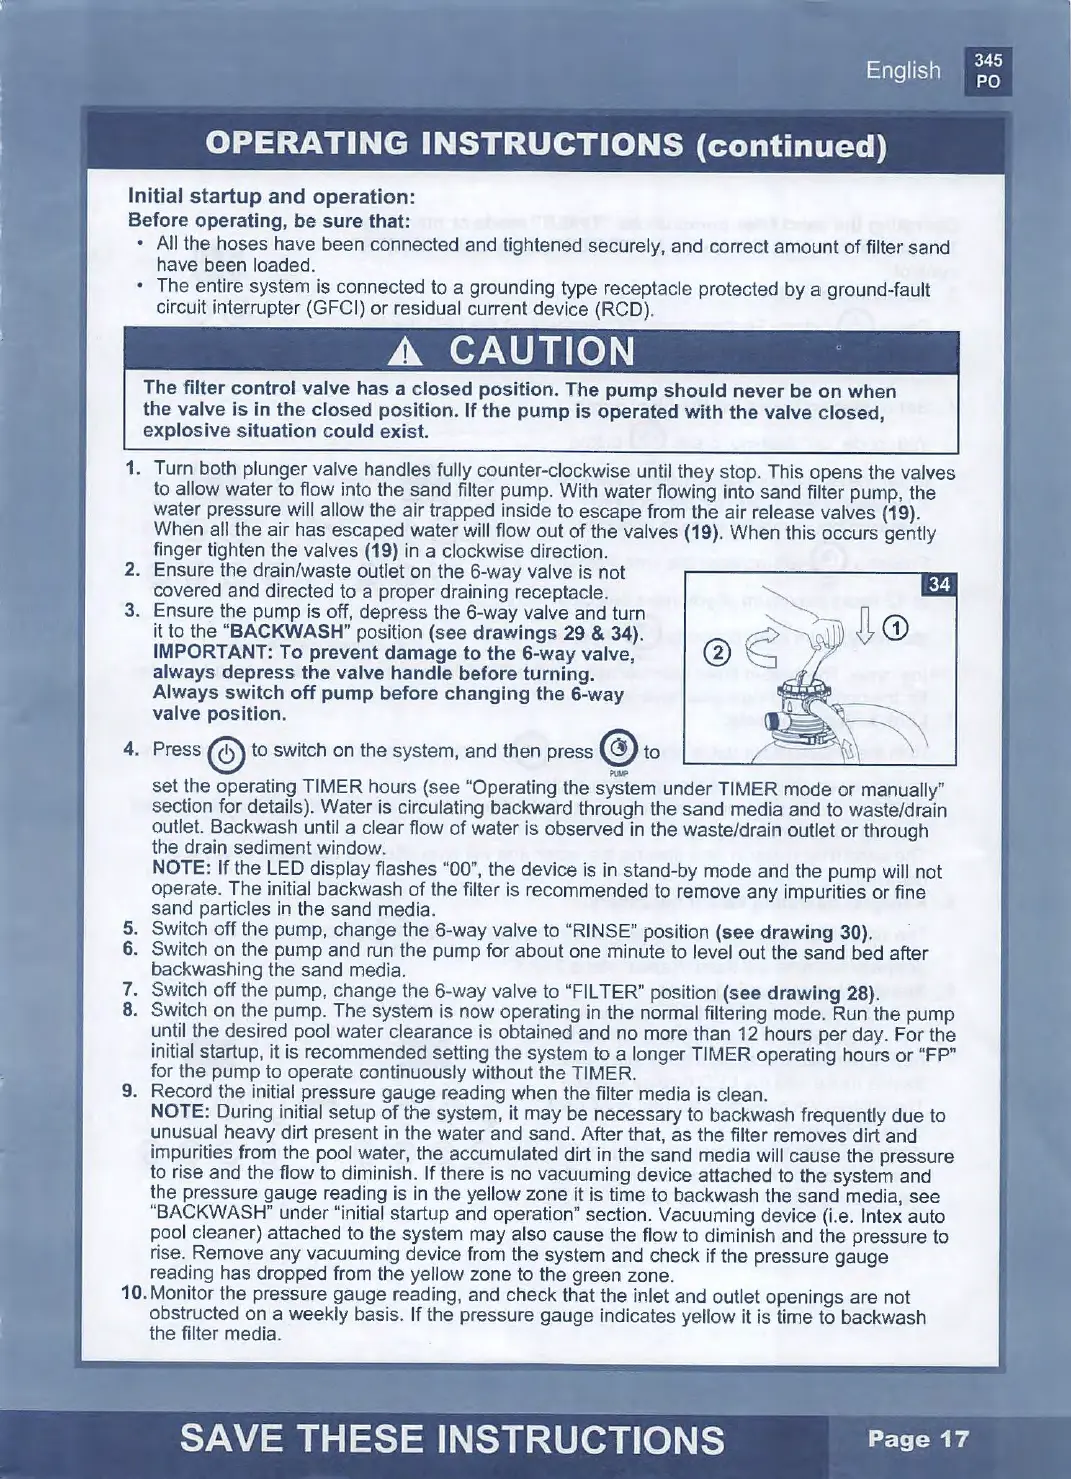
3. Ensure the pump is off, depress the 6-way valve and turn
it to the
"BACKWASH" position (see
drawings
29
& 34).
IMPORTANT
:
To
prevent
damage
to
the
6-way
valve, @
always depress
the
valve
handle
before turning.
Always
switch
off
pump
before changing
the
6-way
valve position.
4.
Press@
to switch on the system, and then press
Cg)
to
set the operating TIMER hours (see "Operating the system under TIMER mode
or
manually"
section for details). Water is circulating backward through the sand media and to waste/drain
outlet. Backwash until a clear flow
of
water is observed in the waste/drain outlet
or
through
the drain sediment window.
NOTE: If the LED display flashes "00", the device is in stand-by mode and the pump will not
operate. The initial backwash
of
the filter is recommended to remove any impurities or fine
sand particles in the sand medi
a.
5.
Switch off the pump, change the 6-way valve to "RINSE" position
(see
drawing 30).
6. Switch on the pump and run the pump for about one minute to level out the sand bed after
backwashing the sand media.
7. Switch off the pump, change the 6-way valve
to
"FILTER" position (see drawing 28).
8.
Switch on the pump. The system is now operating in the normal filtering mode. Run the pump
until the desired pool water clearance is obtained and no more than 12 hours per day. For the
initial startup, it is recommended setting the system to a longer TIMER operating hours
or
"FP"
for the pump to operate continuously without the TIMER.
9. Record the initial pressure gauge reading when the filter media is clean.
NOTE: During initial setup
of
the system, it may be necessary to backwash frequently due to
unusual heavy dirt present in the water and sand. After that, as the filter removes dirt and
impurities from the pool water, the accumulated dirt in the sand media will cause the pressure
to rise and the flow to diminish.
If
there is no vacuuming device attached to the system and
the pressure gauge reading is
in
the yellow zone it is time to backwash the sand media, see
"BACKWASH" under
"i
nitial startup and operation" section. Vacuuming device (i.e. lntex auto
pool cleaner) attached to the system may also cause the flow to diminish and the pressure to
rise. Remove any vacuuming device from the system and check
if
the pressure gauge
reading has dropped from the yellow zone to the green zone.
10. Monitor the pressure gauge reading, and check that the inlet and outlet openings are not
obstructed on a weekly basis. If the pressure gauge indicates yellow it is time to backwash
the filter media.
 Loading...