– 27 –
警告
警告
ミシンの不意の起動による事故を防ぐため、電源を切ってから行ってください。
WARNING :
Turn OFF the power before starting the work so as to prevent accidents caused by abrupt start of the
sewing machine.
为了防止意外的起动造成的事故,请关掉电源后再进行操作。
34.
ゲージ部品の交換
/ REPLACING THE GAUGE PARTS /
规格零件的更换
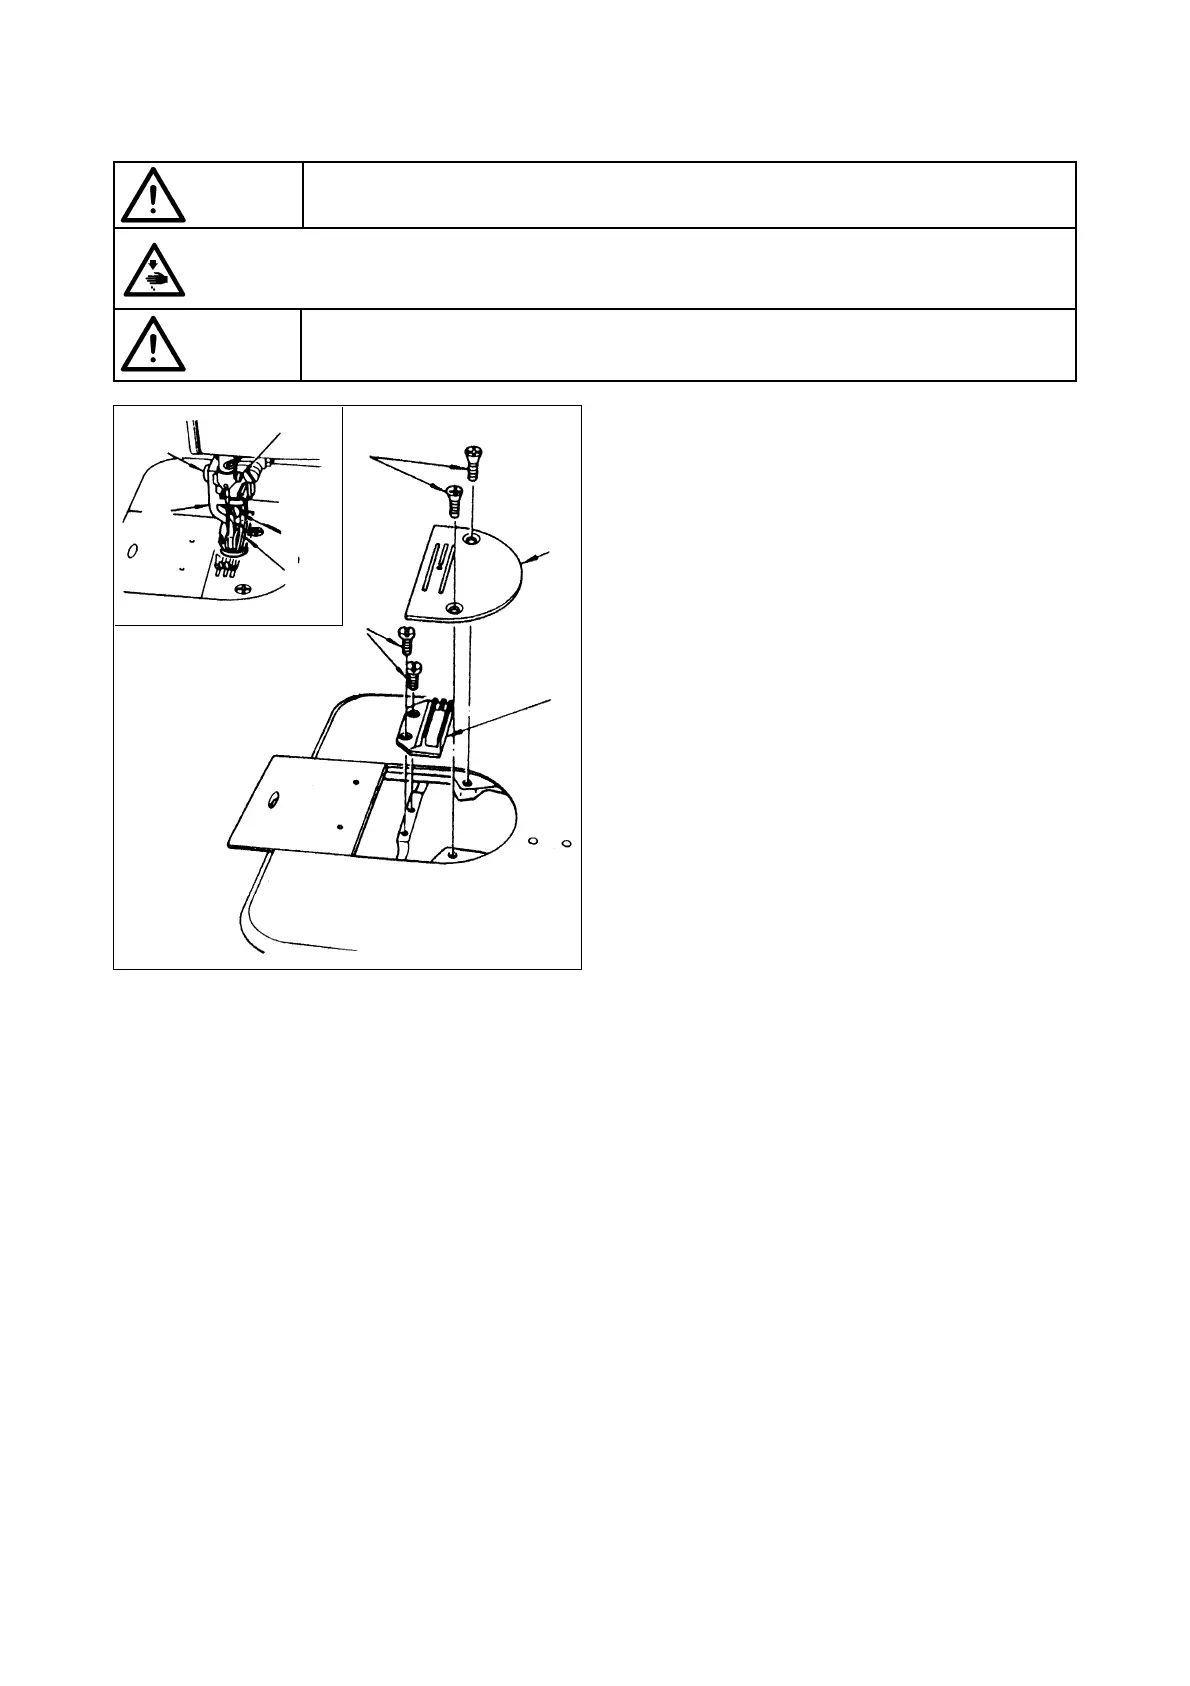
1.ゲージの取り外し方
1)針止めねじ❶をゆるめ、針❷を取り外します。
2)押え止めねじ❸を外し、押え❹を取り外します。
( 上送り押え❻を上に持ち上げるようにしますと、
簡単に取り外すことができます。)
3)上送り押え止めねじ❺を外し、上送り押え❻を取
り外します。
4)針板止めねじ❼を外し、針板❽を取り外します。
5)送り止めねじ❾を外し、送り❿を取り外します。
2.ゲージの取り付け方
1)ゲージの取り外しと逆の順序で、取り付けを行っ
てください。
2)取り付け後、送り歯の高さを確認してください。
1.
Removing the gauges
1) Loosen needle setscrew
❶
, and remove needle
❷
.
2) Remove setscrew
❸
, and remove presser foot
❹
.
(You can easily remove the presser foot by lifting
walking foot
❻
.)
3) Remove setscrew
❺
, and remove walking foot
❻
.
4) Remove setscrew
❼
, and remove throat plate
❽
.
5) Remove setscrew
❾
, and remove feed dog
❿
.
2. Installing the gauges
1) Install the gauges by reversing the removing order
described above.
2) After installing the gauges, check the height of the
feed dog.
❸
❹
❻
❺
❶
❼
❾
❽
❿
1.
规格零件的拆卸方法
1) 拧松机针固定螺丝
❶
, 拆下机针
❷
。
2) 卸下压脚固定螺丝
❸
, 拆下压脚
❹
。
3) 卸下上送布压脚固定螺丝
❺
, 拆下上送布压脚
❻
。
4) 卸下针板固定螺丝
❼
, 拆下针板
❽
。
5) 卸下送布固定螺丝
❾
, 拆下送布器
❿
。
2.
规格零件的安装方法
1) 与拆卸规格零件相反的顺序进行安装。
2) 安装后 , 请确认送布牙的高度。
 Loading...