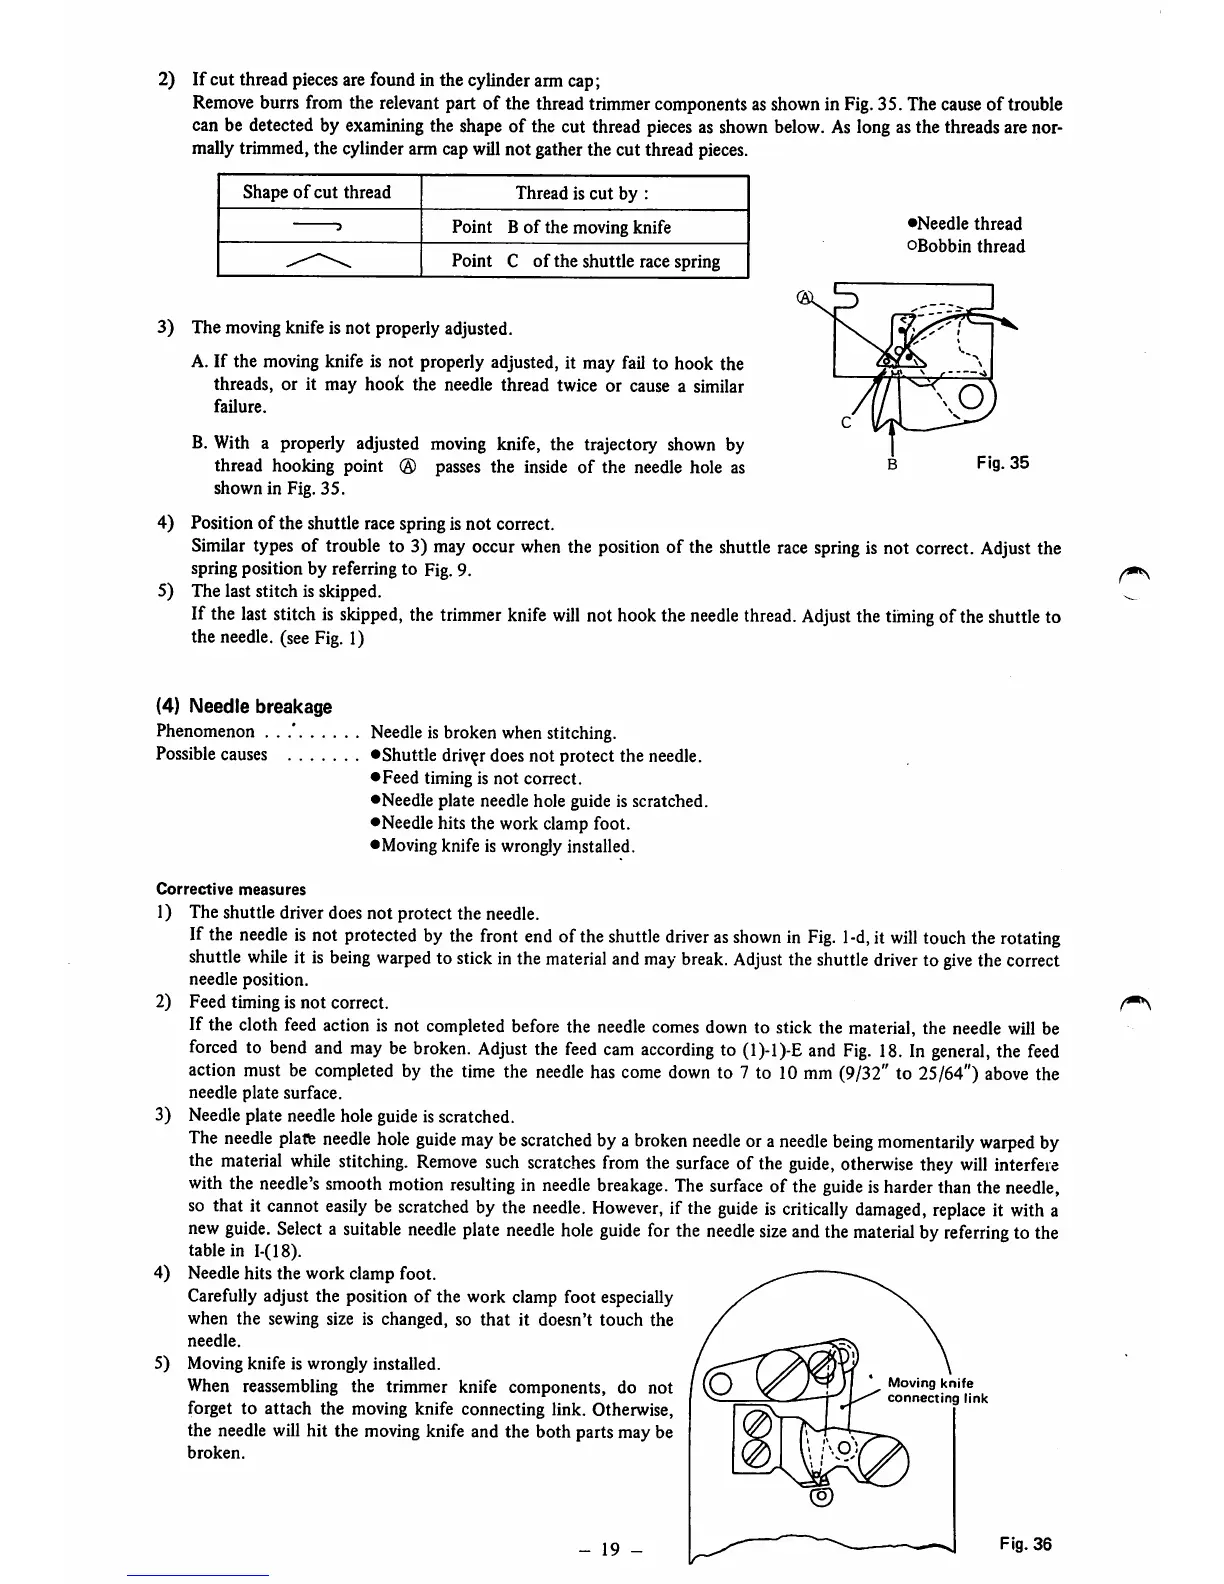
2) If cut thread
pieces
arefoundin the cylinderarmcap;
Remove
burrs from the relevant part of the thread trimmer components as shownin Fig.35. The causeof trouble
can be detected by
examining
the shape of the cut thread
pieces
as shownbelow. As long asthe threadsare nor
mallytrimmed, the cylinderarm cap willnot gather the cut thread
pieces.
Shape
of
cut
thread
Thread is
cut
by :
3
Point B
of
the
moving knife
Point C of the shuttle race spring
3) The
moving
knife is not properly adjusted.
A. If the moving knife is not properly adjusted, it may fail to hook the
threads, or it may hook the needle thread twice or cause a similar
failure.
B. With a properly adjusted
moving
knife, the trajectory shown by
thread hooking point ® passes the inside
of
the needle hole as
shown in Fig.
35.
•Needle
thread
oBobbin
thread
Fig.
35
4) Position of the shuttle race spring is not correct.
Similar
types
of
trouble
to 3)
may
occur
when
the
position
of the
shuttle
race
spring
is not
correct.
Adjust
the
springposition by referringto Fig.9.
5) The last stitch is skipped.
If the laststitch is
skipped,
the
trimmer
knife
will
not hookthe
needle
thread.
Adjust
the
timing
of the shuttle to
the needle, (see Fig. 1)
(4) Needle breakage
Phenomenon
Possible
causes
Needle is broken when stitching.
•Shuttle
driver does not protect the needle.
•Feed
timing is
not
conect.
•Needle
plate needle hole guide is scratched.
•Needle hits the work clamp foot.
•Moving knife is wrongly installed.
Corrective
measures
1) The shuttle driver does not protect the needle.
If the
needle
isnot
protected
by the
front
end
ofthe
shuttle
driver
as
shown
in
Fig.
1-d,
it
will
touch
the
rotating
shuttle
while
it is
being
warped
to
stick
inthe
material
and
may
break.
Adjust
the
shuttle
driver
to
give
the
correct
needle position.
2) Feed timing is not correct.
If the cloth
feed
action
is not
completed
before
the
needle
comes
down
to stick the
material,
the
needle
will
be
forced
to
bend
and
may
be
broken.
Adjust
the
feed
cam
according
to
(1)-1)-E
and
Fig.
18.
In
general,
the
feed
action must be
completed
by the time the
needle
has
come
down
to 7 to 10
mm
(9/32" to 25/64")
above
the
needle plate surface.
3) Needleplate needle hole guideisscratched.
The
needle
platte
needle
hole
guide
may
be
scratched
bya
broken
needle
ora
needle
being
momentarily
warped
by
the
material
while
stitching.
Remove
such
scratches
from
the
surface
of the
guide,
otherwise
they
will
interfere
with
the
needle's
smooth
motion
resulting
in
needle
breakage.
The
surface
of the
guide
is
harder
than
the
needle,
so that it
cannot
easily
be
scratched
by the
needle.
However,
if the
guide
is
critically
damaged,
replace
it
with
a
new
guide.
Select
a
suitable
needle
plate
needle
hole
guide
for the
needle
size
and
the
material
by
referring
to the
table in 1-(18).
4) Needle hits the work clamp foot.
Carefully adjust the position of the work clamp foot especially
when the sewing size is changed, so
that
it doesn't
touch
the
needle.
5) Moving knife is wrongly installed.
When reassembling the trimmer knife components, do not
forget to attach the moving knife connecting link. Otherwise,
the needle will hit the movingknife and the both parts may be
broken.
19
-
Moving
knife
connecting
link
Fig.
36
 Loading...