-
4
-
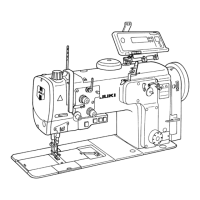
ATTACHING THE BELT COVER
MODO DE COLOCAR LA CUBIERTA DE LA CORREA
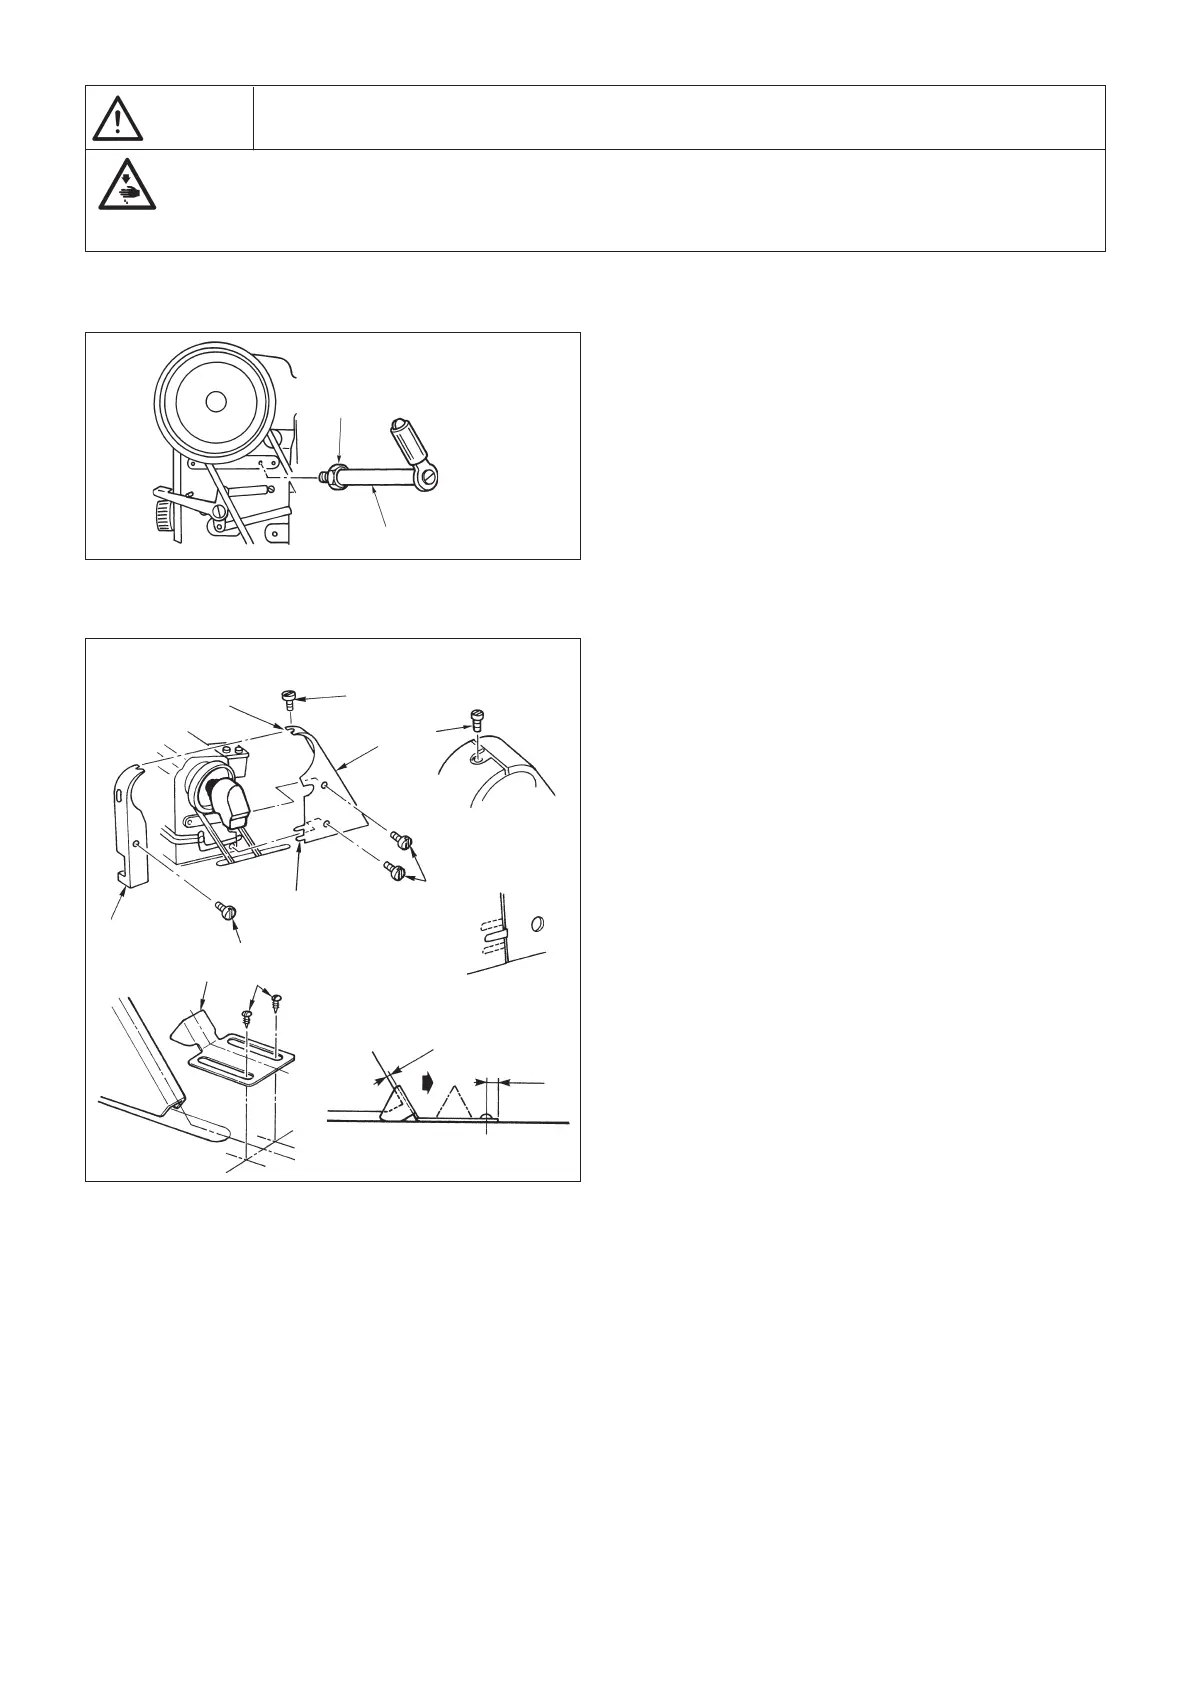
INSTALLING THE SYNCHRONIZER SUPPORT ROD
MODO DE INSTALAR LA VARILLA DE SOPORTE DEL SINCRONIZADOR
爪部(上)
Notch (upper)
Muesca (superior)
爪部(下)
Notch (lower)
Muesca (inferior)
2.5mm
10mm
WARNING :
Turn OFF the power before starting the work so as to prevent accidents caused by abrupt start of
the sewing machine.
¡AVISO! :
Antes de comenzar el trabajo, desconecte la corriente eléctrica para evitar accidentes debi-
dos a un arranque brusco de la máquina de coser.
1) ベルトカバー ( 後 ) を止めねじにて、アーム
に固定します。
2) ベルトカバー ( 後 ) の爪部 ( 上 ) と爪部(下)
にベルトカバー ( 前 ) をはめ込みます。
3) 止めねじおよびでベルトカバー ( 前 ) を固
定します。
4)
ベルトカバー補助板がベルトカバーと 2.5 mm
すき間をあけた時、ベルトカバー補助板後端か
ら 10 mm の位置に木ねじで固定します。
5) ミシンを倒す時は、木ねじを緩め、ベルトカバー
補助板を矢印の方向へ止まるまで移動させてから
倒してください。
1) Fix belt cover (rear) on the arm with screws .
2) Fit belt cover (front) to notch (upper) and notch (lower)
of the belt cover (rear).
3) Fix belt cover (front) with screws and .
4) Fix belt cover auxiliary plate at the position of 10 mm from the rear end with wood screws when there is a clearance of
2.5 mm between the belt cover and the auxiliary plate.
5) When tilting the machine head, loosen wood screws and move the belt cover auxiliary plate in the direction of the arrow
until it stops. Then, tilt the machine head.
(Caution) Afterattachingthebeltcover,conrmwhetherornottherespectivecordsdonotcomeincontactwiththebelt
and the handwheel. Disconnection of the cords will result when they come in contact with one another.
1) Fije la cubierta de la correa (posterior) en el brazo con los tornillos .
2) Acomode la cubierta de la correa (frontal) en la muesca (superior) y en la muesca (inferior) de la cubierta de la correa (posterior).
3)
Fije la cubierta de la correa (frontal
con los tornillos
y
.
4) Fije la placa auxiliar de la cubierta de la correa en la posición a 10 mm desde el extremo posterior con los tornillos de madera
de modo que se provea una separación de 2,5 mm entre la cubierta de la correa y la placa auxiliar.
5) Cuandolevanteelcabezaldelamáquina,aojelostornillosdemadera y mueva la placa auxiliar de la cubierta en la direc-
cióndelaechahastaquesepare.Entonces,inclineelcabezaldelamáquina.
(Precauciones) Despuésdecolocarlacubiertadelacorrea,conrmequelosrespectivoscordonesnoentrenencontactoconlacorrea
y el volante; de lo contrario, puede ocurrir la desconexión de dichos cordones al entrar en contacto con los mismos.
1) 検出器支え棒を、取り付けナットを用いて
アームに取り付けます。
1) Attach synchronizer support rod
to the arm using at-
taching nut
.
1) Coloque la varilla de soporte del sincronizador en el brazo
usando la tuerca de montaje .
 Loading...