Installing Common Form Factor Modules In SRX1400, SRX3400, and SRX3600 Services
Gateways
To install a Common Form Factor Module (CFM):
1. Attach an ESD grounding strap to your bare wrist and connect the strap to one of the
ESD points on the chassis. For more information about ESD, see the hardware
documentation for your services gateway.
2. If you are installing cold-swap-only CFMs, power off the services gateway.
To power off the services gateway, press the Power button for three to five seconds:
•
On SRX3400 and SRX3600 Services Gateways, the Power button is located on
the front panel of the Switch Fabric Board (SFB).
•
On SRX1400 Services Gateways, the Power button is located on the front panel of
the System I/O card (SYSIOC).
The PWR LED blinks to show you that the services gateway is shutting down. Wait for
the services gateway to shut down before you proceed to the next step.
3. Identify the slot on the services gateway where you will install the CFM. For information
about CFM slot compatibility see
4. Place the CFM on an antistatic mat or remove it from its electrostatic bag and place
it on top of the bag.
5. If the slot you are installing the CFM in is covered by a blank panel, loosen the screws
at each end and remove the panel. Keep the panel in a safe place in case you decide
to remove a CFM from the services gateway.
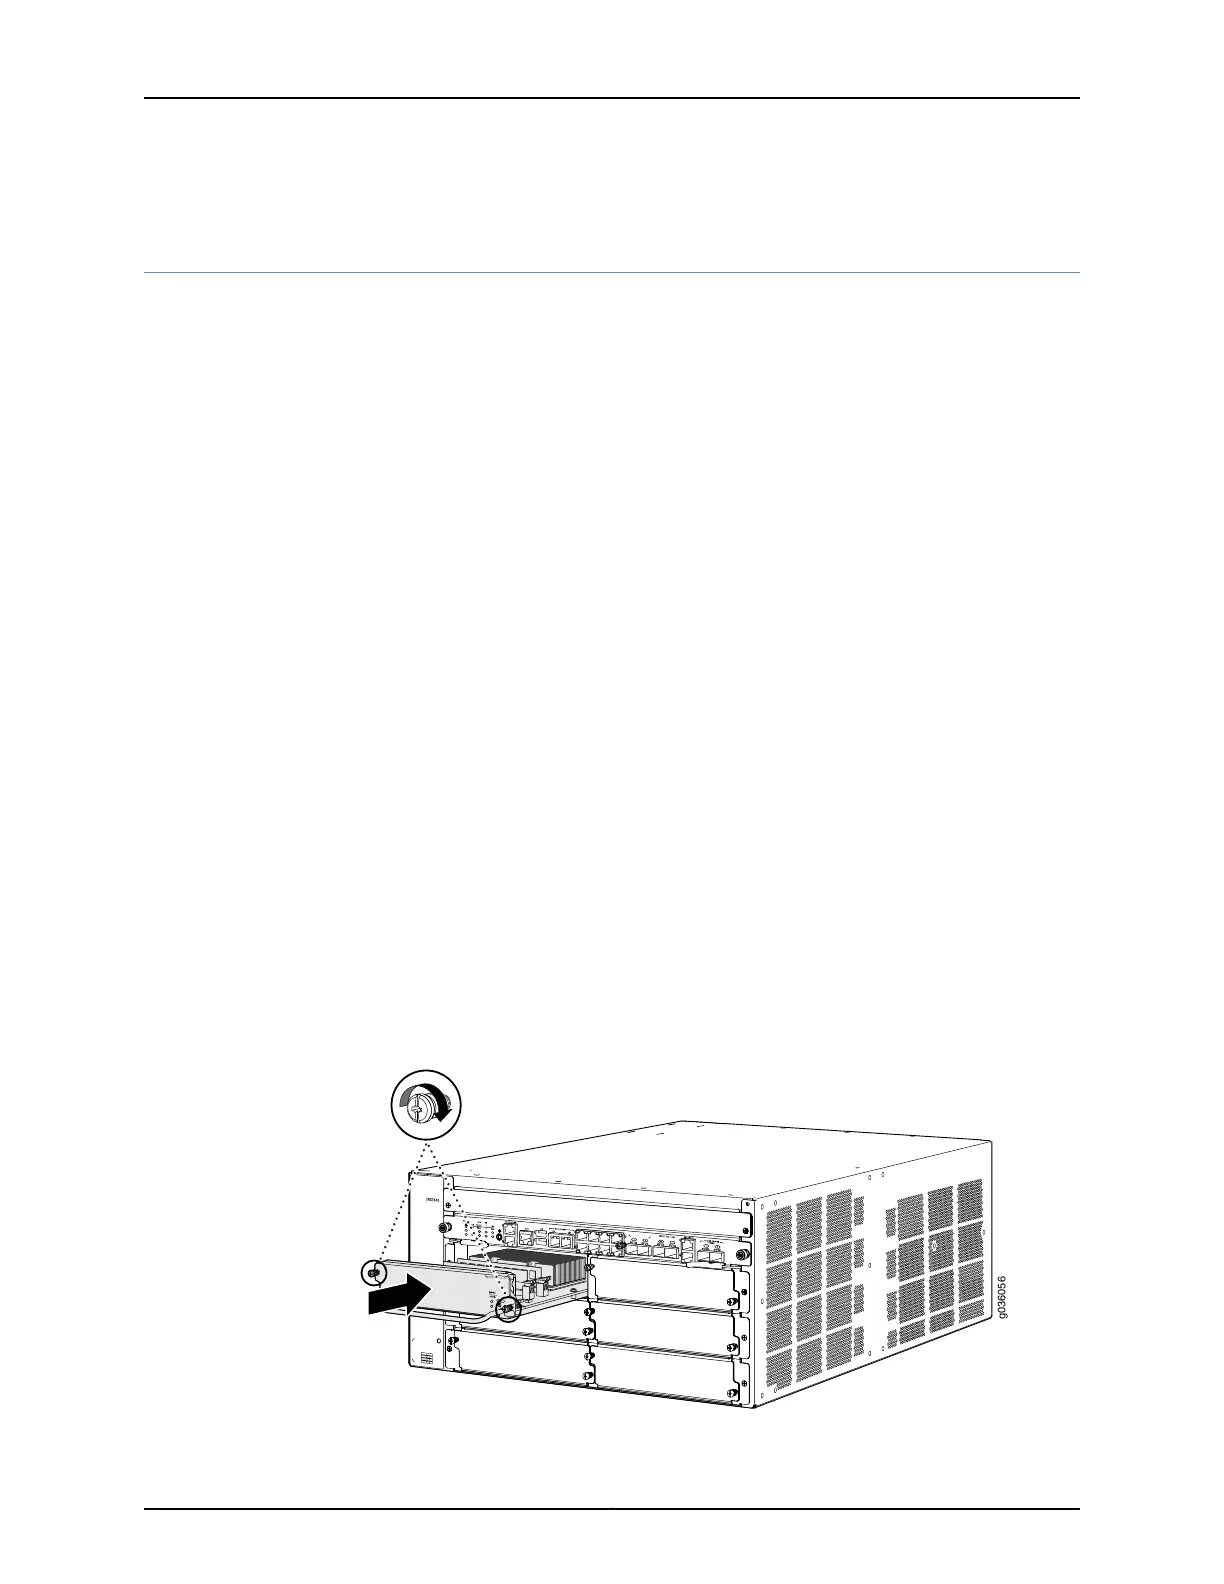
6. Orient the CFM so that the faceplate faces you. Slide the CFM all the way into the
card cage until you feel resistance.
7. Tighten the screws on either side of the CFM faceplate(Figure 17 on page 22).
Figure 17: Installing a CFM (SPC and SRX3600 Shown, Other Devices and
CFMs Similar)
g036056
S
R
X
3
K -SP C-1 -10
-
4 0
Copyright © 2016, Juniper Networks, Inc.22
SRX1400, SRX3400, and SRX3600 Services Gateway Module Guide
 Loading...