– 52 –
Moving a Group—MOVE GR
This function allows you to move a group.
Once a group is moved, the tracks and the other groups are
renumbered.
• To stop any time during the editing process after step
3
,
press MD TITLE/EDIT.
On the remote control ONLY:
In the following example, the process is explained from the
very first—that is, inserting a disc. You can also edit an MD
during playback (in Normal play mode).
1
Insert an MD you want to edit into the MD loading
slot while the unit is turned on.
• If the GROUP indicator is not lit on the display, press
GROUP to activate this function.
2
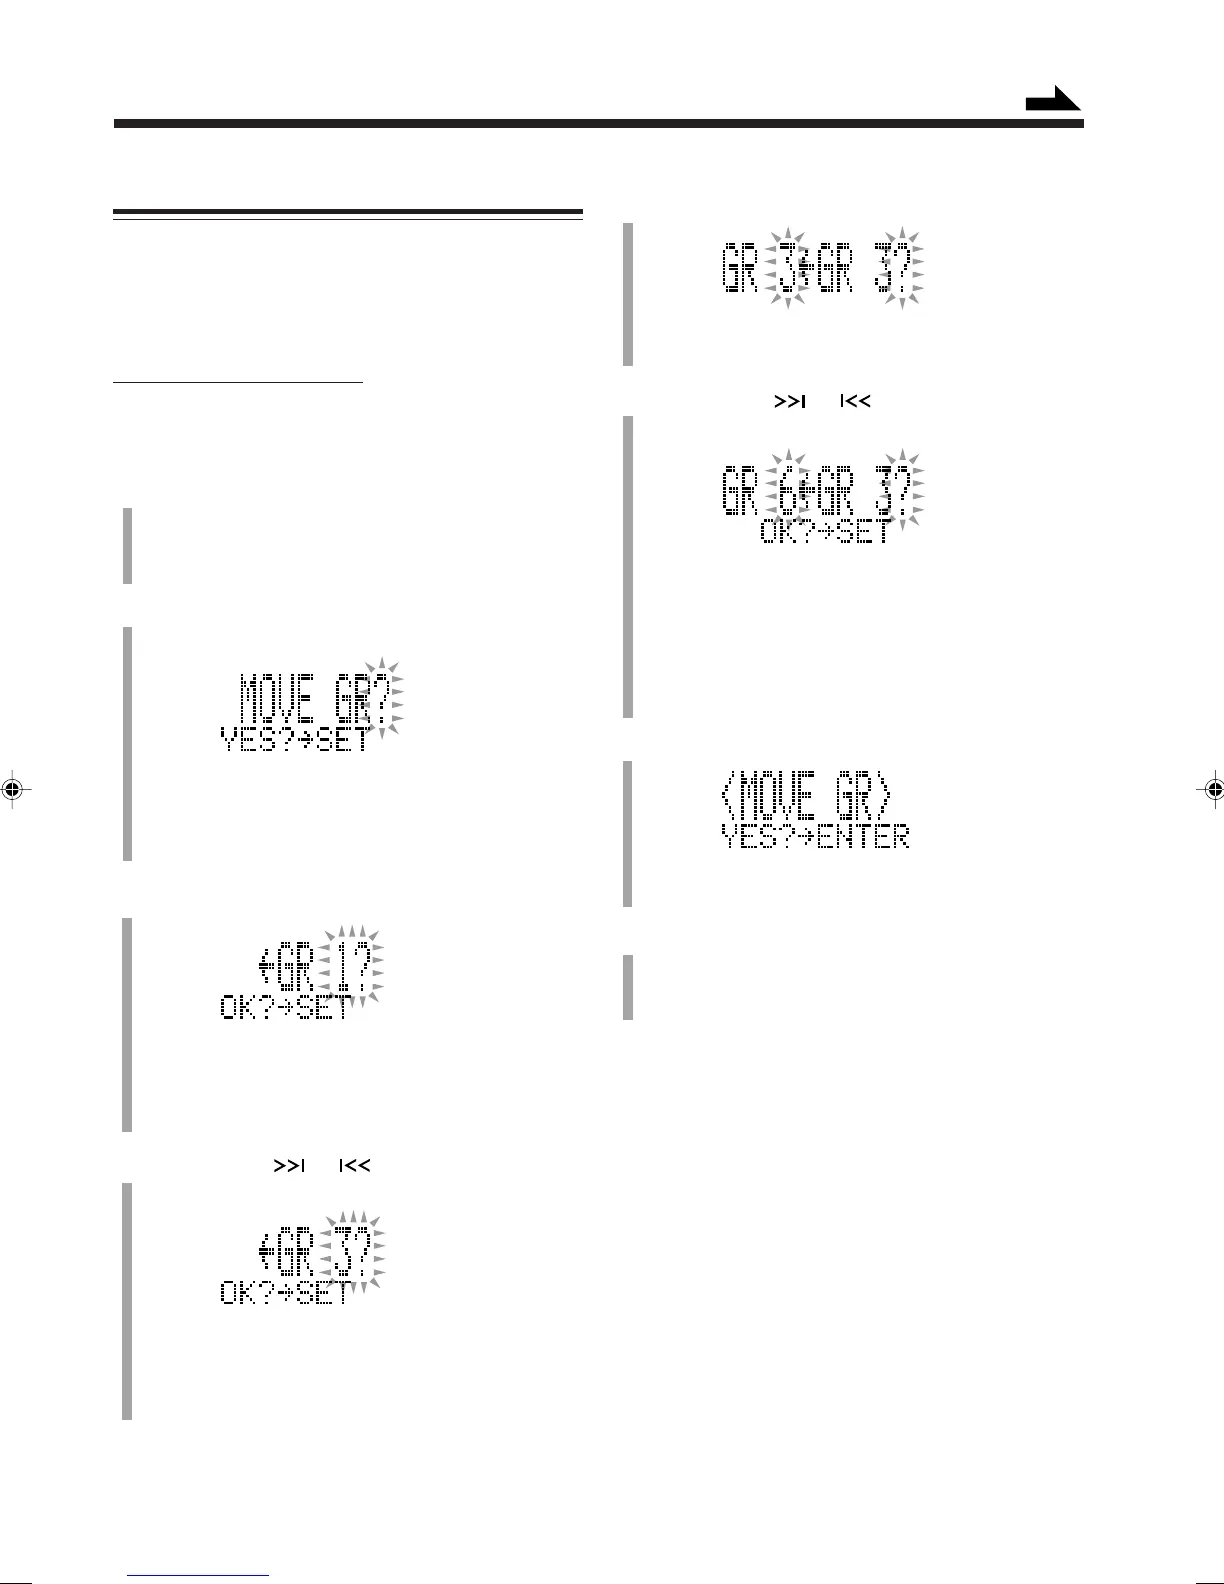
Press MD TITLE/EDIT repeatedly until “MOVE
GR?” appears in the main display.
• If the loaded MD has one or no group, “MOVE GR?”
will not appear.
• If you want to stop this editing process, press
ENTER.
3
Press SET.
• During playback:
The group number of the current track will appear. If
the track does not belong to any groups, group
number will be indicated by “– –.”
4
Press GROUP or to select the group you
want to move.
• During playback:
The tracks in the selected group are played back
repeatedly.
Ex. When the group 3 is selected
5
Press SET.
• To cancel the setting, press CANCEL, then repeat
step
4
.
6
Press GROUP or to select the position
where you want to move the group.
• During playback:
The tracks in the selected group are played back
repeatedly.
• To cancel the setting, press CANCEL, then repeat
step
4
.
7
Press SET.
• To cancel the setting, press CANCEL, then repeat
step
4
.
8
Press ENTER.
“EDITING” appears in the main display for a while,
then “WRITING” flashes while the editing you have
made is being recorded on the MD.
Ex. When the group 6 is selected
Continued
EN45-59_CA-NXMD1R[B]f.pm6 01.8.20, 11:3452
 Loading...