F_J [_ _'t_-___'_
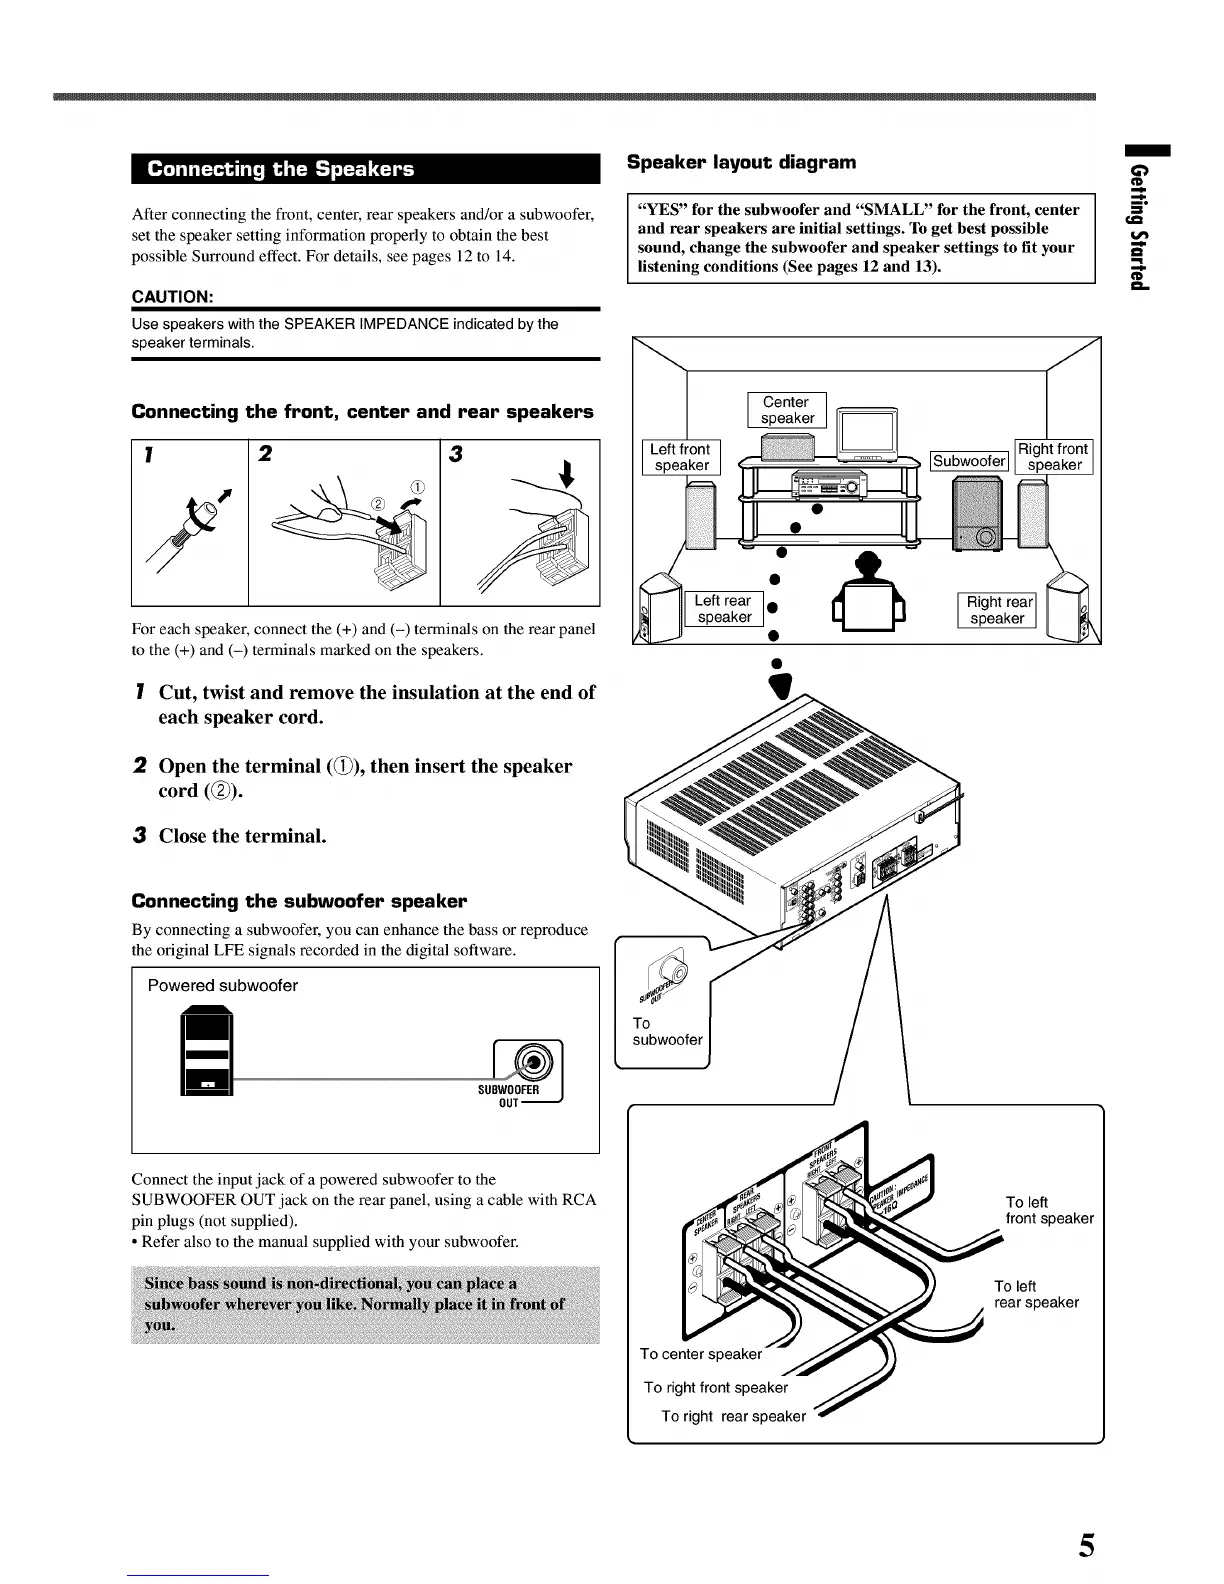
After connecting the front, center, rear speakers and/or a subwoofer,
set the speaker setting information properly to obtain the best
possible Surround effect. For details, see pages 12 to 14.
CAUTION:
Use speakerswith the SPEAKER IMPEDANCE indicatedby the
speaker terminals.
Connecting the front, center and rear speakers
! 2 3
For each speaker, connect the (+) and (-) terminals on the rear panel
to the (+) and (-) terminals marked on the speakers.
I Cut, twist and remove the insulation at the end of
each speaker cord.
:2 Open the terminal (@), then insert the speaker
cord (@).
;3 Close the terminal.
Connecting the subwoofer speaker
By connecting a subwoofer, you can enhance the bass or reproduce
the original LFE signals recorded in the digital software.
Powered subwoofer
Speaker layout diagram
"YES" for the subwoofer and "SMALL" for the front, center
and rear speakers are initial settings. To get best possible
sound, change the subwoofer and speaker settings to fit your
listening conditions (See pages 12 and 13).
[
Center
speaker
[Subwoofer]
Right rear
speaker
To
subwoofer
/
ID
L
Connect the input jack of a powered subwoofer to the
SUBWOOFER OUT jack on the rear panel, using a cable with RCA
pin plugs (not supplied).
° Refer also to the manual supplied with your subwoofer.
To center speaker
To right front speaker
To right rear speaker
To left
front speaker
To left
rear speaker
5
 Loading...