- 13
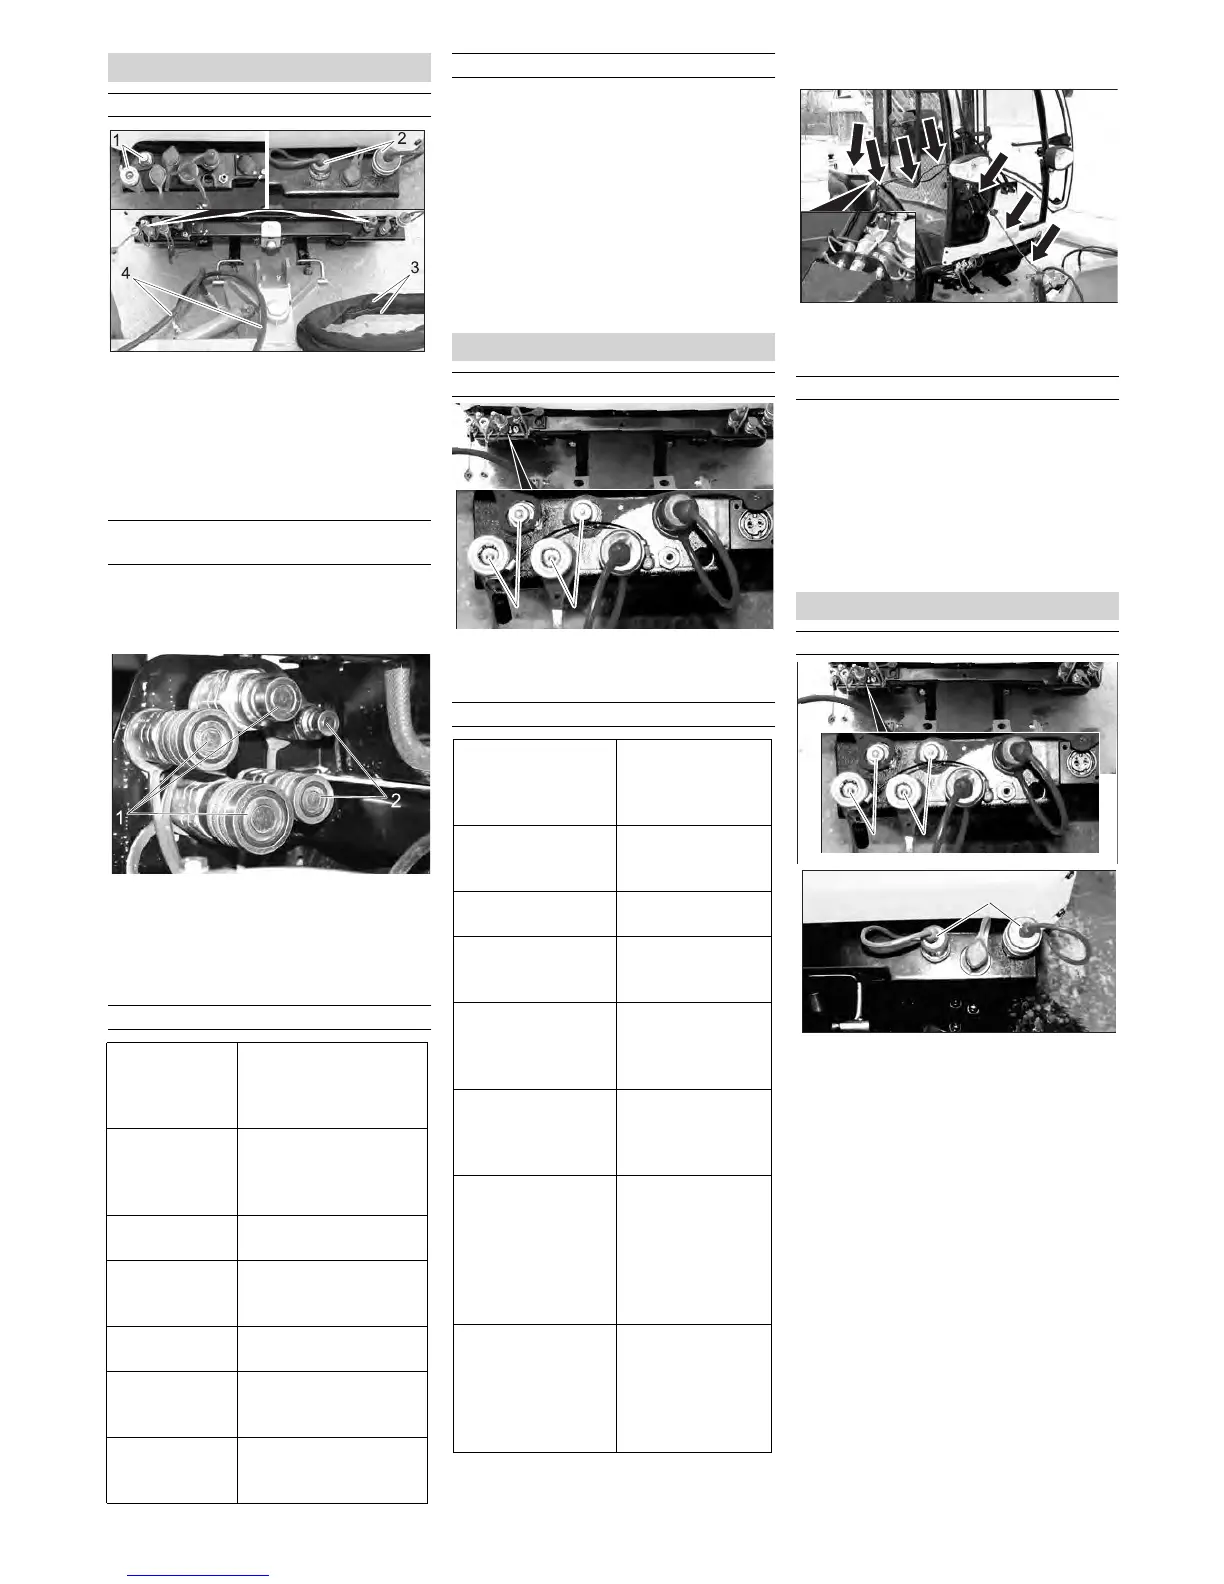
1 Hydraulic couplings AUX2
Hydraulic couplings, swivel drive
2 Hydraulic couplings main PTO
Hydraulic couplings, brush roller drive
3 Hydraulic hoses, brush roller drive
4 Hydraulic hoses, swivel drive
If the front brush roller is to be used while
the waste container/fresh water tank is at-
tached to the machine, the suction turbine
must be deactivated.
1 Hydraulic couplings main PTO
2 Hydraulic couplings AUX2
Disconnect the hydraulic hoses from
the hydraulic coupling of the main PTO.
– If you use the machine without waste
container/water tank with the front
brush roller, a balance weight must be
attached to the rear of the vehicle for
driving on public roads as a counter
weight.
– Set the motor speed to "eco", the lower
level of the range.
Note:
Removing the waste container/fresh water
tank will increase the driving stability and
the driver's view.
1 Hydraulic couplings AUX2
2 Hydraulic couplings AUX1
Route the cables as shown above.
Connect the plug on the rear of the
sweeper.
– If no caster is attached, the balance
weight (option) must be attached to the
rear of the machine for driving on public
roads, when the waste container/water
tank is removed.
Note:
Removing the waste container/fresh water
tank will increase the driving stability and
the driver's view.
1 Hydraulic couplings AUX2
2 Hydraulic couplings AUX1
3 Hydraulic couplings main PTO
Front brush roller
Connecting the hydraulic lines
Deactivate the suction turbine (MC 50
only)
Operations
Lowering the
front roller
brush, floating
Push lever B all the
way towards the
front and lock it in
place.
Lowering and
pressing down
the front roller
brush
Push lever B to-
wards the front.
Raising the front
roller brush
Lever B towards the
back.
Switching on the
front roller brush
Pushbutton (7)
Switch on work hy-
draulics Main PTO.
Preselection
front roller brush
Change-over switch
(14) to AUX 2 front.
Swivelling the
front roller brush
to the right
Lever D towards the
back.
Swivelling the
front roller brush
to the left
Lever D towards the
front.
Prerequisites for operation
Snow removal shields
Connecting the hydraulic lines
Operations
Lowering the snow
blade, floating
Push lever B all
the way towards
the front and
lock it in place.
Lowering and press-
ing down the snow
blade
Push lever B to-
wards the front.
Raising the snow
blade
Lever B towards
the back.
Preselection snow
blade
Change-over
switch (14) to
AUX 2 front.
V-snow blade only:
Swivelling the left
blade half towards
the front
Lever C towards
the front.
V-snow blade only:
Swivelling the left
blade half towards
the back
Lever C towards
the back.
V-snow blade: Swiv-
elling the right blade
half towards the
back
Rigid snow blade:
Swivelling the blade
to the left
Lever D towards
the back.
V-snow blade: Swiv-
elling the right blade
half towards the front
Rigid snow blade:
Swivelling the blade
to the right
Lever D towards
the front.
1
2
Connect the marker lamps (option)
Prerequisites for operation
Snow blower
Connecting the hydraulic lines
1
2
 Loading...