- 26
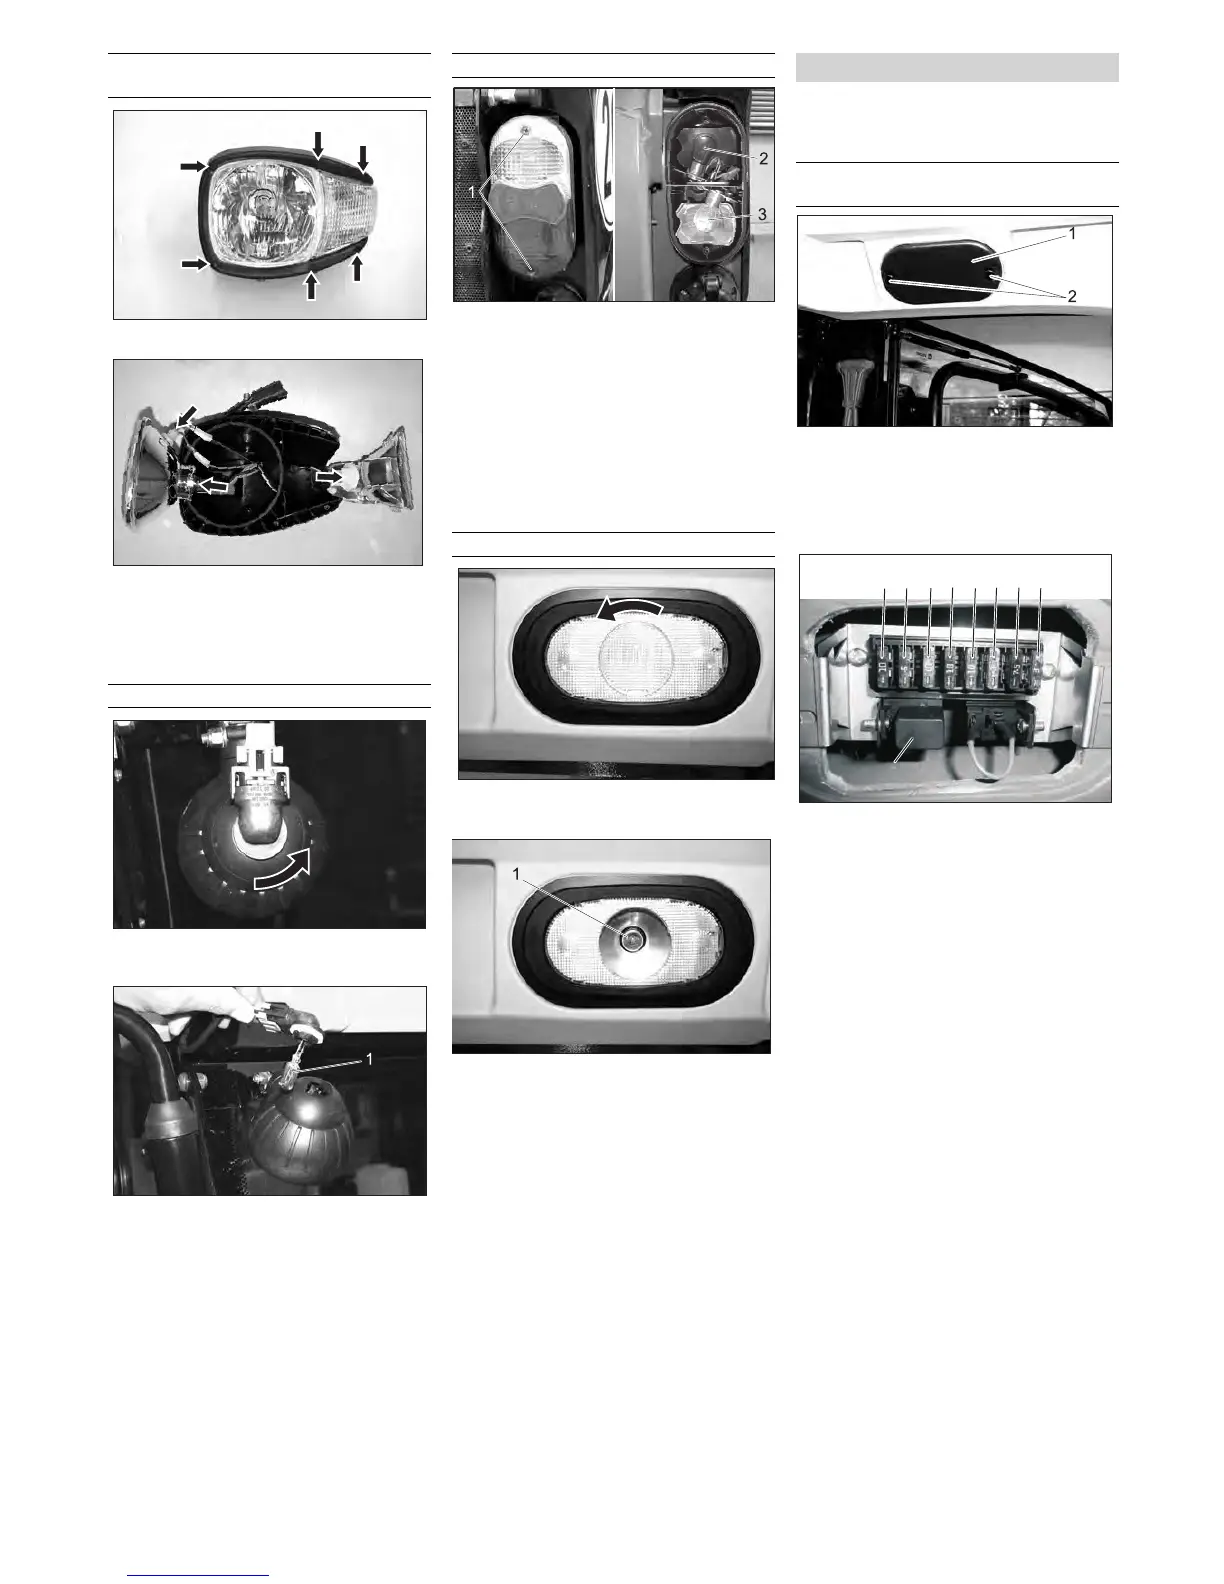
Loosen the screws.
Remove the headlights.
Remove defective bulb.
Insert new bulb.
Note: Wear clean and grease-free
gloves.
Turn the bulb seating in the direction of
the arrow and pull it out.
1 Bulb
Pull the bulb out of the seating and in-
sert a new bulb.
Note: Wear clean and grease-free
gloves.
1 Screw
2 Bulb of the tail lamp, brake light
3 Bulb of the direction indicator
Loosen the screws.
Remove the glass of the tail lamp.
Remove defective bulb.
Insert new bulb.
Note: Wear clean and grease-free
gloves.
Rotate the disc counter-clockwise and
remove it.
1 Bulb
Turn the bulb out and screw in a new
bulb.
Note: Wear clean and grease-free
gloves.
Note
Only use fuses with identical safety ratings.
Replace defective fuses.
1 Cover
2 Knurled head screw
Unscrew the knurled screws and re-
move the cover.
1 Fuse 10 A
Free switch location in the ceiling panel
(second location from the right)
2 Fuse 3 A
Car radio connection
3 Fuse 10 A
Working light
4 Fuse 10 A
Switch for option (e.g. heated outside
mirrors)
5 Fuse 10 A
Wiper
6 Fuse 3 A
Windscreen washer system
7 Fuse 7.5 A
Overall lamp
8 Fuse 3 A
Cabin lighting
9 Relay high beam
Replace the bulb of the lights/direction
indicator lamp (for sweepers)
Replace the bulb of the work lamp
Replacing the bulb of the tail lamp
Replace the bulb of the cabin lighting
Fuses
Replacing the fuses in the fuse box in
the driver cabin
 Loading...