U20-3, U25-3 WSM Hydraulic system (Service section)
IV-S-66
[2] Disassembling and reassembling the pilot valve
1) Tools and tightening torque
Others
• Vapor phase inhibitor
• Kerosene
• Heat-resistant grease
• Sandpaper (#1000, #2000)
• Oilstone
•Vise
2) Maintenance standard
Note 1: It is advisable to replace the O-rings and other sealing elements at every disassembly. They
may be reused when they are found not damaged.
Note 2: When the hex socket bolt (125) has been loosened, be sure to replace the sealing washer
(121).
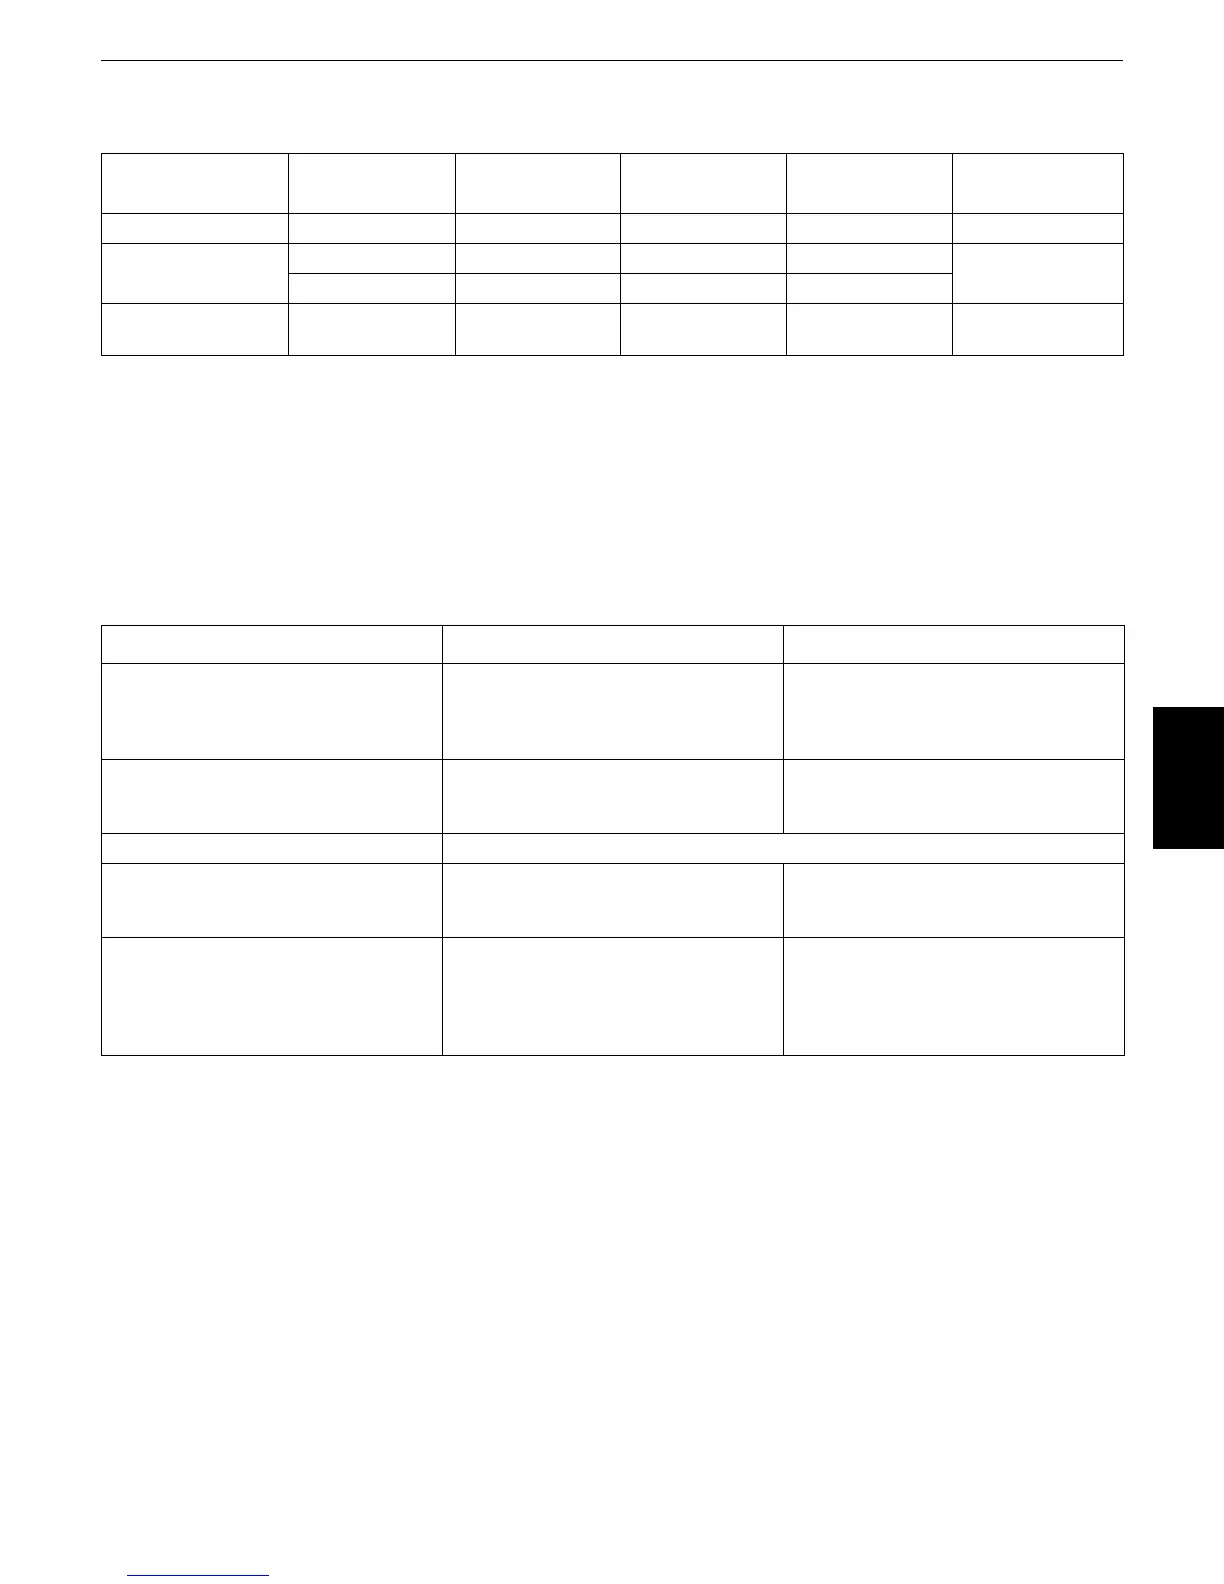
Tool Size (mm) Part No. Part name Screw size
Tightening torque
(N·m)
Hex wrench 6 125 Hex socket bolt M8 20.6 ± 1.5
Money wrench
22 312 Adjusting nut M14
68.6 ± 4.9
32 302 Disc M14
Special tool (Draw-
ing on page 17)
24 301 Joint M14 47.1 ± 2.9
Checkpoints Criteria Remarks
Leak amount
Replace the pilot valve assembly with
new one if the oil leak exceeds 1000 cc/
min with the steering wheel at neutral or
2000 cc/min while in operation.
Conditions:
Primary pressure: 2.95 MPa
Oil viscosity: 23 mm
2
/s
Spool
If the sliding face is worn over 10 μ
more than the non-sliding one, replace
the pilot valve assembly with new one.
This amount of wear corresponds to the
above leak amount. The same condi-
tions as above are expected.
Push rod If the tip is worn 1 mm or more, replace the push rod with new one.
Loose control elements
If the disc (302) or joint (301) is worn
out and loose 2 mm or more, replace it
with new one.
If the shakiness is caused by a loose
fixture, tighten it up.
Stable operation
If unusual noise, hunting, primary pres-
sure drop, etc, occurs and it cannot be
corrected according to "Chapter 8 Trou-
bleshooting", replace the pilot valve
assembly with new one.
 Loading...