Section 5 OTHER CONVENIENT FUNCTIONS
5-35
16. Original size selection mode
With this mode, if you manually select a size for the original, only that
size image will be scanned for copying. Use this mode as well when
copying from originals of non-standard sizes.
NOTES
•You can register the size of non-standard originals that you often
use as a custom original size. (See “Custom original size” on
page 7-42.)
•ALWAYS set non-standard sized originals on the platen.
• Once you select the original size under this mode, you can copy
with originals set on the platen even with the Document
Processor open.
• If this mode is used in combination with the Centering/Image shift
mode, you can, for example, have the image of non-standard
sized originals centered on standard sized copy paper. (See
"Centering/Image shift mode" on page 5-8.)
1
Set the originals to be copied.
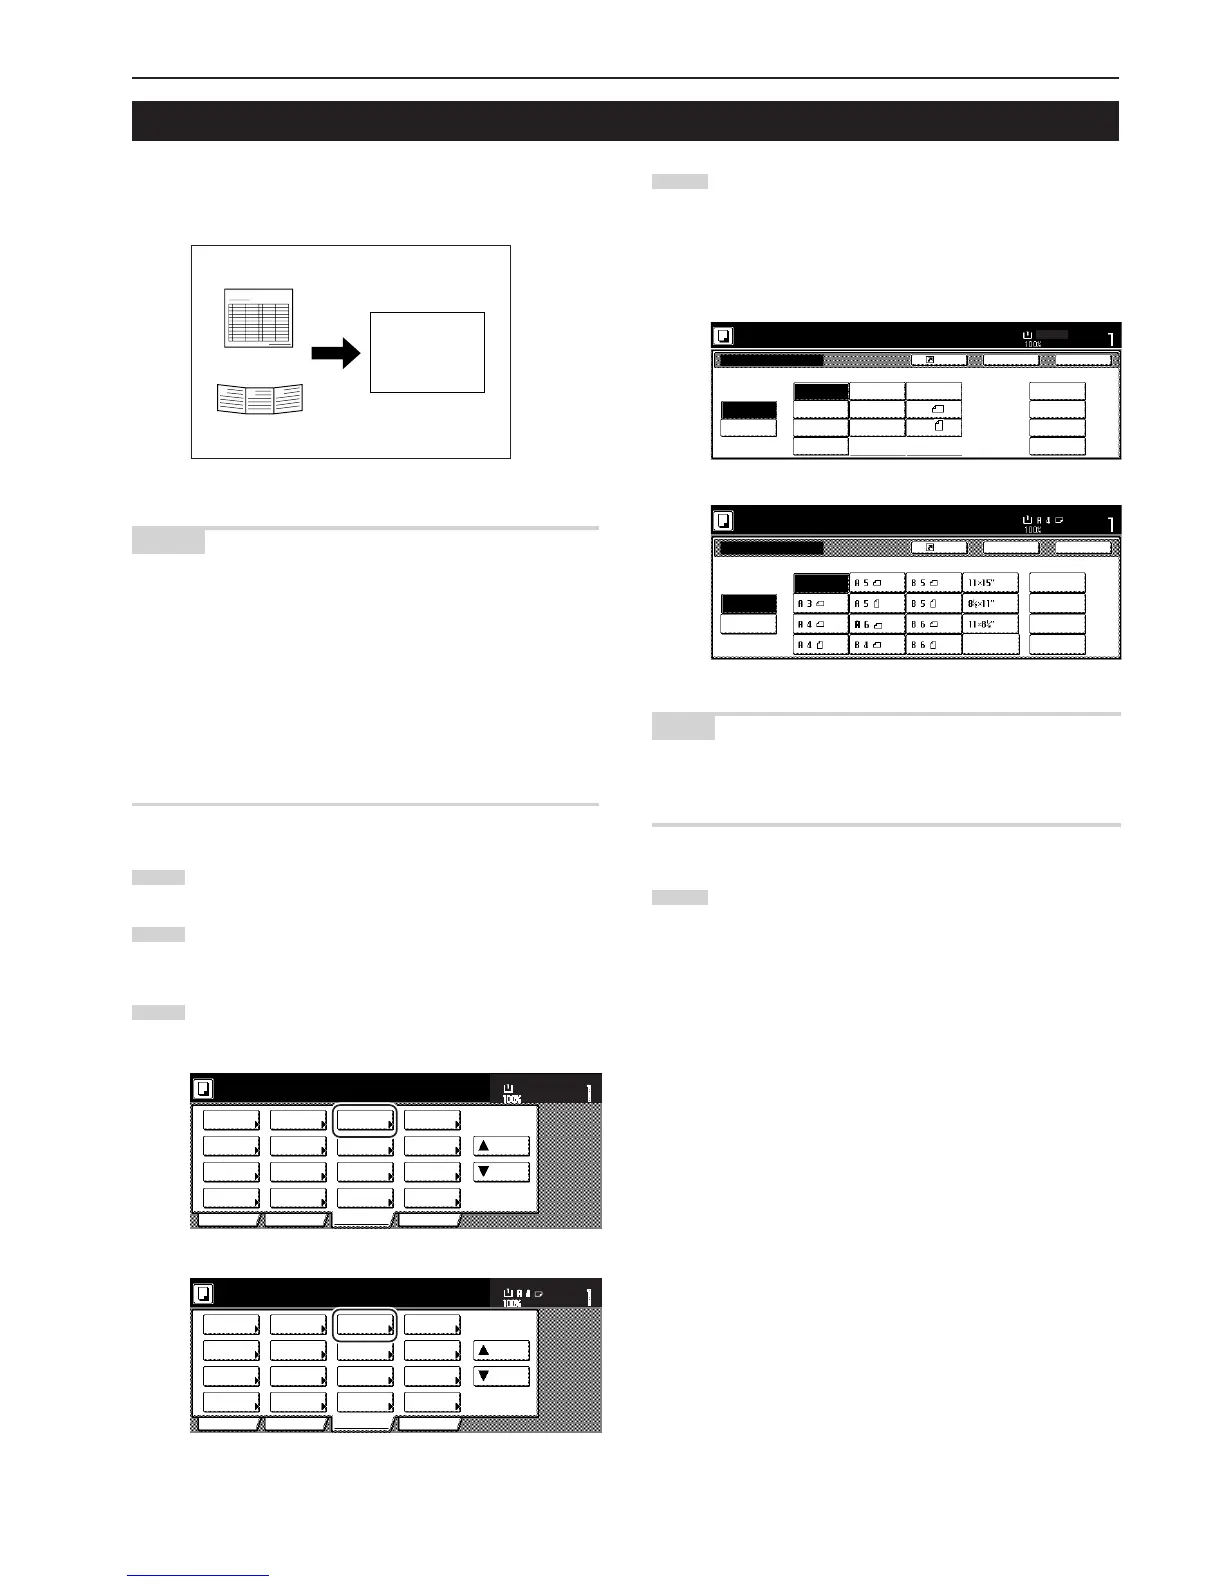
2
Touch the “Function” tab. The content of the “Function” tab
will be displayed.
3
Touch the “Select orig. size” [“Select size original”] key. The
“Select original size” screen will be displayed.
Inch specifications
2 sided/
Separation
Select
paper
Combine
Reduce
/Enlarge
Margin/
Centering
Forms
Overlay
Page #
Function
Basic User choice Program
Cover
Mode
Booklet
Sort/
Finished
Border
Erase
Exposure
mode
Orig.image
quality
Ready to copy.
Select
orig. size
Auto
Selection
Batch
scanning
Up
Down
Set
Paper size
11x8
1
/2"
Metric specifications
Select
paper
2-sided/
Split
Merge copy
Reduce/
Enlarge
Margin/
Imag. shift
Page
numbering
Function
Basic User choice Program
Cover
Mode
Booklet
Erase
Mode
Exposure
mode
Image
quality
Sort/
Finished
Ready to copy.
Select
size orig.
Auto
selection
Large # of
originals
Form
overlay
Up
Down
Set
Paper size
8
1
/2" x 11"
A4
B
C
A
4
If you want to select a standard scanning size, touch the key
that corresponds to the desired size and then go directly to
step 7.
If you want to select the dimensions of the scan area
manually, go to the next step.
Inch specifications
NOTE
If you have registered a custom original size, you will be able to
select that size for use in this mode. (See “Custom original size” on
page 7-42.)
5
Touch the “Input size” key. The screen to set the dimensions
of the scan area will be displayed.
 Loading...