67
Leica IP C
Cleaning and Maintenance 6
6.3.1 Removing the used ink cartridge
1. Open the cover plate (→ "Fig. 34-2") on the left side of the instrument by pressing its top left
corner (→ "Fig. 34").
2. Close the red cap (→ "Fig. 39-3") and loosen it again with one full turn.
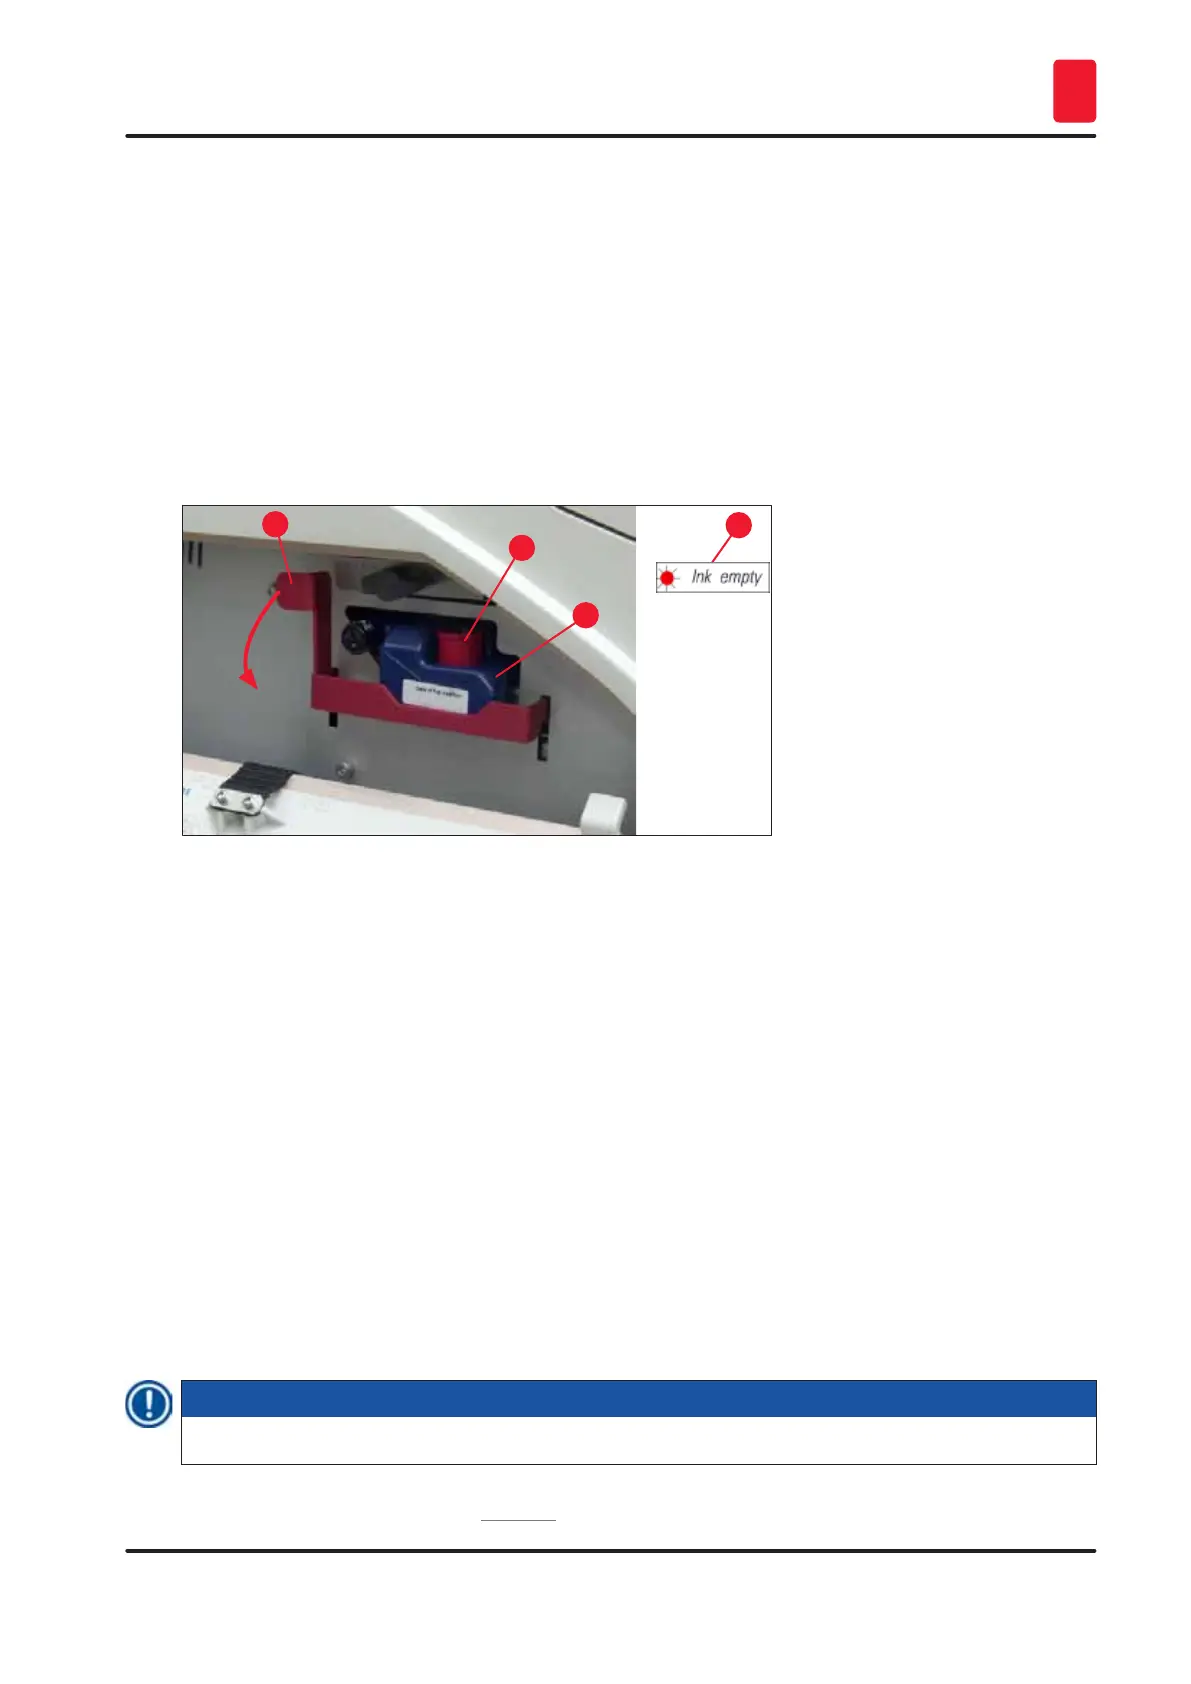
3. Press the red retaining bracket (→ "Fig. 57-1") down and pull the ink cartridge out
(→ "Fig. 57-2") approx. 30 mm until the INK EMPTY LED (→ "Fig. 57-3") lights up.
4. Retighten the red cap and completely remove the cartridge from the printer.
5. Then remove the ink cartridge and store the ink cartridge in a horizontal position in a sealed
container.
6. Dispose the used ink cartridge in accordance with the regulations of your laboratory and your
legislative.
Fig. 57
1
2
3
4
6.3.2 Inserting the new ink cartridge
1. Take a new ink cartridge from the carton and remove the plastic packaging.
2. Carefully shake the ink cartridge 2 to 3 times.
3. Pull the red retaining bracket forward and insert a new ink cartridge about halfway into the
slot.
4. Follow the information on the flag attached to the ink cartridge.
5. Open the red protective cap (→ "Fig. 39-3") one turn counterclockwise.
6. Fully insert the ink cartridge into the slot.
6.3.3 Removing the protective cap
1. Unscrew the red protective cap all the way, remove the information flag and place the red
protective cap in the recess provided on the ink cartridge (→ "Fig. 57-4").
2. Upon completion, make sure that the red retaining bracket is in the correct position
(→ "Fig. 41-1") and close the cover plate. 88 is displayed on the control panel.
Note
Never press the CLEAN button while a new or used ink cartridge is in the instrument!
3. On the control panel press LOADED (→ "Fig. 42-5").
 Loading...