4-40 Service Manual
5025-2xx, 4xx
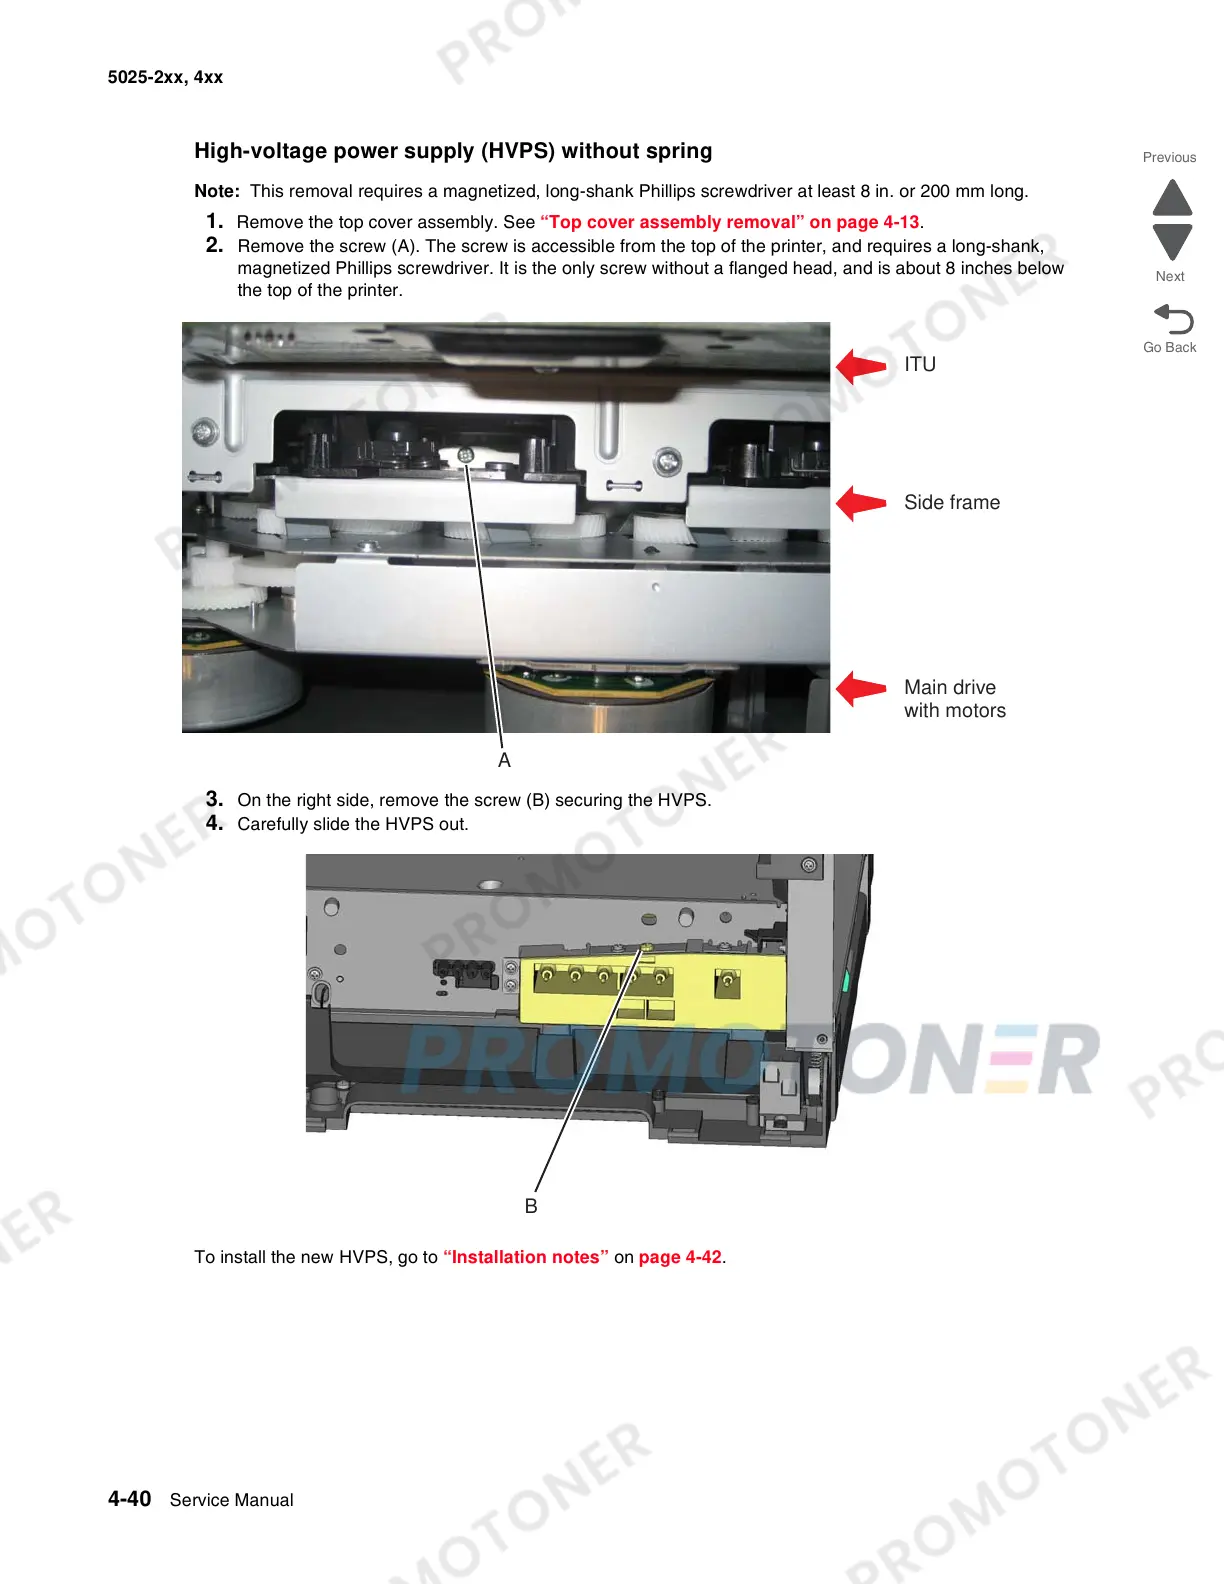
High-voltage power supply (HVPS) without spring
Note: This removal requires a magnetized, long-shank Phillips screwdriver at least 8 in. or 200 mm long.
1. Remove the top cover assembly. See “Top cover assembly removal” on page 4-13.
2. Remove the screw (A). The screw is accessible from the top of the printer, and requires a long-shank,
magnetized Phillips screwdriver. It is the only screw without a flanged head, and is about 8 inches below
the top of the printer.
3. On the right side, remove the screw (B) securing the HVPS.
4. Carefully slide the HVPS out.
To install the new HVPS, go to “Installation notes” on page 4-42.
A
ITU
Side frame
Main drive
with motors
 Loading...