Repair information 4-71
5025-2xx, 4xx
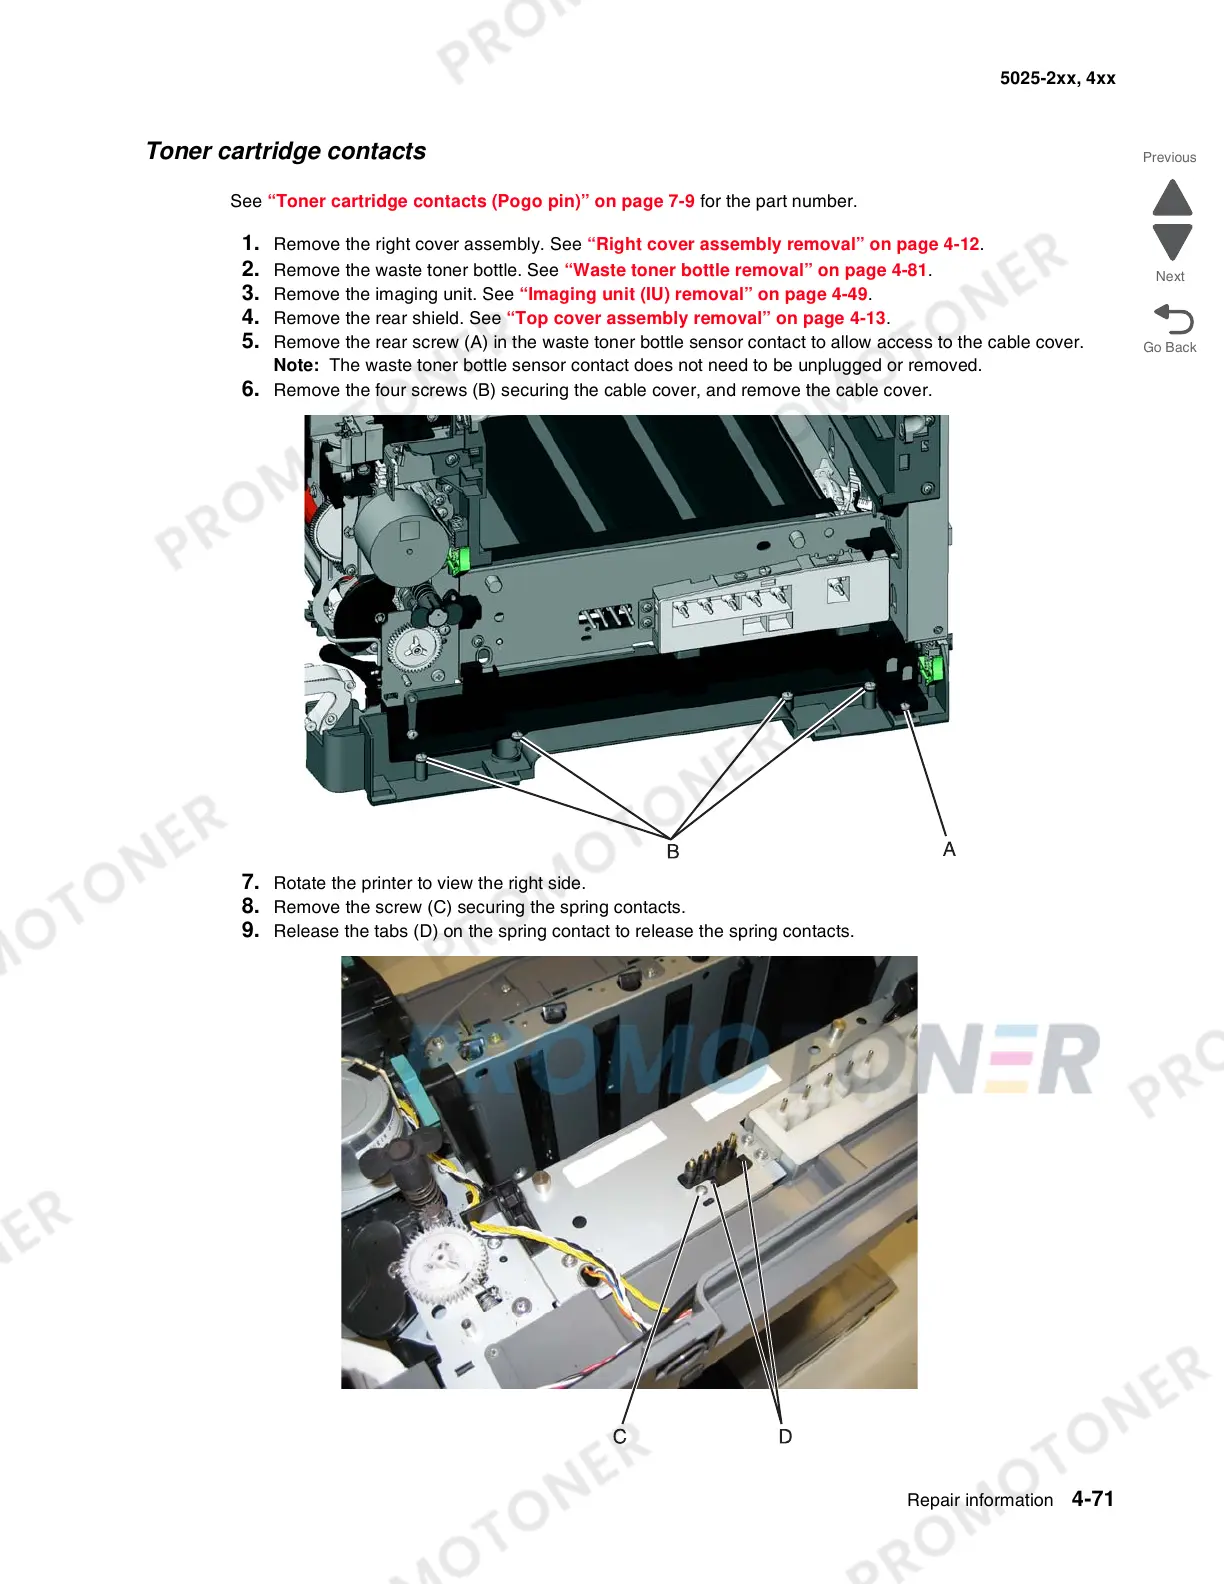
Toner cartridge contacts
See “Toner cartridge contacts (Pogo pin)” on page 7-9 for the part number.
1. Remove the right cover assembly. See “Right cover assembly removal” on page 4-12.
2. Remove the waste toner bottle. See “Waste toner bottle removal” on page 4-81.
3. Remove the imaging unit. See “Imaging unit (IU) removal” on page 4-49.
4. Remove the rear shield. See “Top cover assembly removal” on page 4-13.
5. Remove the rear screw (A) in the waste toner bottle sensor contact to allow access to the cable cover.
Note: The waste toner bottle sensor contact does not need to be unplugged or removed.
6. Remove the four screws (B) securing the cable cover, and remove the cable cover.
7. Rotate the printer to view the right side.
8. Remove the screw (C) securing the spring contacts.
9. Release the tabs (D) on the spring contact to release the spring contacts.
 Loading...