ATTENTION!
The cloning is successful when the backup le is downloaded from the same type of source
device as the destination device. E.g. HDMI-3D-OPT-TX210A contains fewer ports than
SW4-OPT-TX240RAK. If the backup le is downloaded from the TX240RAK and uploaded
to an TX210A transmitter, that would result in errors when checking and uploading.
The restoring process
Step 1. Select the Settings / Backup tab from the menu.
Step 2. Click on the Choose le button on the right panel and browse the desired le.
Step 3. The le is checked and the result will be displayed in the textbox below. If the le is
correct, the settings can be restored.
Step 4. Press the Start restore process button and click on the Yes button when asked.
Step 5. Reboot the device to apply the network settings after nishing.
6.9.4. Network settings (only for SW4-OPT-TX240RAK)
The backup le contains some lines with the network settings:
132
SET /MANAGEMENT/NETWORK.DhcpEnabled=false
133
SET /MANAGEMENT/NETWORK.StaticIpAddress=192.168.0.100
134
SET /MANAGEMENT/NETWORK.StaticNetworkMask=255.255.255.0
135
SET /MANAGEMENT/NETWORK.StaticGatewayAddress=192.168.0.1
136
CALL /MANAGEMENT/NETWORK:ApplySettings()
Above example shows that line no. 132 contains that the DHCP is disabled and line no.
133 contains the static IP address of the appliance. If the le is uploaded to one or more
devices, the exact same settings will be applied. To avoid a possible IP address conict on
the network, follow one of these steps:
Option 1 – Applying dynamic IP address in all the devices
▪ Before the backup process: Make sure that the DHCP is enabled on the device, or
▪ After the backup process: Modify the backup le in a text editor (e.g. Notepad) and
search the following line:
SET /MANAGEMENT/NETWORK.DhcpEnabled=false
Replace the false value to true.
ATTENTION!
The static IP address will be uploaded to the device if the line is in the backup le but will
be ignored when DHCP is enabled.
INFO
The factory default IP address of the LW3 devices is static.
Option 2 – Applying static IP addresses
Be aware that if the backup le is uploaded (restored) in multiple devices, it will cause
an IP address conict. In this case, you have to change the IP address in the backup le
manually before uploading it to each device; search this line:
SET /MANAGEMENT/NETWORK.StaticIpAddress=192.168.0.80
Set the desired IP address and save the le.
Option 3 – Keep the original IP settings
If the Network settings of the destination device shall stay unchanged, make sure
that these lines are deleted from the backup le, before you upload and restore it in a
device. The network settings are listed at the end of the le (the lines starting with
SET /MANAGEMENT/NETWORK and CALL /MANAGEMENT/NETWORK).
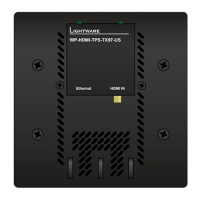
HDMI-3D-OPT-TX200 series
User’s manual
Software control Page 47 / 106
 Loading...