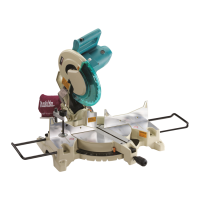
25 ENGLISH
Installing the blade
CAUTION: Make sure to install the circular saw
blade so that the direction of the arrow on the blade
matches that on the blade case. Failure to do so may
and/or the workpiece.
To install the circular saw blade, perform the following
steps:
1. Mount the circular saw blade carefully onto the
on the circular saw blade matches the direction of the
arrow on the blade case.
Fig.34: 1. Arrow
2.
then use the hex wrench to tighten the hex socket bolt
(left-handed) counterclockwise securely while pressing
the shaft lock.
3. Return the blade guard and center cover to its
original position. Then tighten the hex socket bolt of the
center cover to secure it.
4. Pull and turn the stopper pin to release the car-
riage from the raised position. Lower the carriage and
check that the blade guard moves properly.
15.88 mm hole-diameter saw blade
outward onto the mounting shaft and then place circular
Fig.35: 1.2. Circular saw blade
3.4. Hex socket bolt (left-
handed) 5. Spindle 6. Recessed side
other than 25.4 mm or 30 mm hole-
diameter saw blade
of blade mounting part on the other side. Choose a
circular saw blade hole perfectly.
Fig.36: 1.2. Circular saw blade
3.4. Hex socket bolt (left-
handed) 5. Spindle 6. Blade mounting part
CAUTION: Make sure that the blade mounting
perfectly. Mounting the circular saw blade on the
wrong side can result in the dangerous vibration.
Connecting a vacuum cleaner
When you wish to perform clean cutting operation, con-
nect a Makita vacuum cleaner to the dust nozzle (upper
Fig.37: 1.2. Hose 3. Vacuum cleaner
Dust bag
CAUTION: When performing a cutting, always
attach the dust bag or connect a vacuum cleaner
to prevent dust-related hazards.
The use of the dust bag makes cutting operations clean
and dust collection easy. To attach the dust bag, remove
the dust extraction hose from the tool and connect the
dust bag to the dust nozzle (upper dust port).
Fig.38: 1. Dust extraction hose 2. Dust bag 3. Dust
nozzle (upper dust port)
When the dust bag is about half full, remove the dust bag from
the tool and pull the fastener out. Empty the dust bag of its
contents, tapping it lightly so as to remove particles adhering
to the insides which might hamper further collection.
Fig.39: 1. Fastener
Securing workpiece
WARNING:
It is extremely important to always
secure the workpiece correctly with the proper type of
vise.
and cause damage to the tool and/or the workpiece.
WARNING:
When cutting a workpiece that is lon-
ger than the support base of the saw, support the entire
length of the material beyond the support base and at the
same height to keep the material level. Proper workpiece
support helps to avoid blade pinch and possible kickback
on the vertical vise and/or horizontal vise to secure the work
-
piece. Thin material tends to sag. Support workpiece over
its entire length to avoid blade pinch and possible KICKBACK.
Fig.40: 1. Support 2. Turn base
Guide fences
WARNING: Before operating the tool, make
WARNING: Before bevel-cutting, make sure
that no part of the tool, especially the blade, con-
tacts the upper and lower fences when fully low-
ering and raising the handle in any position and
while moving the carriage through its full range
of travel. If the tool or blade makes contact with
the fence this may result in kickback or unexpected
Use upper fences to support the material higher than
the lower fences. Loosen the clamping screw so that
the upper fences slide in and out over the lower fences.
Reposition the fences and then tighten the screw.
Fig.41: 1. Upper fence 2. Lower fence 3. Clamping
screw 4.
NOTICE:
the factory. Do not remove the lower fences.
NOTICE: If the upper fence is still loose after tight-
You don't need to use it unless needed.

 Loading...