TRANSMISSION AND TORQUE CONVERTER 5540F/YB5515 SERVICE MANUAL
7-48 Published 10-21-2010, Control# 198-04
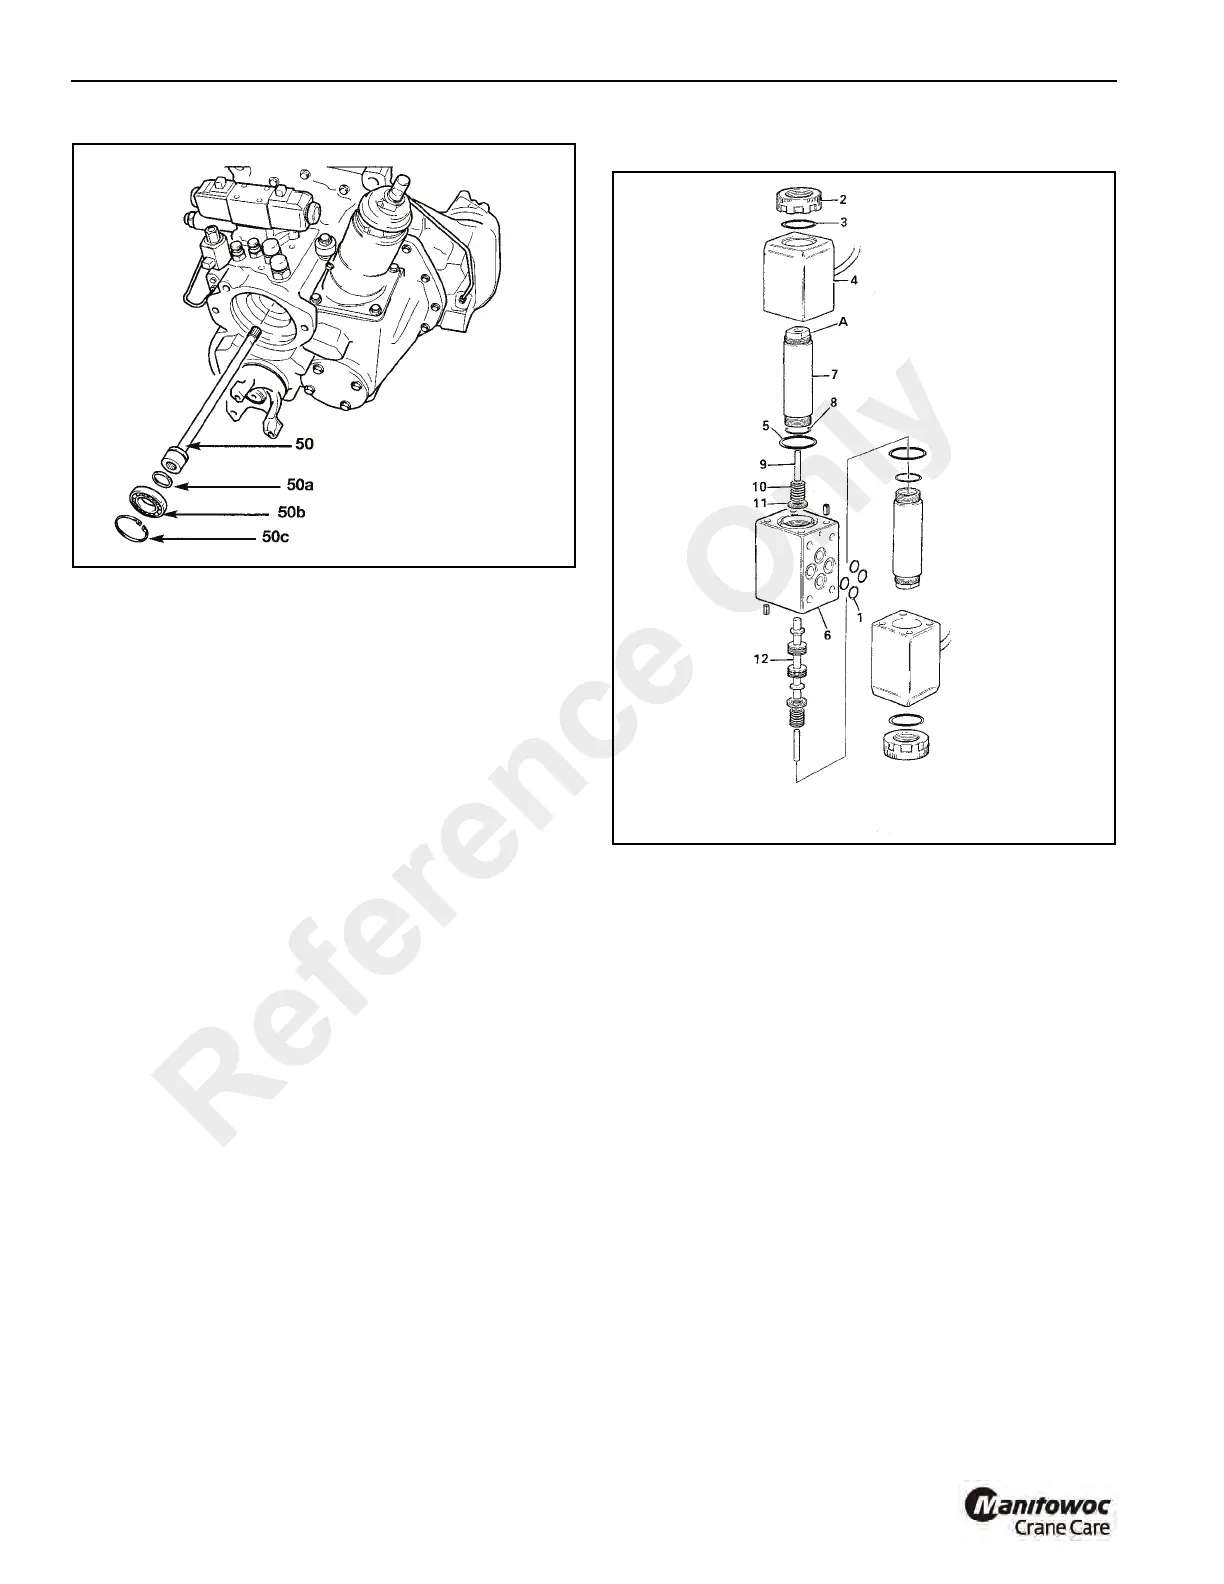
Solenoid Valve Disassembly and Assembly
The numerical sequence shown on the illustration is
intended as a guide to dismantling.
NOTE: It is not normally recommended to remove the
spool 12, Figure 7-72 from the valve body. None of
the component parts of the CETOPS valve
assembly can be renewed individually. The extent
of permissible servicing is cleaning and the
consequential renewal of O-ring seals. If damage
to any component or distortion of the spool is
evident the complete valve assembly must be
renewed.
Great care should be taken when disassembling and
assembling the valve to avoid the following:
• Contamination
• Damage to spools
• Damage to seal grooves
Any of the above may result in possible problems with the
operation of the valve.
For assembly the sequence should be reversed.
For clarity, only one solenoid has been numbered in the
dismantling sequence.
Dismantling
1. Remove the surface mounted O-rings 1.
2. Unscrew the knurled nut 2 and remove O-ring 3,
withdraw the solenoid 4 and O-ring 5.
3. Hold the solenoid valve body 6 in a vice, using the
spanner flats A, remove spindle 7 and O-ring 8.
4. Pull out actuating pin 9, spring 10, spring retainer 11 and
spool 12.
5. Dismantle the opposite solenoid in the same sequence
as described above.
6. Inspect the spool and spool bore for signs of wear, nicks
scratches etc.
Assembly
1. Renew all O-rings.
2. Lightly lubricate all parts with clean transmission fluid
before assembling.
3. Check that the flying leads are secure and that the
connectors are intact.
Reference Only

 Loading...


