48
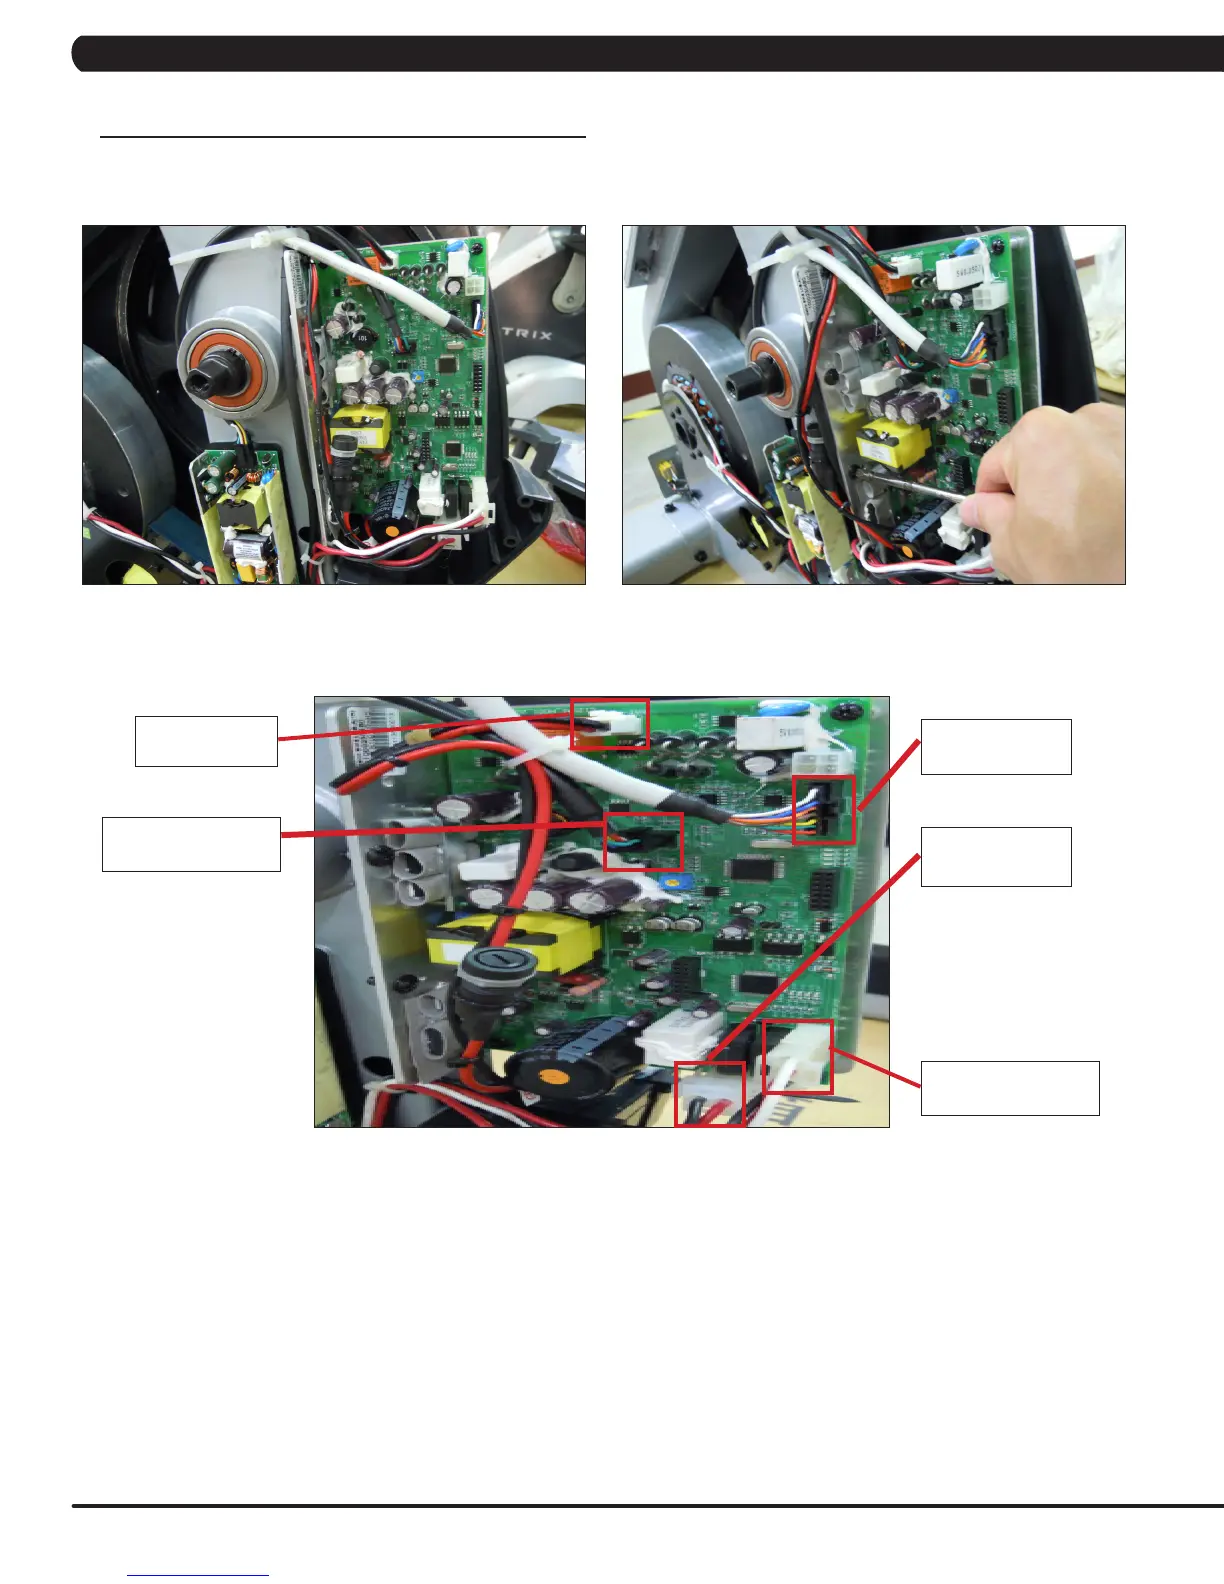
9.17 LOWER CONTROL BOARD REPLACEMENT
CHAPTER 9: PART REPLACEMENT GUIDE
1) Remove the left side front cover as outlined in Section 9.15.
2) Disconnect the 5 wire connections to the lower board (Figure A).
3) Remove the 2 screws holding the lower control board to the frame (Figure B), and remove the lower control board.
4) Reverse Steps 1-3 to install a new lower board. Figure C shows the electrical connections to the lower board.
5) Test the bike for function as outlined in Section 9.24.
FIGURE A
FIGURE B
FIGURE C
3 Pin Connector from
the Generator
2 Pin Connector
from the ECB
8 Pin Connector
from the Console
6 Pin Connector from
the DC power source
2 Pin Connector
from the Battery
 Loading...