71
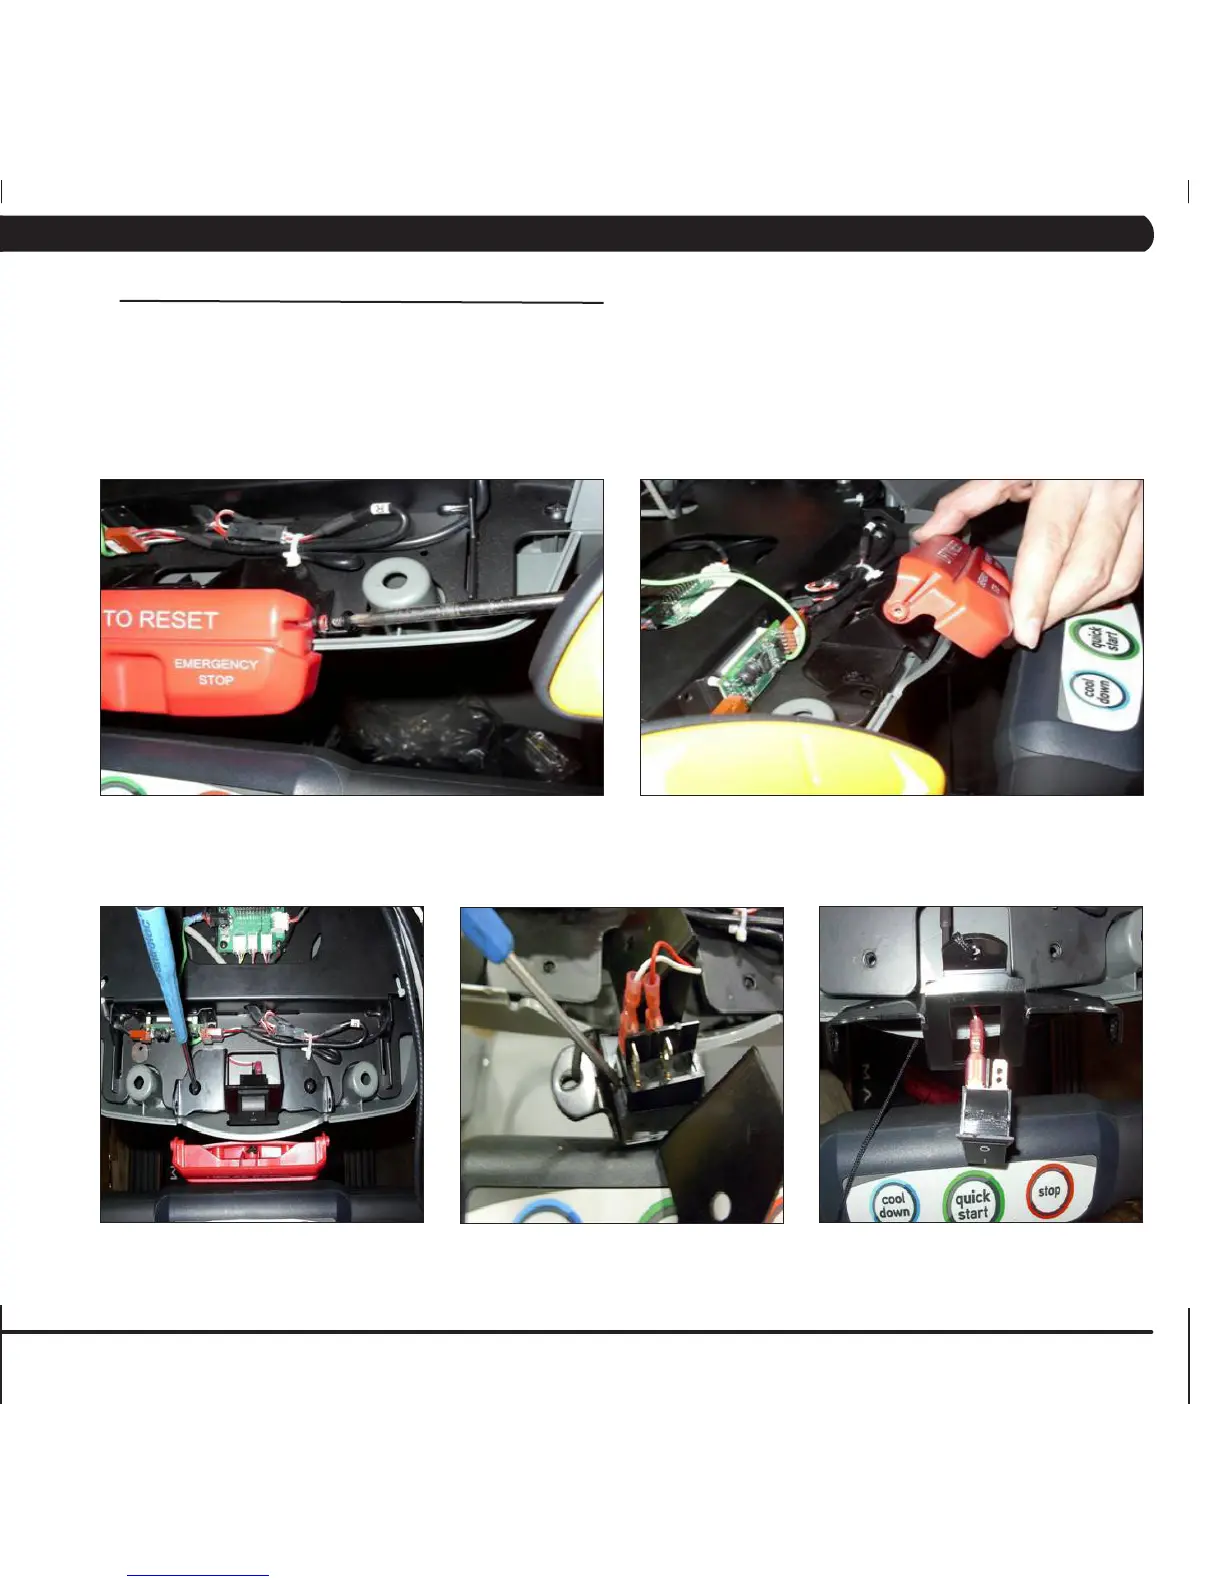
9.17 EMERGENCY STOP SWITCH REPLACEMENT
CHAPTER 9: PART REPLACEMENT GUIDE
1) Turn off power to the unit and disconnect the cord from the machine.
2) Remove the console as outlined in Section 9.13.
3) Use a Phillips screwdriver to remove two screws, one from each side of the red button (Figure A).
4) Lift the button from the bracket by pulling one side out at a time (Figure B).
5) Use a Phillips screwdriver to remove two screws, one from each side of the mounting bracket (Figure C).
6) Turn the bracket and use a straight screwdriver or pliers to compress each end of the switch and release it from the bracket (Figures D & E).
7) Make sure the new switch has the same orientation as the old one when installing, and that the wires are properly connected.
FIGURE A FIGURE B
FIGURE C
FIGURE D FIGURE E
 Loading...