58- 58 -
HWE10170 GB
When using PAR-30MAA remote controller, the static pressure settings can be made from the remote controller.
To set the external static pressure from the function selection screen on the remote controller (Only PAR-30MAA)
Follow the instructions below and the instructions detailed in the remote controller manual for how to set the switches.
1. Set the function setting No. 32 (Switch setting/Function selection) to “2”.
2. Set the function setting No. 8 and No. 10 to appropriate values, according to the external static pressure.
[Important]
Be sure to write down the settings for all functions in the “Current setting” row if any of the initial settings has been
changed.
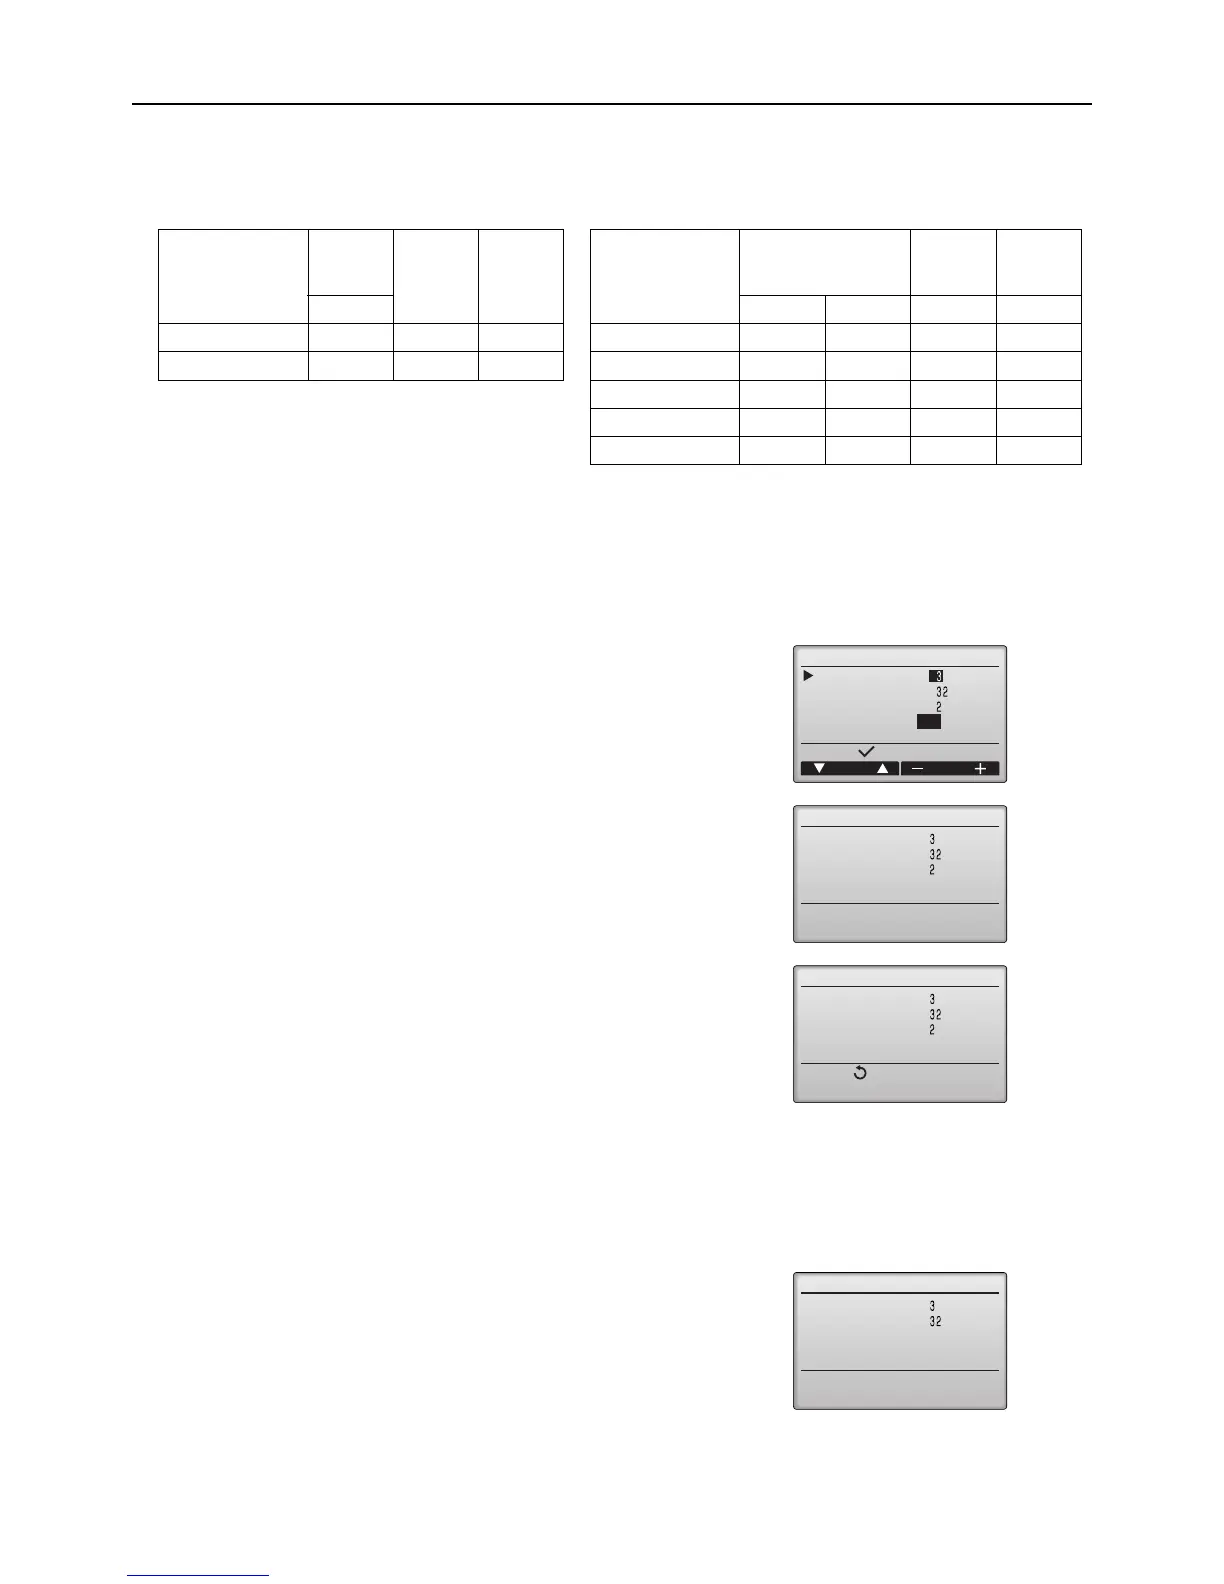
2) Selecting a function
*The steps below explain how to set the settings on the MA Smart Remote Controller.
To change the settings
To confirm the setting
Notes:
The actual static pressure setting and the Dip switch setting may not match if the setting was set from the remote
controller.
To check the static pressure setting, check it on the remote controller, not on the dip switch.
Selection
Function
setting
No.
Initial
setting
Current
setting
External static
pressure setting
Function setting No.
Initial
setting
Current
setting
No. 32 No. 8 No. 10
Switch setting 1 O 50Pa 1 1
Function selection 2 100Pa 2 1
150Pa 3 1 O
200Pa 2 2
250Pa 3 2
1. Select Function setting from the Service menu to bring up the Function
setting screen. (Refer to the remote controller manual for how to set the
items in the service menu.)
2. Using the F1 through F4 buttons, set the settings for the M-NET address,
Function No., and Data, select “Set”, and press the Enter button. The
settings signals will be sent from the remote controller to the indoor units.
3. “Sending data” will appear on the screen, and when signal transmission
is successfully completed, “Setting completed” will appear. Press the
BACK button to return to the Function setting screen.
1. Select Function setting from the Service menu to bring up the Function setting screen. (Refer to the remote
controller manual for how to set the items in the service menu.)
2. Using the F1 through F4 buttons, set the settings for the M-NET address, Function No., and Data, select “Conf”,
and press the Enter button.
3. “Checking” will appear on the screen, and when signal transmission is
successfully completed, the current settings values will be displayed.
 Loading...