10 | Assembly Instructions
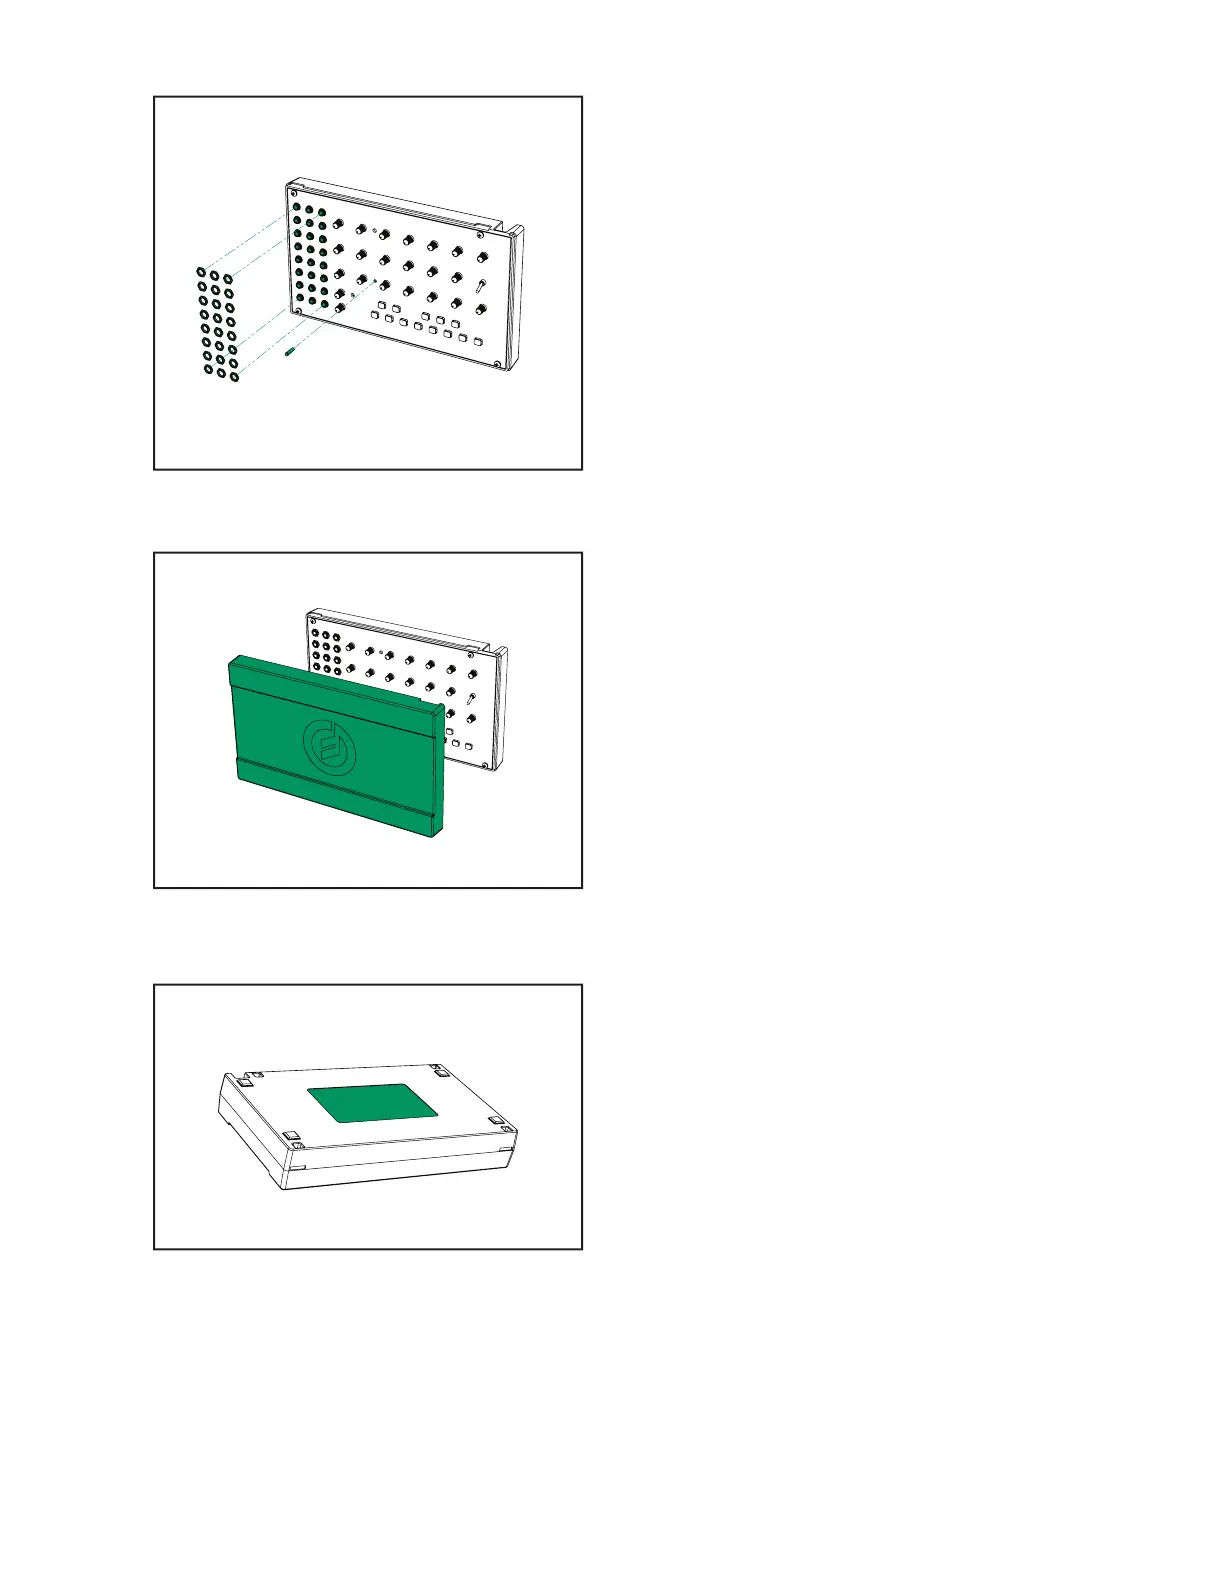
SECURE PATCHBAY AND
INSTALL LIGHT PIPE
ATTACH THE LID
Mavis includes a protective Lid that keeps dust
and debris o of your instrument. Place the Lid on
top of Mavis when not in use, while in transit, and
for the next assembly step.
APPLY THE SERIAL NUMBER
Now that you’ve built your new instrument, it’s
time to make it ocial.
With the Lid on, flip the entire unit upside down
and apply the Serial Number Label to the bottom
of the Chassis. Don’t forget to write your name in
the "Built By" section.
Use the 8mm end of the included Hex Nut Driver
to secure a Hex Nut to each of the 24 jacks on
the Patchbay (be careful not to over-torque). This
will provide a secure platform for plugging and
unplugging patch cables. Next, there is a clear
plastic Light Pipe that carries light from the LFO
RATE LED on the PCB to the Front Panel. Insert
the tapered end of the Light Pipe into the hole
directly to the right of the LFO RATE knob. When
inserted correctly, it should sit nearly flush with the
Front Panel.
 Loading...