Installing Remote Printers and/or CRT Installation
NFS-640 Installation Manual P/N 51332:B1 12/01/2003 51
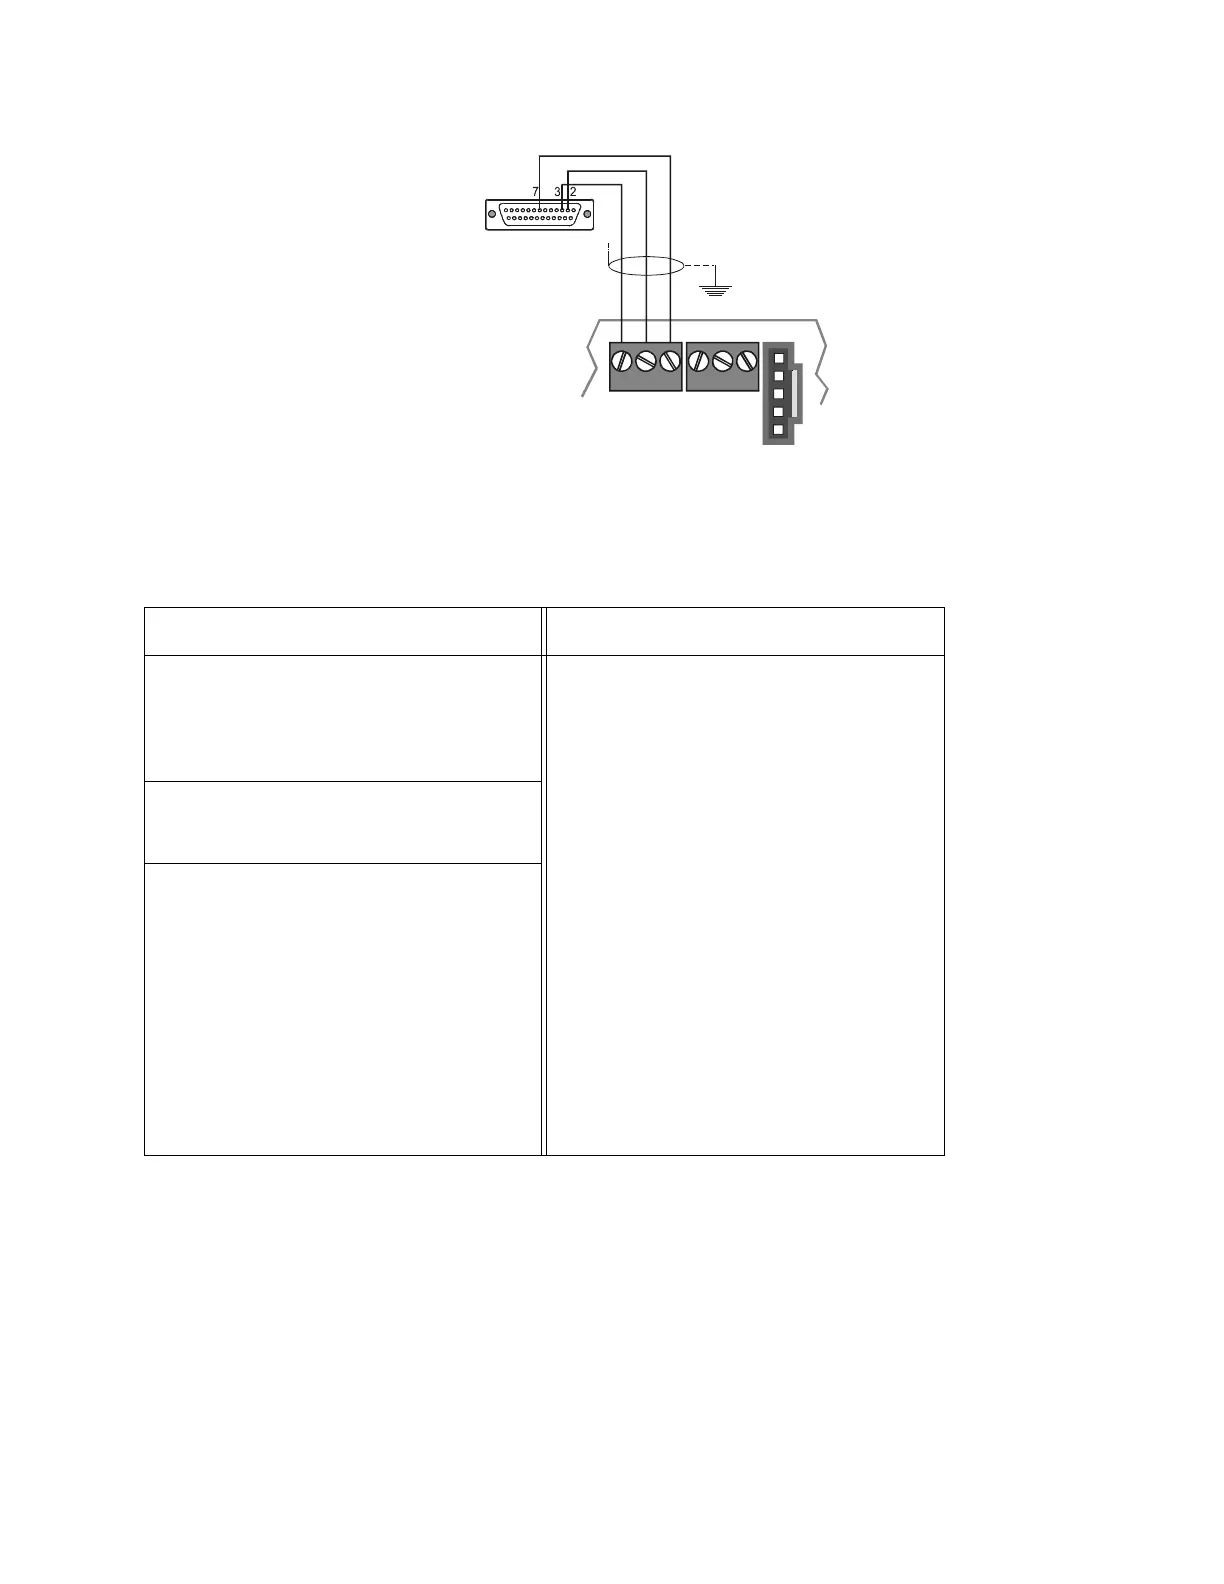
Figure 30 Remote Printer Connections
Setting Printer Options
Refer to the documentation supplied with the PRN-5 for instructions on using the printer menu
controls. Set the printer options (under the menu area) according to the settings listed in Table 6.
3.9.3 Installing and Configuring a Keltron Printer
Connect the remote printer to the Control Panel as follows:
1. Connect the three (3) open leads of the custom cable to the TB14 terminal block on the control
panel as shown in the figure below.
2. Connect DC power from TB7 terminal block on the control panel as shown in the figure below.
3. Plug the DB-25 connector end of the custom cable into the EIA-232 port of the Keltron printer.
Tighten securely.
TB14 TB15
PRINTER
TX RX REF
PC/CRT
TX RX REF
Note: Outputs are
power-limited but
are not supervised.
nfs640-prn5conn.cdr
DB-25 connector
on PRN-5 (female
socket shown)
Control Panel
Terminate one end of
shield at backbox
Table 6 PRN-5 Setup Options
Option Setting Option Setting
L/R Adjust
Font
LPI
ESC Character
Bidirectional Copy
0
HS Draft
6 CPI
ESC
ON
CPI
Skip
Emulate
I/O
Buffer
Serial
Baud
Format
Protocol
Character Set
S1. Zero
Auto LF
MENULOCK
PAPER
BIN 1
BIN 2
SINGLE
PUSH TRA
PULL TRA
PAP ROLL
PAPOPT
10 CPI
0.5
Epson
36K
9600
2400
7 Bit, Even, 1 Stop
XON/XOFF
Standard
On
Off
12/72"
12/72"
12/72"
12/72"
12/72"
12/72"
No
CG-TAB
Country
Auto CR
Graphic
E-USE ASCII
1S
Color Option
Formlen
Lines
Standard
Not Installed
6 LPI-60
Executive 10.5"
 Loading...