N.B.
IF YOU HAVE TO REPLACE THE OIL PUMP AND COUNTERSHAFT CONTROL GEAR IT IS NEC-
ESSARY TO REPLACE THE COUNTERSHAFT GEAR AS WELL.
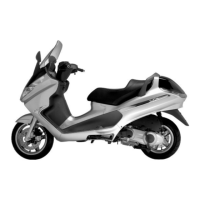
- Before installing the gear on the crankshaft, care-
fully clean the two matching surfaces removing
any residues of LOCTITE from the holes using a
brush.
Blow with compressed air and degrease the mounting holes on both surfaces to make the new LOCTITE
grip.
Apply the recommended product to the holes again.
Recommended products
Loctite 243 Medium-strength threadlock
Loctite 243 medium-strength threadlock
- Repeat the same procedure for the 4 fastening screws.
- Insert the control gear on the crankshaft with the hole countersink visible.
- Tighten the 4 fastening screws to the prescribed torque.
N.B.
TO AVOID DAMAGING THE SCREW CONTROL HEXAGON, IT IS PREFERABLE TO USE AN IN-
SIDE HEXAGON SOCKET WRENCH.
Locking torques (N*m)
Gear mounting on crankshaft screws 10 -12
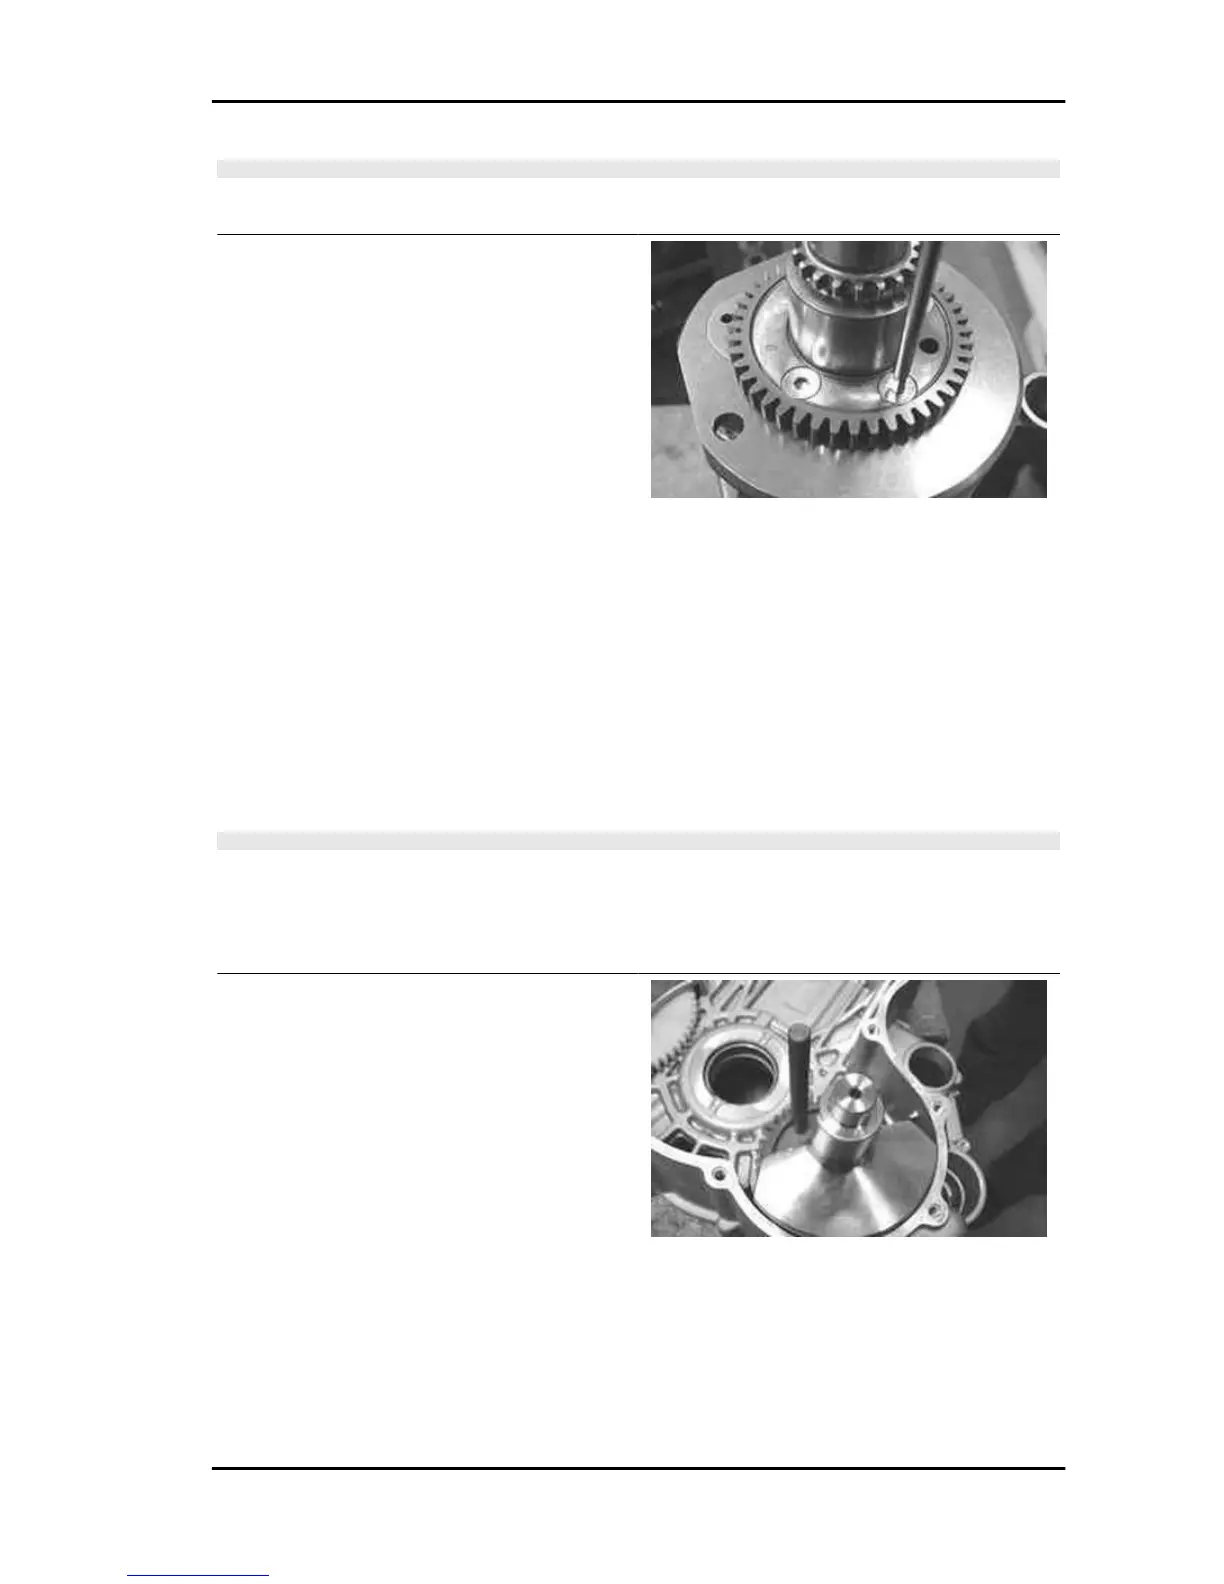
- Lubricate the main bearing on the flywheel side
half-crankcase.
- Lubricate the shim adjustment washer.
- Insert the shim adjustment washer on the crank-
shaft in its original position.
- Insert the special timing tool in the hole on the
countershaft.
Specific tooling
020471Y Pin for countershaft timing
X8 400 Euro 3 Engine
ENG - 175
 Loading...