( Installation
Notes
• Check all
connections and systems before
final installation.
•
Do not use unauthorized parts as
this
ma
y
cause malfunctions.
• Consult
y
our
dealer if installation requ ires
drilling
of holes
or
other
modifications
to
the
vehicle.
•
Do
not
install
this
unit
where:
- it
ma
y interfere with operation of
the
vehicl e.
- it may cause injury to a passenger as a result
of a sudden stop.
•
The semi
conductor
laser
wil l
be
damaged
if
it overheats.
In
stall
this
unit
away
from
hot
places such
as
near the heater outlet.
•
Optimum
performance is obtained
when
the
unit is
installed
at
an
angle of
less
than
30
°.
When in stal lin
g,
to ensure proper heat dis-
persal when using
this
unit. make sure you
leave
ample
space behind
the
rear panel and
wrap any loose cables
so
they are
not
block-
ing the
ve
nts.
Leave
amp
le
spac e
•
To
some types of vehicles,
this
unit
cannot
be
properly installed.
In
such
case, use
the
op-
tional installation kit (ADT-VA
133).
)
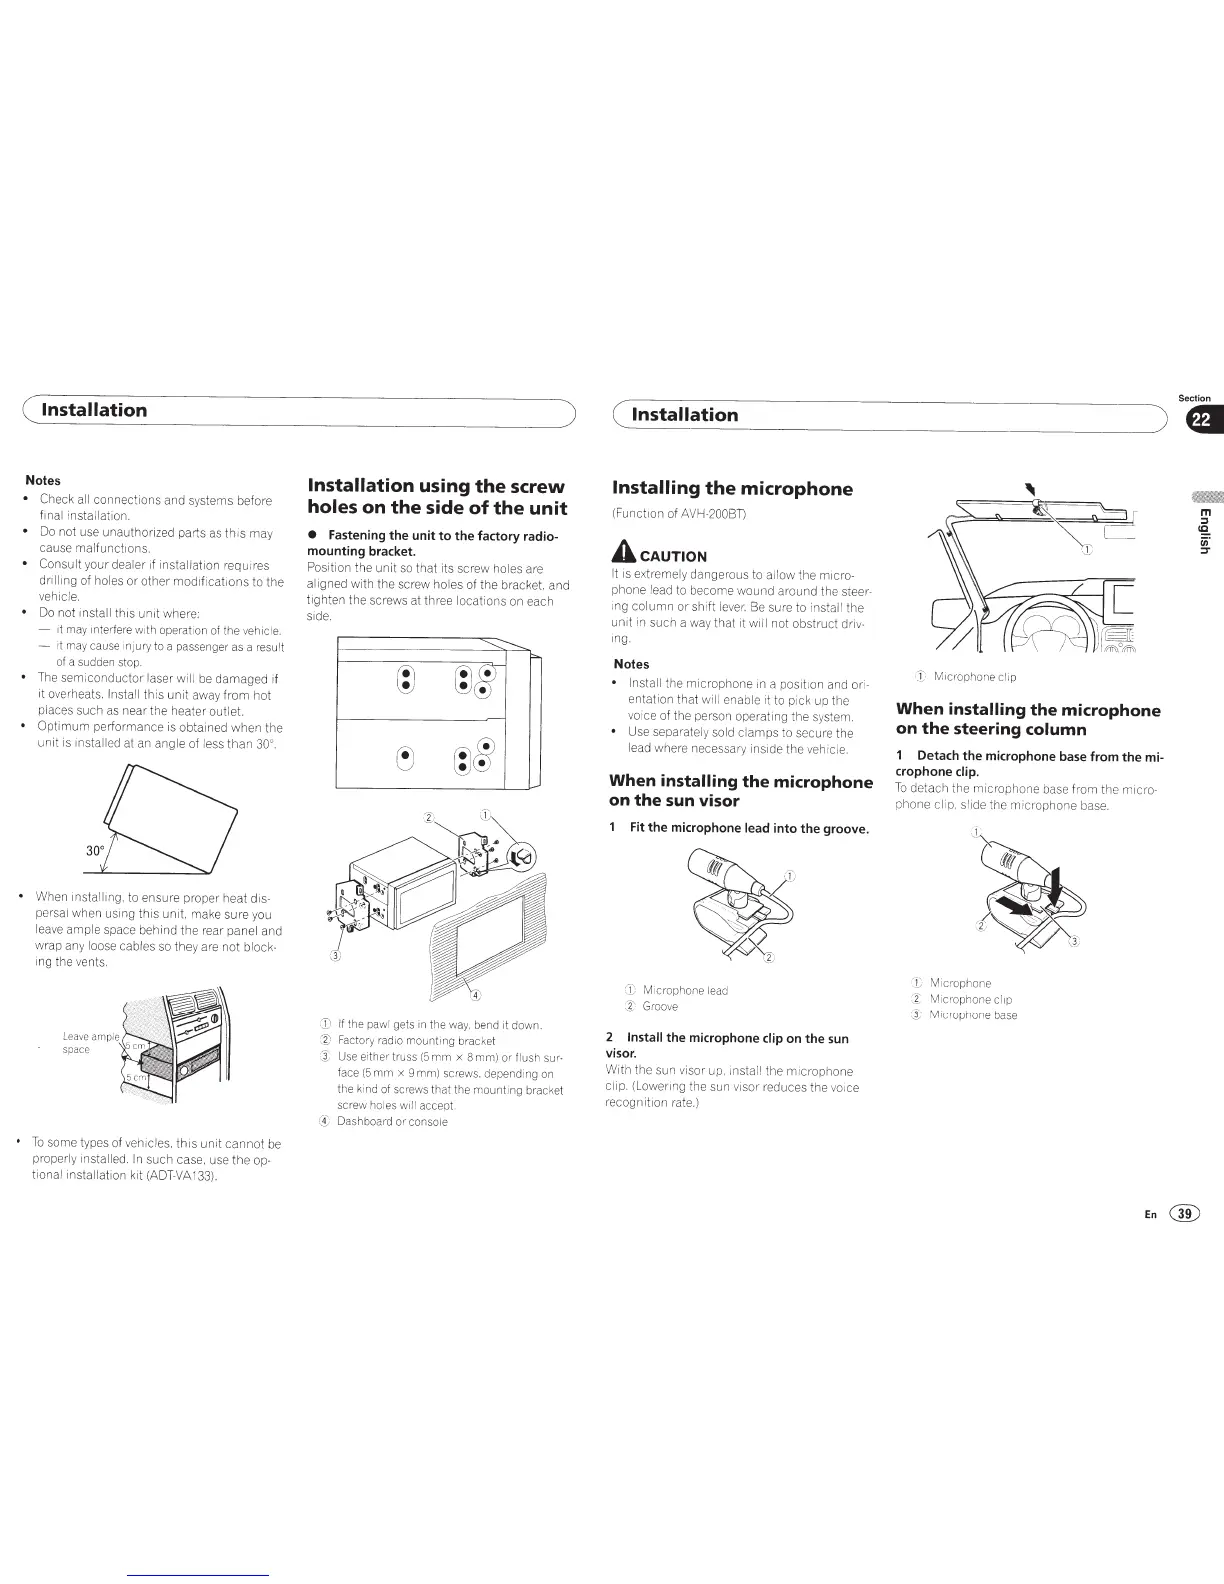
Installation
using
the
screw
holes on
the
side
of
the
unit
•
Fastening
the
unit
to
the
factory radio-
mounting bracket.
Position the
unit
so
that
its screw holes are
aligned with the screw holes of the bracket. and
tigh
ten the screws at three locations on each
side.
~--....._
p,.,
l;J
r;J&
~
c~@
1---
CD
If
the
pawl
gets in the way, bend it down.
@
Factory radio
mounting
bracket
·
J::
.
Use either tru
ss
(5
mm
x 8
mm)
or flush
sur
-
face
(5
mm
x 9 mm) screws. depending on
the kind of
sc
rews
that
the
mount
ing bracket
screw hol
es
wi
ll
accept.
C4)
Dashboard or console
(
Installation
Installing
the
microphone
(Function of
AVH-200BD
A
cAUTION
It
is extremely dangerous to a
ll
ow
the micro-
phone
lead
to become
wound
around the steer-
ing
column
or
sh
i
ft
lever. Be sure to
install
the
unit
in such a way
that
it
will
not
obstruct
driv-
ing.
Notes
• Install the
micr
ophone
1n
a
posit1on
and ori-
entation
that
will
enable it to pick up the
voice of the person operating the
sy
stem.
• Use separately
so
ld
clamps
to secure the
lead where necessary inside the vehicle.
When
installing
the
microphone
on
the
sun visor
Fit
the
microphone
lead
into the groove.
CD
Mi
cr
ophone
lead
:1)
Groove
2
Install
the microphone
clip
on the
sun
visor.
With the
su
n visor
up
,
install
the m i
crophone
clip. (Lowering the sun
v1sm
reduces the
vo1c
e
recognition rate.)
Section
)fl
'
(D
Micr
ophone
cl
ip
When
installing
the
microphone
on
the
steering column
Detach
the
microphone base from the mi-
crophone
clip.
To
detach the
microphone
base from the micro-
phone
cli
p,
slide the
microphone
base.
Microph
one
:I
.·
Microphone
clip
Q·
Mic
r-oph
one base
En@

 Loading...