Configuring Poly Studio Using Poly Lens
Desktop
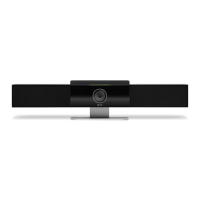
Download Poly Lens Desktop to access configuration options for your Poly Studio USB video bar.
Download and Install the Poly Lens Desktop App
Download the Poly Lens Desktop App to access configuration settings and features.
See the Poly Lens Desktop App User Guide for information on using your device with Poly Lens Desktop.
Note: The Poly Lens application is not supported on Chromebooks at this time.
Task
1 Go to the Poly Lens App product page.
2 Select the applicable download for your operating system.
3 Follow the onscreen installation instructions.
Initialize Your Device Using the Setup Wizard
Use the setup wizard to set up your device for the first time or after a factory reset.
Note: The setup wizard leads you through the minimum configuration steps for your device. You can configure additional
settings after the initial setup.
Task
1 Launch .
2 Connect your device to your computer.
3 After detects your device, select the device from the list in the left sidebar.
4 Enter the password (the default password isPolycom12#$).
5 Do one of the following:
• Select Import Configuration to import an existing configuration file to set up your device.
1 Enter the device name.
2 Select and import an existing configuration file.
• Select Begin Setup.
1 On the Get Started page, specify the following information:
– Country
– Device Name
– New Device Password: Enter a password that adheres to the onscreen requirements, or select Use Weak
Password to enter a simple password.
2 Select Next.
3 On the Network page, do one of the following:
– Select the Wi-Fi toggle and configure the Wi-Fi network. Select Next.
– Select Skip to ignore the settings.
4 On the Provisioning page, do one of the following:
– Configure the provisioning server and select Next.
– Select Skip to ignore the settings.
6 Select Finish.
14
 Loading...