3
Shooting
54
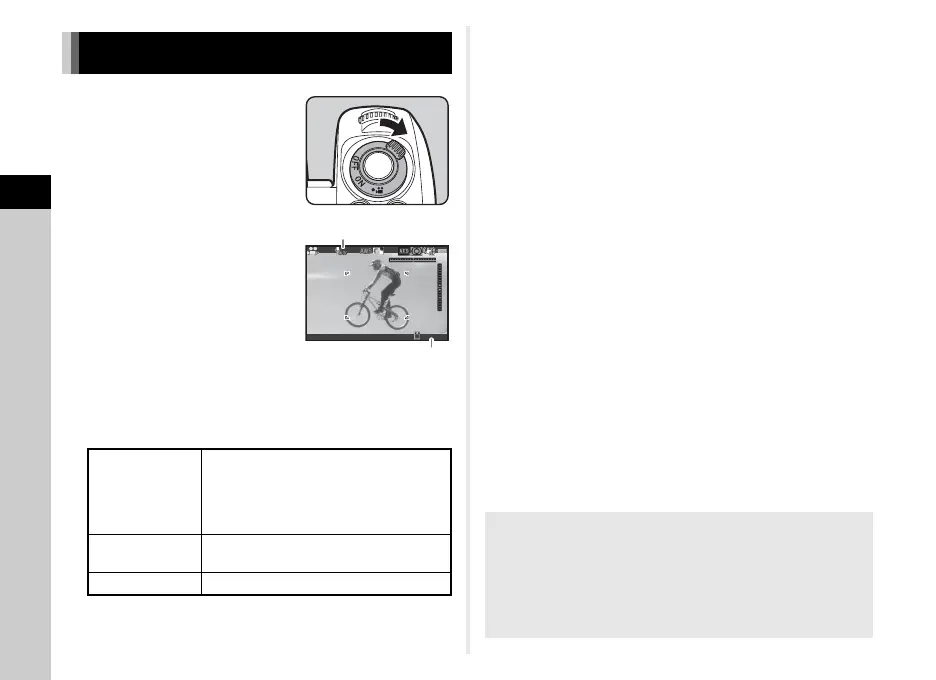
1 Turn the main switch to
C.
The indicator lamp lights red and
the Live View image is displayed.
2 Set the mode dial to the desired capture mode.
The following settings are available depending on the
capture mode.
3 Focus on the subject.
In v mode, press 0 halfway.
4 Press 0 fully.
Movie recording starts.
In the upper left area of the monitor, “REC” blinks and the
size of the recorded movie file is displayed.
5 Press 0 fully again.
Movie recording stops.
6 Return the main switch to the [ON] position to
exit C mode.
The camera returns to shooting with the viewfinder in A
mode.
u Caution
• When recording a movie with sound, camera operation
sounds are also recorded.
• When recording a movie with an image processing function
such as Digital Filter applied, the movie file may be saved with
some frames omitted.
• If the internal temperature of the camera becomes high
during recording, recording may be terminated.
• When a retractable lens is attached, recording stops if the
lens is retracted during recording and an error message is
displayed.
•In C mode, the Wi-Fi™ function is disabled.
Recording Movies
G, J, K, L
The camera operates in the selected
exposure mode. (The aperture value
can be changed only before shooting.
When set to L mode, the sensitivity
can also be changed.)
O to Q
The camera operates according to the
saved exposure mode.
Other modes The camera operates in G mode.
99'99"
Focus Motor Noise during Movie Recording
When [AF Mode] of [AF with Live View] in the C1 menu is
set to y, focus motor drive noise is recorded.
Adjusting the sound level in [Recording Sound Level] of the
C1 menu, or using an external microphone can reduce the
motor noise to be recorded.

 Loading...