2.Installation
12
Admin)
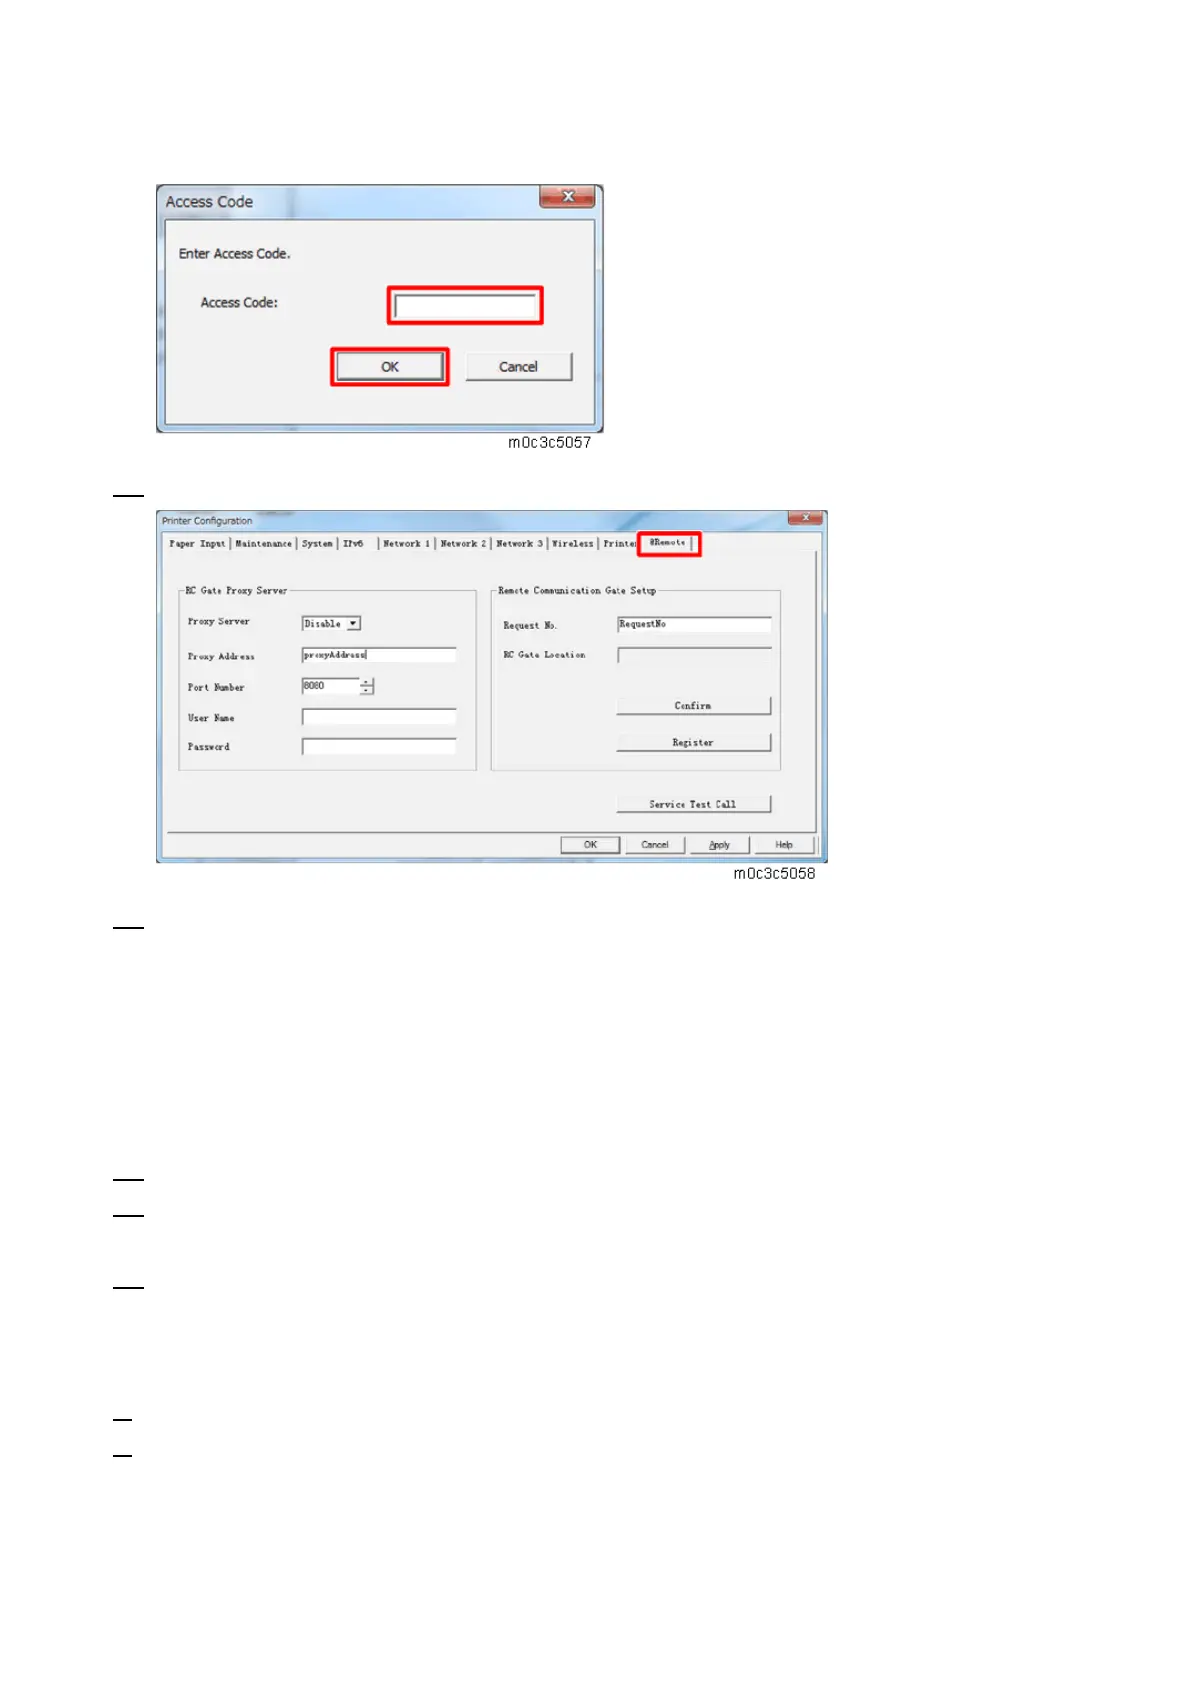
10. Select the [@Remote] tab in the printer setting screen.
11. Input the following items if necessary, then click [OK].
[RC Gate Proxy Server: Proxy Server]: Select [Enable] in the pull down menu.
[RC Gate Proxy Server: Proxy Address]: Input the address of the proxy server.
[RC Gate Proxy Server: Port Number]: Input the HTTP proxy port number.
[RC Gate Proxy Server: User Name]: Enter the HTTP proxy authentication user name.
[RC Gate Proxy Server: Password]: Enter the HTTP proxy authentication password.
[Remote Communication Gate Setup: Request No.]: Input the request No.
12. Enter the "Maintenance Mode (SP mode)".
13. Check if the function flag is "Disable (Default)".
SP menu > [@Remote] > [Remote Service] > [Function Flag]
14. Remove the USB cable from the machine, and connect to the user's LAN.
Restore the IP address of the customer engineer's PC. (When using a USB cable, skip this step.)
Execute the @Remote Settings
1. Enter the "Maintenance Mode (SP mode)".
2. Check if the @Remote status is "0".
SP menu > [@Remote] > [Remote Service] > [Instl:Condition]
If the @Remote status is not "0", ask the @Remote Center Administrator.
 Loading...