Chapter 3-4
Robomow RL555, RL855, RL2000
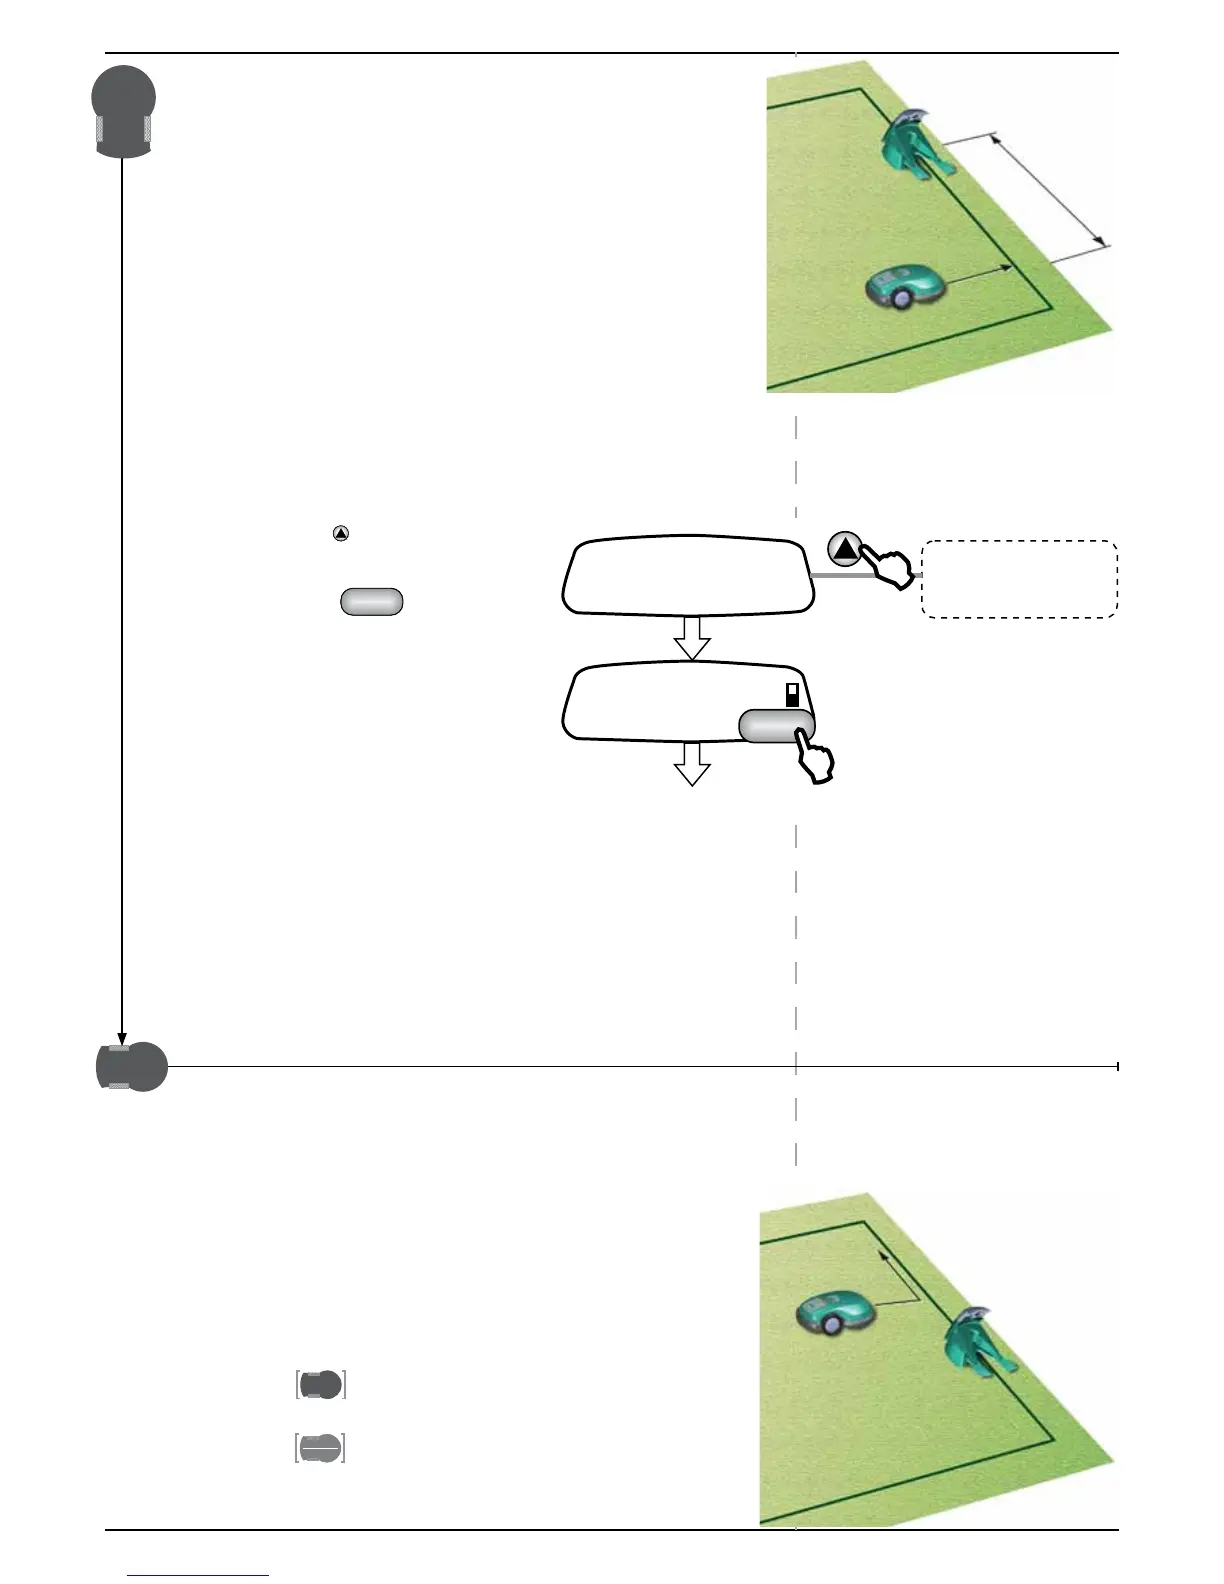
3.4 Testing Base Station and Perimeter Wire charging
position
In order to ease adjusting Base Station’s position, use just 2 stakes
for the initial setting. After this test is completed, you will drive all 5
stakes in place.
P Remove the Manual Controller from its holder and grasp it with
both hands.
P Use the Navigation Pad on Manual Controller to drive Robomow:
position it on inner lawn, facing the Perimeter Wire, at least 3 m
(10 feet) in front of Base Station,
P Reinsert Manual Controller in its holder.
Adjust the controller and its coil until it is at level with top of Robomow.
P Verify that the section of the Perimeter Wire leading to the Base Station
is pegged and secured to the ground. Correct pegging if necessary.
P Verify that ‘ON’ led on the Base Station is blinking.
P Press the
upper scroll arrow
on the Manual Controller once for
the message ‘Go to base’ and
then press
.
P Robomow starts moving towards
Base Station.
Follow it and check if it docks properly into the Base Station: check that
the two metal contacts on Robomow’s front make full contact with the
metal plate under the Base Station’s cover.
) If the plates are not in full contact, slightly move the
Base Station, for Robomow to get into the right position for
charging.
P Once the test is completed, drive all 5 stakes into ground to fully secure
the Base Station.
3.5 Test the Perimeter Wire Position for Edge Mowing
Follow the instructions below to start the test:
This test determines if there are minor adjustments needed in Perimeter
Wire positioning.
After the test is completed all pegs are driven in to secure the wire to
the ground.
P Remove the Manual Controller from its holder and grasp it with
both hands.
P Use the Navigation Pad on Manual Controller to drive Robomow:
position it towards the Perimeter Wire.
)
 Loading...