Detailed Settings for a Live Set (Live Set Edit)
Here’s how to make detailed settings for the four layers of a Live Set.
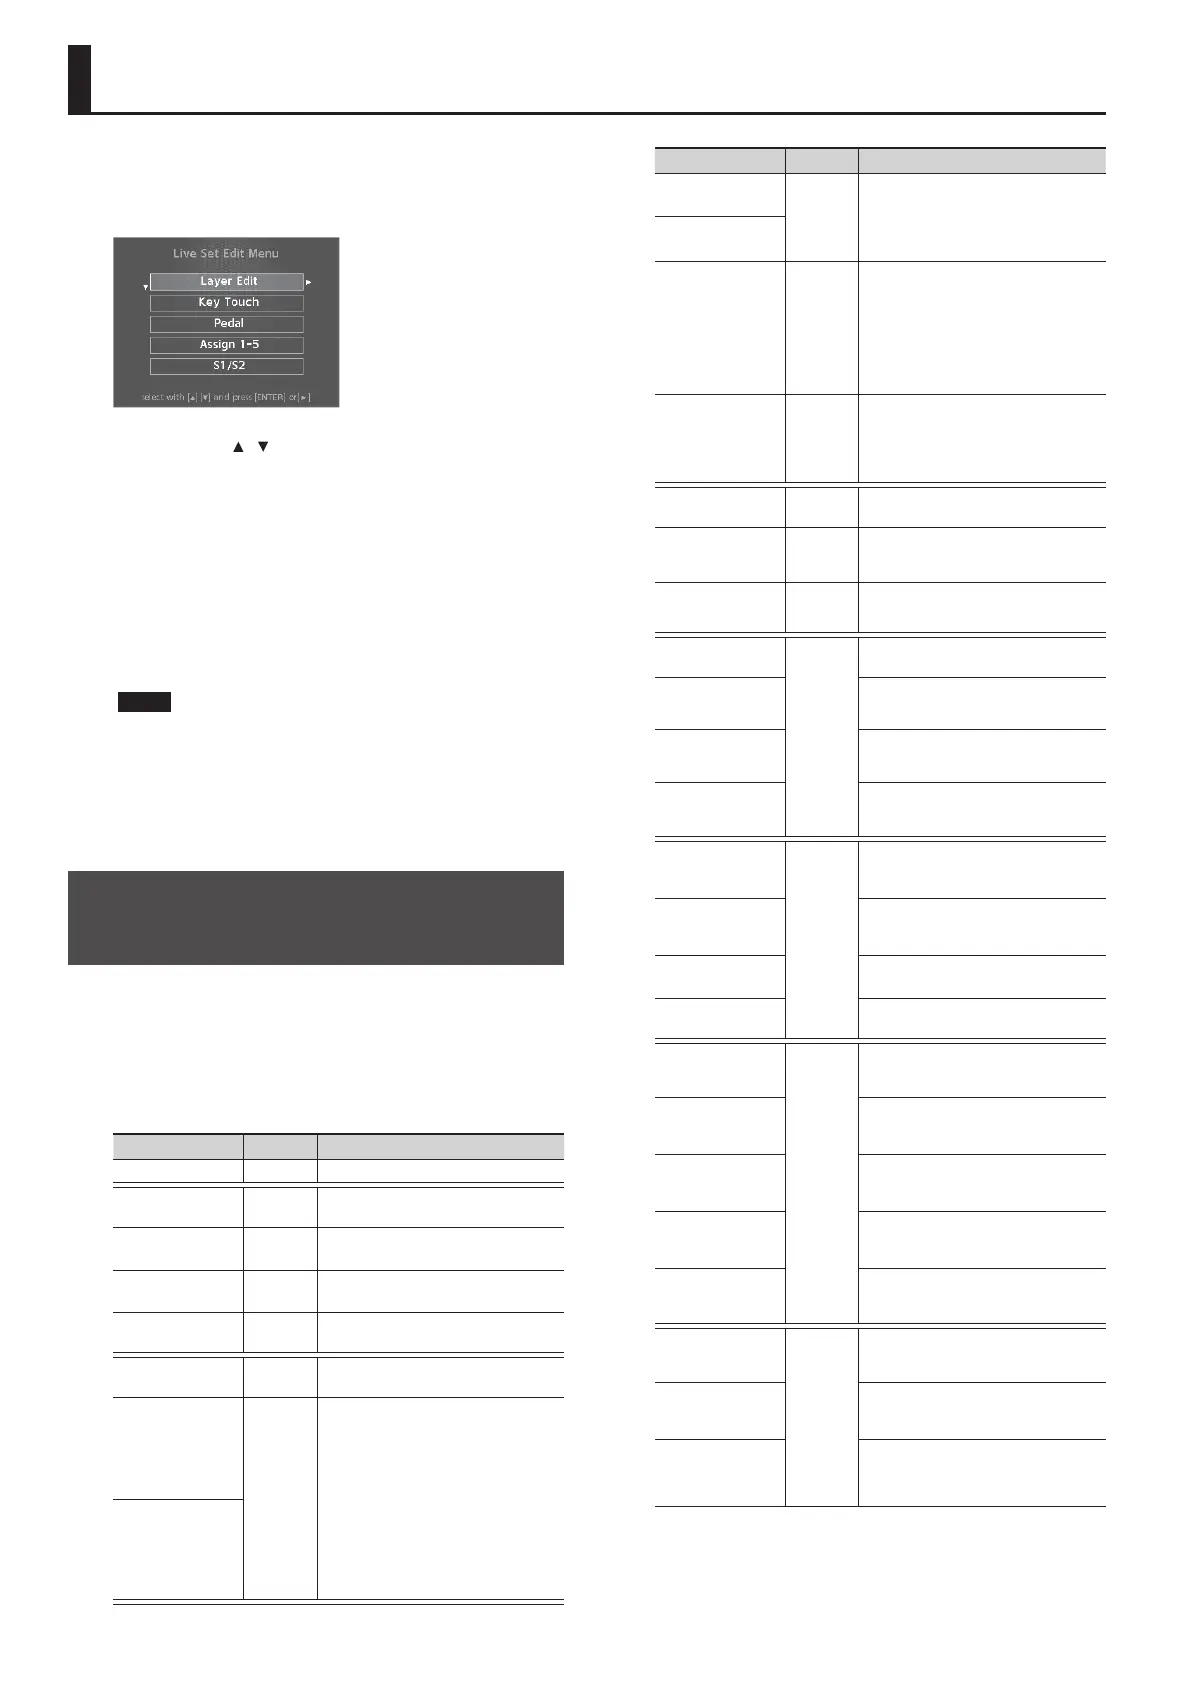
1. Press the [LIVE SET EDIT] button.
The Live Set Edit Menu screen appears.
2. Use the cursor [ ] [ ] buttons to select the item you want
to edit, and press the [ENTER] button.
The corresponding edit screen appears.
3. Select the parameter that you want to edit, and use the
[DEC] [INC] buttons or the value dial to edit the value.
If you press the [EXIT/SHIFT] button, you'll return to the Live Set Edit
Menu screen.
4. When you’ve nished making settings, press the [EXIT/
SHIFT] button several times to return to the Tone screen
or the Live Set screen.
NOTE
If you’ve edited the settings, an “EDITED” indication is shown in
the Live Set screen or the Tone screen.
If you turn o the power, select another Live Set, or select
another tone in the Tone screen while the “EDITED” indication
is shown, the edits you made are discarded. If you want to keep
your edits, press the [WRITE] button to save the Live Set (p. 23).
Detailed Settings for Each Layer
(Layer Edit)
Here’s how to edit each layer (Upper 1–3, Lower).
1. In the Live Set Edit Menu screen, select “Layer Edit” and
press the [ENTER] button.
2. Select the parameter that you want to edit, and use the
[DEC] [INC] buttons or the value dial to edit the value.
Parameter Value Explanation
TONE
Selects the tone.
VOL
Volume
0–127 Sets the volume for each of the layers.
PAN
Pan
L64–0–R63
Species the left/right position of the sound
when outputting in stereo.
REV
Reverb Send Level
0–127 Species the level of signal sent to reverb.
DLY
Delay Send Level
0–127 Species the level of signal sent to delay.
TRA
Layer Transpose
-48–0–+48
Allows you to individually transpose layers to a
dierent pitch.
KR.LWR
Keyboard Range Lower
A0–C8
Set the keyboard range in which each Layer
will sound.
This can be used to make notes in dierent
areas of the keyboard play dierent Tones.
Specify the lower limit (KR.LWR) and upper limit
(KR.UPR) of the key range being set.
You can also set this by pressing a specic key
and then pressing the [ENTER] button.
* This is eective only when the [SPLIT] button
is on (p. 13) in the key range settings.
* “Full” is displayed when the [SPLIT] button
is set to OFF.
KR.UPR
Keyboard Range Upper
Parameter Value Explanation
VR.LWR
Velocity Range Lower
1–127
Species the lower limit (VR.LWR) and upper
limit (VR.UPR) of the range in which the tone is
played according to the velocity.
Make this setting when you want the tone to
change depending on the key velocity.
VR.UPR
Velocity Range Upper
V.SNS
Velocity Sensitivity
-63–+63
This setting determines how the volume
changes in response to the velocity.
The volume is increased as the keyboard is
played with greater force when a positive value
is used; when a negative value is selected, the
volume decreases as the keys are played with
greater force.
* This setting is disregarded with certain tones.
V.MAX
Velocity Max
1–127
Maximum velocity value for the corresponding
key.
Lowering this value will produce softer notes
even if you play the keyboard strongly.
* This setting is disregarded with certain tones.
C.TUNE
Coarse Tune
-48–+48
Adjusts the pitch in semitone steps
(+/-4 octaves).
F.TUNE
Fine Tune
-50–+50
Adjusts the pitch in one-cent steps
(+/-50 cents).
1 cent = 1/100th of a semitone
VC RES
Voice Reserve
0–63, Full
Species the number of voices that will be
reserved for each layer if you attempt to play
more than 128 voices.
DAMP
Damper Control Switch
ON, OFF
Species whether the damper pedal will
(ON) or will not (OFF) control each layer.
FC1
FC1 Control Switch
Species whether the pedal connected to the
FC1 jack will (ON) or will not (OFF) control each
layer. (*1)
FC2
FC2 Control Switch
Species whether the pedal connected to the
FC2 jack will (ON) or will not (OFF) control each
layer. (*1)
EXT
EXT Pedal Control
Switch
Species whether the pedal connected to the
EXT jack will (ON) or will not (OFF) control each
layer. (*1)
PB
Pitch Bend
Control
Switch
ON, OFF
Species whether the pitch bend lever will
(ON) or will not (OFF) control each layer.
MD
Modulation Control
Switch
Species whether the modulation lever will
(ON) or will not (OFF) control each layer.
S1
S1 Control Switch
Species whether the [S1] button will
(ON) or will not (OFF) control each layer. (*1)
S2
S2 Control Switch
Species whether the [S2] button will
(ON) or will not (OFF) control each layer. (*1)
A1
Assign 1 Control
Switch
ON, OFF
Species whether the ASSIGN [1] knob will
(ON) or will not (OFF) control each layer. (*1)
A2
Assign 2 Control
Switch
Species whether the ASSIGN [2] knob will
(ON) or will not (OFF) control each layer. (*1)
A3
Assign 3 Control
Switch
Species whether the ASSIGN [3] knob will
(ON) or will not (OFF) control each layer. (*1)
A4
Assign 4 Control
Switch
Species whether the ASSIGN [4] knob will
(ON) or will not (OFF) control each layer. (*1)
A5
Assign 5 Control
Switch
Species whether the ASSIGN [5] button will
(ON) or will not (OFF) control each layer. (*1)
TON CLR
Tone Color Control
Destination
Select one
layer
Select the layer that you want to control using
the [TONE COLOR] knob.
MOD FX
Modulation FX Control
Destination
Select the layer that you want to control using
the MODULATION FX [DEPTH] and [RATE]
knobs and [ON/OFF] button.
TR/AMP
Tremolo/Amp Control
Destination
Select the layer that you want to control using
the TREMOLO [DEPTH] and [RATE] knobs and
[ON/OFF] button, and the AMP SIM [DRIVE]
knob and [ON/OFF] button.
*1 The parameters that can control each layer are the parameters
indicated by (*1) in the “List of Functions Assignable to Pedals,
Knobs, and Buttons” (p. 30).
28
 Loading...