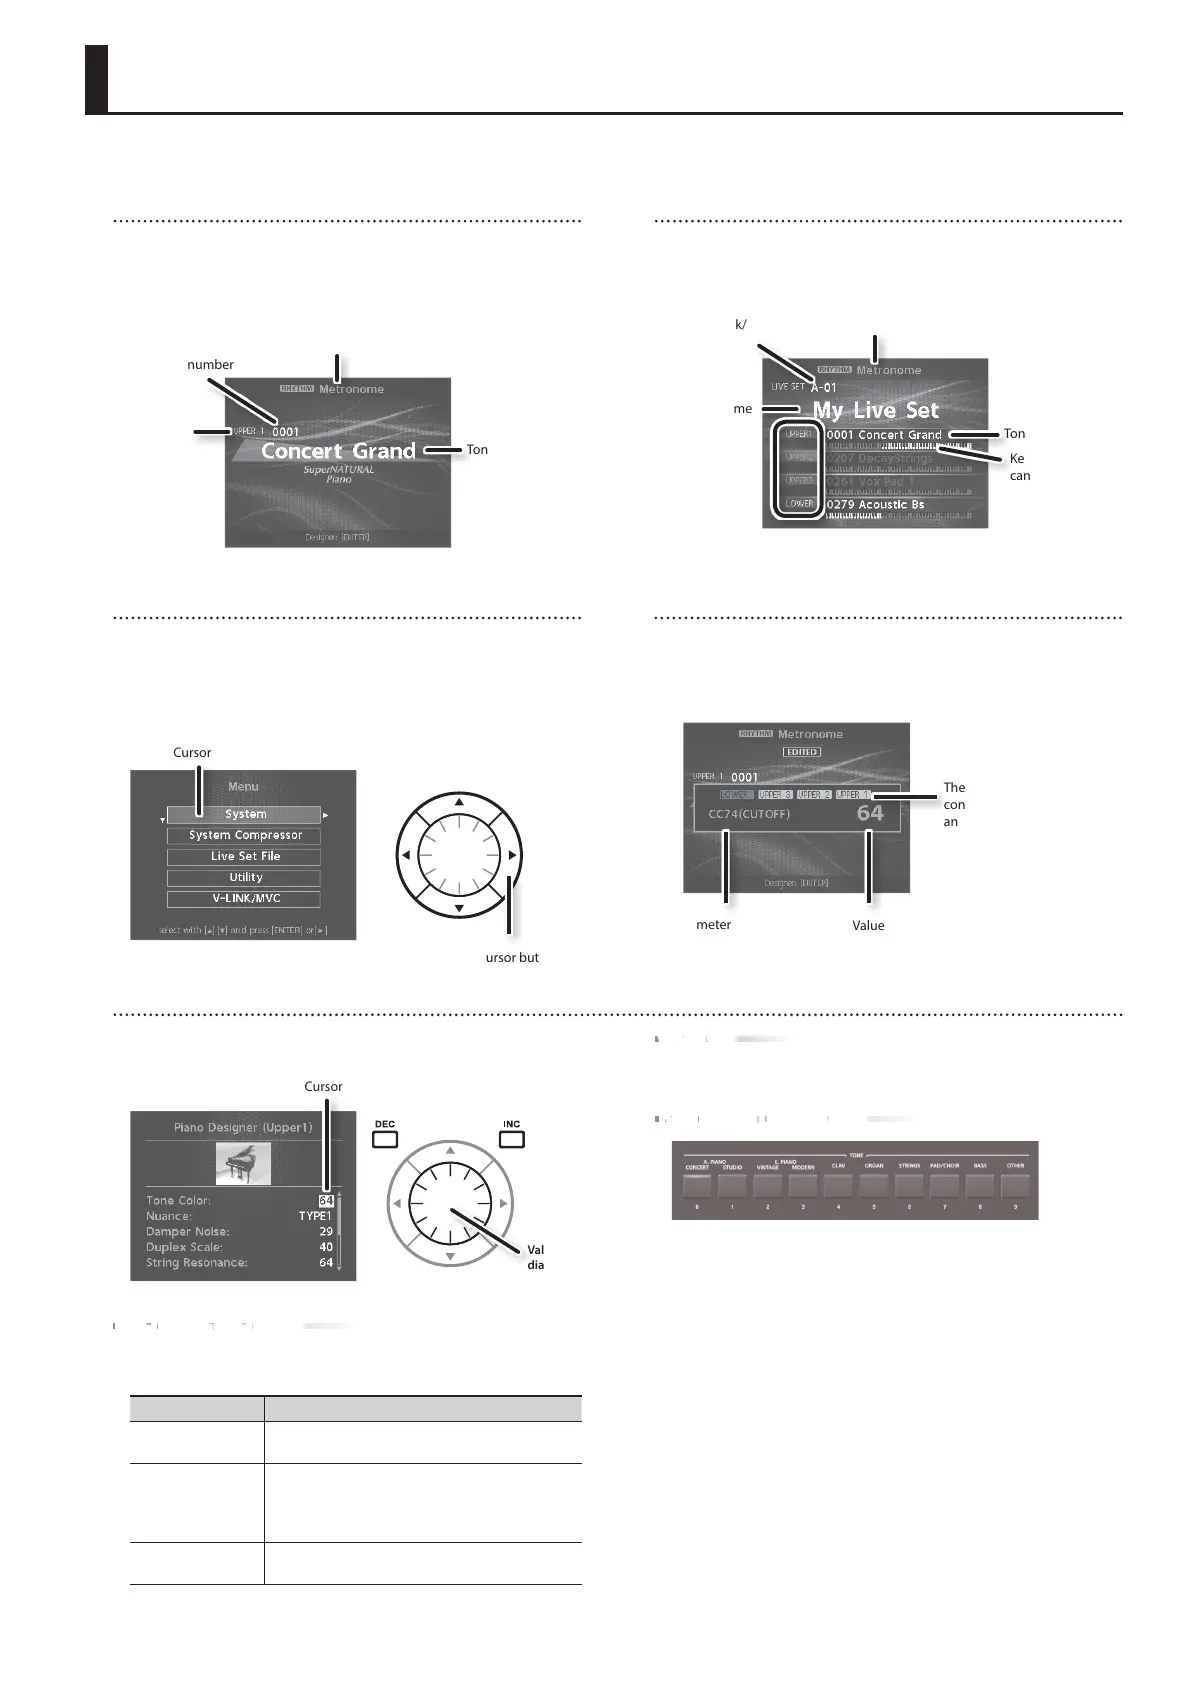
Tone screen
This is the screen that appears when you start up the RD-800 or
when you press a TONE button.
Currently selected rhythm
or song
Tone name
Layer
Tone number
Navigating among items to be set (cursor)
When more than one parameter is present in a screen, the name
and value of the parameter to be changed is shown with a box
around it. This box is referred to as the “cursor.” The cursor is moved
with the Cursor [H] [I] [K] [J] buttons.
Cursor button
Cursor
Live Set screen
This is the screen that appears when you press a LIVE SET button.
Currently selected rhythm
or song
Tone name
Live set name
Key regions that
can be played
by each layer are
highlighted.
Layers that are
turned on are
highlighted.
Live Set bank/
number
When changing settings values, you can use the [DEC] and [INC]
buttons, value dial, or the TONE buttons (numeric keys).
Cursor
Value
dial
[DEC] button, [INC] button
Pressing the [INC] button increases the value, and the [DEC] button
decreases it.
Purpose Panel operation
To continuously
change the value
Hold down the [DEC] button or [INC] button.
To rapidly change
the value
While holding down the [INC] button, press the
[DEC] button.
While holding down the [DEC] button, press the
[INC] button.
To set the item to its
default value
Press the [DEC] button and [INC] button simultane-
ously.
Basic Operation
VALUE dial
Turn the dial clockwise to increase the value, or counterclockwise to
decrease the value.
TONE buttons ( numeric keys)
For some settings, you can use the TONE buttons as a numeric
keypad of [0]–[9] buttons to specify a numeric value directly.
When you enter the number, the value will blink. This indicates that
the value has not yet been nalized. To nalize the value, press the
[ENTER] button.
Knob and slider operations
When you use a knob or slider to modify a setting, the modied
parameter and its value appears in a popup screen.
This screen will automatically close after a time.
Parameter
Value
The layer that can be
controlled by the knobs
and sliders is highlighted.
Editing a value
* Illustrations and screen shots included in this document are for the purposes of explaining the functions and operation; they may dier slightly from what
you actually see on your instrument.
9
 Loading...